Happy Friday, y’all! Don’t you love how fast we get back to a weekend on these short weeks!? Hope you have something fun planned!
My card today is a bit of a throwback – to a layout I just used and to an older coloring technique that I have NOT visited in a while. It’s called Joseph’s Coat and I love it. It’s a technique that worked perfectly with the Magnolia Mood stamp set to create a beautiful thank you card. Take a look-see:
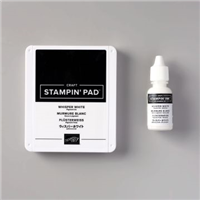
I started with a Basic Black card base. I placed the two smaller floral images from Magnolia Mood on a single block and then stamped all over the front AND the inside panel in Whisper White ink. This gorgeous stamp set – and it’s bundled dies – will be available to customers on 5 March in the Online Exclusives section of the Online Store!
Remember – the Whisper White ink takes an extra little bit to dry, so I set the card base aside while I worked on the rest of the card.
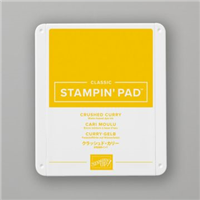
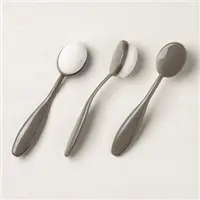
Using Blending Brushes, I added random splotches of Flirty Flamingo, Crushed Curry and Granny Apple Green ink to a piece of Basic White cardstock. I made sure each splotch was pretty saturated with color.
With the panel covered, I used the low setting on my Heat Tool to dry the ink REALLY WELL. This is really important – the ink needs to be really dry, y’all! Then I rubbed it with my Embossing Buddy. Just to be safe.
I inked the large floral from Magnolia Mood in Versamark Ink and stamped it on the panel. Then I sprinkled it with Clear Embossing Powder.
I made SURE there was no excess embossing powder (even used a little paint brush….) and heat set the powder with the high setting of my Heat Tool.
When the embossing was totally dry, I used a Blending Brush to cover the entire panel with Tuxedo Black Memento Ink. I added a lot of ink – the special sauce on this technique is a DARK panel.
I used a paper towel to wipe all the ink from the embossed image – revealing the gorgeous colors below! 😎. Something fun about Joseph’s Coat is that no two cards will be completely alike!
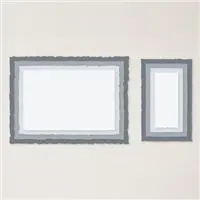
Using the Second-from-Largest Deckled Rectangle die, I cut the image – cheating it towards the LEFT side of the die cut. I also used the same die to cut out a Flirty Flamingo mat.
I used Liquid Glue to adhere the mat to the card front and then popped the art image over top with Black Stampin’ Dimensionals. Note: you can see that the whole thing is aligned more on the left side of the card front – versus centered – and that was on purpose!
I tied a simple bow with two lengths of white Baker’s Twine and used a little Liquid Glue to adhere it to the front of the card base – tucked right in the corner of the two rectangle die cuts.
On a piece of Flirty Flamingo cardstock, I stamped the Magnolia Mood sentiment in Tuxedo Black Memento Ink and cut it out with the Next-to-Smallest Deckled Rectangle. I adhered the sentiment to the card front with Black Stampin’ Dimensionals.
I added some green Adhesive-backed Shiny Sequins (coming on 5 March in the Online Exclusives) and the card front was done!
On the inside, I used a Blending Brush to color one of the smaller Magnolia Mood flowers in Flirty Flamingo and stamped it in the corner of a Basic White panel.
I used Liquid Glue to adhere the panel to a Flirty Flamingo mat and into the card base and the card was done!
My Basic White Medium Envelope got the Magnolia Mood image in Flirty Flamingo on the front…
…and the other small floral on the envelope flap.
Et Voila! Well? What do you think of the Joseph’s Coat technique? I think it’s gorgeous with this new Magnolia Mood set – but…I bet you can ALSO think of some other sets and images that would be wunnermus!! And – don’t miss out on chances to stamp black cardstock with pretty images in WHITE! So COOL!!
I hope you like!
If you’d like to recreate this project, all the products and card cuts you’ll need are down below! And – this is the card I made on my Thursday Aftre Lunch Bunch Live YouTube Video yesterday. If you’d like to see it – for the first time or again! – here ’tis.
I’ve also created a printable PDF with written instructions and a list of the products used to create this card. You can download, print and/or save it by clicking this image:
Missed any tutorials? You can check out my past projects right here!
TTFN
Connect with me: https://campsite.bio/stampsnlingers
HOST CODE FOR 16 FEB – 29 FEB: NNV2K4JA
Use this host code when you order $50 or greater and receive a free gift (AND the Monthly Card Tutorial) from me! If your order is over $150, please do not use this code, but you’ll still get the free gift. The free gift is your choice of any item valued up to $10.00 in any active Catalog! That includes some of the Host Exclusive stamp sets! See my Customer Rewards page for full details.
Note: Make sure that you can see my name on the final checkout page listed as your Demonstrator when you order so that you know that you’re ordering with me and you’ll get my rewards!
You’ll also be getting a link to my ZOOM The Craftroom (an exclusive TWICE-A-WEEK online event for my customers) and the monthly Online Tutorial. The February Tutorial features the beautiful Thoughtful Expressions Bundle!
An Update on Our Basics Embossing Powders

Y’all may have noticed that the Basics Embossing Powders (Item #155554) pack is no longer available in the Online Store. So – I figured I’d let you know the scoop!
A while back, Stampin’ Up! made the decision to switch manufacturers of our Basics Embossing Powders. When they started it, it looked like they’d have plenty of inventory to last through the end of the 2023–2024 Annual Catalog sales period. BUT – y’all have been REALLY LOVING the powders – and we sold out WAY faster than anticipated.
Since we couldn’t re-stock….the end result, is the discontinuation of item 155554.
The good news is – they’ll re-introduce the Basic Embossing Powders in the upcoming 2024-2025 Annual Catalog (under a new item number).
The BAD NEWS IS…. unfortunately – they anticipate that the new embossing powders will not arrive until Fall. Which means – you’ll see the powders in the new catalog when it comes out in May…. but you won’t be able to purchase them until they arrive.
Sorry for the bummer news and….thanks for being patient with us!!
GET THOSE RETIRED PRODUCTS
YOU MISSED THE FIRST TIME AROUND!
Be sure to check out the Retired Products on my Online Store. A LOT has gone out the door but there are still great deals to be had!
Check out all the New Additions right here!
Or – check out ALL the products that are remaining in my store right….here!
ONE WEEK REMAINS!!
We ALL look forward to Sale-A-Bration each year and there’s no doubt at all that THIS is the time to SHOP, HOST and JOIN!
Get all the deets at my Stampin’ Up! Promotions page right here!
INTERESTED IN JOINING US??
If you’d like to join our team, we’d love to have you! You can become a demonstrator for just $99! We welcome all types of Demonstrators from those only purchasing to get the discount for themselves to those who want to run a business and those anywhere in between! Look at those faces – you KNOW we have a lot of fun! 🙂
When you purchase the Starter Kit for $99 + taxes (if applicable), the kit ships for FREE and you get to pick $125 in Stampin’ Up! merchandise.
Now – Sale-A-Bration is half-over but there’s still time to cash in on the AMAZING good Joining Special before it disappears on 29 Feb (it’s Leap Year – so we get one extra day!)
AND – for just SEVEN MORE DAYS – you’ve got TWO great Options!
Option 1: Pay $99+tax for your Starter Kit – Get FREE SHIPPING on the kit – Select $125 in Stampin’ Up! product of your choice. THEN – pick the brand NEW Glass Mat Studio! You’ll get the 14″ x 17″ Glass Mat; the Waterproof, slip-free, heat resistant Silicone Mat – with its 4 palette squares for custom-color mixing or holding Stampin’ Spots; and a durable, re-usable, lint-free cleaning cloth!!
Don’t want a Glass Mat? Well – then…there’s…
Option 2: Pay $99+tax for your Starter Kit – Get FREE SHIPPING on the kit – Select $125 in Stampin’ Up! product of your choice. THEN pick $30 MORE free Stampin’ Up! product of your choice!
TWO great Options – one HUGE end result! You’ll be a Stampin’ Up! Demonstrator – with ALL the cool perks and bennies that go along with that!
Head over to my Join My Team page here to see all those benefits of being a Demonstrator! I’d love to have you on my team and help you get all the discounts, and early goodies, and…ALL THE THINGS! 🙂
If you have any questions about joining, please drop me a note at stamps-n-lingers@comcast.net, I’d love to chat with you!
You can also see additional information on my Stampin’ Up! site here!
Click here to purchase your Starter Kit and Get Started!
Get the Stampin’ Up! Products This Project: You’ll also need the Magnolia Mood and Adhesive-backed Shiny Sequins when they become available
Card Cuts Used in the This Project:
Basic Black Cardstock: 5 1/2″ x 8 1/2″ (card base, scored and folded at 4 1/4″)
Flirty Flamingo Cardstock: Second-from-Largest Deckled Rectangle (mat on front); Next-to-Smallest Deckled Rectangle (sentiment); 3 3/4″ x 5″ (mat for inner liner)
Basic White Cardstock: Second-from-Largest Deckled Rectangle (art panel on front); 3 5/8″ x 4 7/8″ (inner liner)
If you need any stamping supplies, I’d be very happy to be your Demonstrator. Just click on the Order Stampin’ Up! Online Now button on the right side of the screen to go directly to my online store or drop me an email if you have any questions. Happy Stamping!
Shop the Clearance Rack here. Earn FREE Stampin’ Up! Products – Join my Punkin Head Peppermint Rewards – My online customer thank you program!
Finn Fan Fix 


 Inky Bee Stampers
 KarensCardCorner
 Stamp with Amy K
 Stamp With Nel
 Stampin With Shirley G
 Tarabeth Stamps
 TL's Bright Spot
Such a pretty card!! That image is perfect for this technique and I love the subtle stamping on the background too! Pretty sunset too! It’s finally starting to stay light past 4:30 here…must mean that spring is on the way! 🙂
I know – the later sunset is the best part for me! I like long days and I cannot lie! Thanks, Amy! 🙂
I’m not sure which is prettier, the card or the sunset. Probably leaning toward the sunset, but that Joseph’s coat technique is gorgeous. I especially like the white inked background.
I wouldn’t have been TOO surprised to discover that you were not the one taking the photo! 🙂
LOL! He IS talented, so… one never really knows! Thanks, Julie! 🙂
Gorgeous card! You had me at Flirty Flamingo….one of my favs 😁 Wow-what a sunset!!! I hope you and Finny savored the moment.
We did. Althogh – he was sorta busy sniffing and…stuff! ;). Thanks, Judi! 🙂
Great card…and love the sunset. Was thinking the Finn thumbs might have become opposable. Probably not…and just as well!
Yes – that would be…bad. Very bad! LOL! Thanks, Mom! 🙂
Such a fun technique, you explained it perfectly! I’ll definitely be giving this a try.
Your sunset photo is stunning and inspiration for a card!
Thanks so much, Pat – and yes, that sunset would be beautiful in cardstock and ink! 🙂