Monthly Archives: January 2015

Bitty Butterflies to Celebrate the Arrival of A New Little Girl!

Yeah! It’s the weekend and I wanted to share another girly baby card with you.  But, first two little pieces of news.  News one – today, I’ll be at the Heritage Stamp Show with my friends Amy Koenders, Sue Prather and Heather Van Looy.  It looks to be a lot of fun – we’ll have a card display and make & takes along with catalogs and other goodies!  Here‘s some info about the show, if you happen to be in the area – it’s at the Gwinnett County Fairgrounds, 2405 Sugarloaf Pkwy, Lawrenceville, GA 30046.  Second – and this is HUGE (well, for me, at least!).  Today marks the first post I’m writing on my brand new computer!  This is really pretty epic.  My old computer is a vintage 2007 model iMac.  And, in 2007, it rocked.  In 2014, it IS a rock!  I tell you true – I could feel hairs on my head getting gray waiting for that poor thing to load a website, or – gasp! – save a file!  I am a died-in-the-wool Apple girl – so this post comes to you from my new MacBook Pro.  And.  It.  Is.  Like.  LIGHTNING!  Of course, if I hang on to THIS one for 7 years, it may well be a rock, too.  But not today – whoo whoooo!

Okay – that’s the end of the new news.  Let’s get to the card.  This one is purely girl.  All pink and yellow and pretty.  I used the Stamping and Blogging Sketch #87 as my inspiration.  If you click the picture below, you’ll go to the wonderful card that Sandi MacIver did with this sketch.  I really DID build my card before I saw Sandi’s creation – even though it doesn’t look like it!  I guess great minds think alike.  😉

SB87

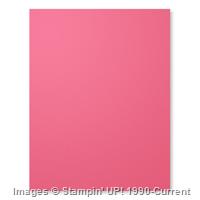
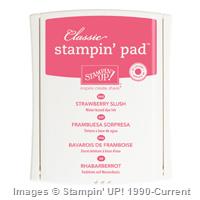
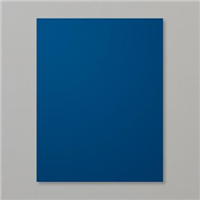
I used Strawberry Slush Card Stock for my card base.  I folded it so that it was a tall card, opening long-ways.  Yikes – that hardly made sense at all – here’s the picture so you can see what I tried to say.

Sweet Girl Card Front 1 Watermarked

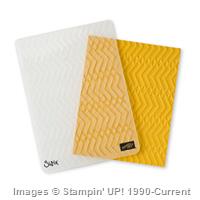
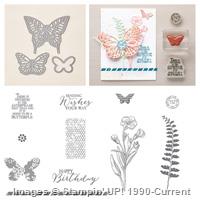
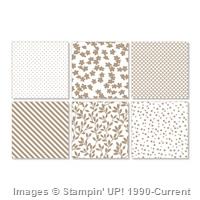
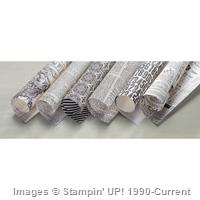
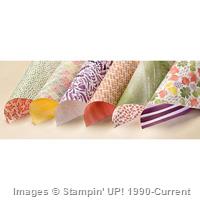
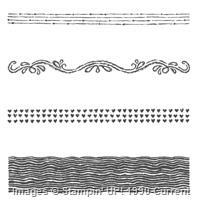
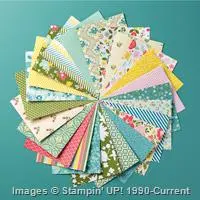
I ran a piece of Painted Blooms DSP (Occasions Catalog) through the Big Shot in the Happy Hearts Textured Impressions Embossing Folder and then punched the “bottom” edge with one of my Martha Stewart edge punches.  I SNAIL’d that to the card base and moved on to the rest of my elements.  I stacked 3 squares of paper and card stock for the sentiment – the largest is a piece of the Painted Blooms DSP – cut with a scalloped square framelit and edged with my Strawberry Slush Stampin’ Write Marker. that I first stamped with the  also in Strawberry Slush Ink.  I inked up the Something Lacy Background Stamp (Annual Catalog) with my Strawberry Slush Stampin’ Write marker and stamped a piece of my Strawberry Slush card stock – which I then used for the middle sentiment mat and 5 of my Bitty Butterflies.

Pink and Yellow Sweet Girl Card Front 1 Watermarked

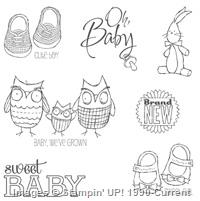
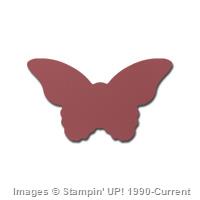
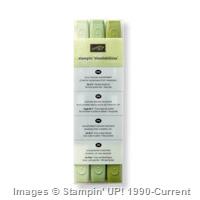
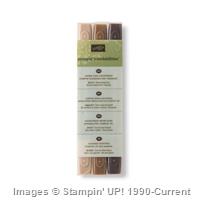
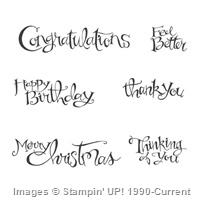
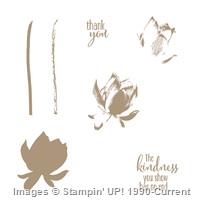
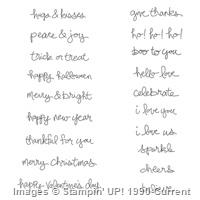
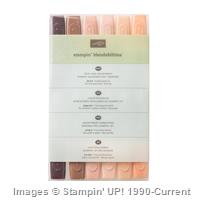
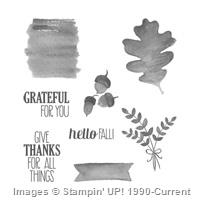
The sentiment is from the Baby We’ve Grown set in the Annual Catalog.  I stamped it onto a scalloped square in Soft Suede Ink, and then colored it with my Pink Pirouette and Daffodil Delight Blendabilities.  I SNAIL’d the whole stack together and adhered it to the card front with Stampin’ Dimensionals.  The butterfly panel started with a piece of Whisper White CS, embossed with the Happy Hearts TIEF that I SNAIL’d to a Strawberry Slush mat.  The butterflies are all cut with the Bitty Butterfly punch and then I sort of rolled the wings up a tiny it to give them a little life.  The odd-man-out butterfly is white CS stamped with the Lovely Lace background in Strawberry Slush and colored with a Daffodil Delight Blendability (this is a free item available in the Sale-A-Bration catalog, going on through 31 Mar).  The butterflies were stuck to the white panel with a little bit of Multipurpose Liquid Glue.  Then the panel was adhered to the card front with Stampin’ Dimensionals.  Just to finish it off, I gave the odd butterfly a few Pearl Basic Jewels and each little baby girl shoe got a tiny pearl – just to send the cute factor right over the top!  And – done!

Sweet Girl Card Front 1 Watermarked

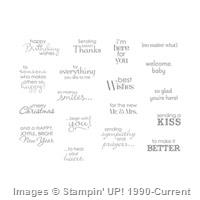
On the inside, I edged another piece of Whisper White CS and stamped the bunny from the Baby We’ve Grown set in Soft Suede.  He got a quick color with the Blendabilites in Pink Pirouette and the Strawberry Slush Stampin’ Write Marker.  The sentiment, from the Petite Pairs stamp set, in Soft Suede, brought it all home.

Pink and Yellow Sweet Girl Interior 1 Watermarked Pink and Yellow Sweet Girl Interior 2 Watermarked

I think this is a really cute and happy card.  And the design would be easy-peasy to use for a boy just by changing up to blue tones, or you could go more gender-neutral and use greens and yellows.  Which, since it appears that the friends I made these cards for all are having boys….I should have done!  Anyone need a cute girl baby card….?? Let me know.

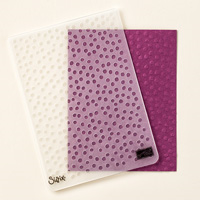
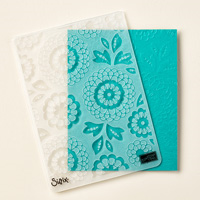
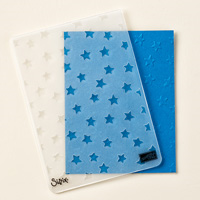
Today’s the last day to use my January Hostess Code.  Don’t forget that you’ll also get a free gift from me and you may qualify for Punkin Head Peppermints!  And, if you’ve been waiting for the Textured Impressions Embossing Folders  – this is a good week.  There are 6 TIEFs on sale right now – check out the Weekly Deals below and stock up on all your favorite folders.

And don’t forget to come by the Heritage Stamp show if you happen to be in the area today.  I’d love to meet you!

Thanks for taking the time to share my share with me!

TTFN

Mary

JANUARY 1 – 31 HOSTESS CODE:  RMQE9AEQ Use this hostess code when you order and receive a free gift from me!  But, if your order is over $150, please do not use this code (you’ll miss out on your own Stampin’ Rewards/Hostess $$ if you use it) but you’ll still get the free gift.  The free gift for January is your choice of any item valued up to $4.95 in either the 2014-15 Annual Catalog or the 2015 Occasions Catalog!

Here are the card cuts for today’s project

Strawberry Slush Card Stock: 4 1/2″ x 11″ (card base – folded at 5 1/2″); 1 3/4″ x 1 3/4″ (middle sentiment mat); 4 1/4″ x 2″ (Butterfly mat); Bitty Butterflies

Whisper White Card Stock: 4″ x 1 3/4″ (embossed panel under butterflies); 1 1/2″ x 1 1/2″ (scalloped sentiment); 4 1/4″ x 5 1/4″ (inner liner)

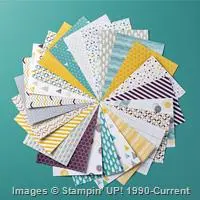
Painted Blooms DSP: 4 1/4″ x 5 1/4″ (Card front); 2″ x 2″ (scalloped bottom sentiment mat); one Bitty Butterfly

 STAMPIN’ UP! ITEMS USED IN THIS PROJECT:

Price: $99.95

Supply List

Built for Free Using:  My Stampin Blog

 WEEKLY DEALS 27 Jan – 3 Feb 15 Click here to see the Weekly Deals from Stampin’ Up! in my online store.  The Weekly Deals are only while supplies last and only available at these great prices through 3 Feb.

Visit my online store here
Shop the Clearance Rack here.
Earn FREE Stampin’ Up! Products – Join my Punkin Head Peppermint Rewards – My online customer thank you program!


Categories: General, New Baby | Tags: , , , , , , , , , , , , , , , , , , , , , , , , , | 4 Comments

Painted Blooms, Butterflies and Irresistibly Yours for the Happy Stampers Blog Hop!

Happy Thursday – and welcome to the first Happy Stampers Blog Hop of 2015!  This is my first hop, and I’m really excited to be included with the other talented ladies who are taking part.  One of the coolest parts of stamping is how everyone can, with roughly the same tools, come up with an almost endless variety of ideas.  Blog hops really illustrate how versatile these products are.  So, once you’ve checked out my projects, be sure to go to each of their blogs to enjoy their creations.  Take a minute to leave each of us a comment, because, in addition to some great ideas, we’re all giving away a little Blog Candy, too!  For this hop, we’ll all show you a card made with some Occasions catalog product(s) and one with Sale-a-Bration product(s).

Happy Stampers Jan 2015 Blog Hop LogoMy first card to share with you uses the Irresistibly Yours DSP (Sale-a-Bration catalog) and the Butterfly Basics stamp set and complementary Butterflies Thinlits Dies (Occasions), which are available as a money-saving bundle (so, you KNOW that’s how I got it!).  I colored the DSP with my Sale-a-Bration Blendability markers.

Happy Birthday Butterfly Outside Card 3 watermarked

My design inspiration for this card was Mojo Monday Sketch #380.  And, as I looked at the supplies I’d chosen, I gratefully stepped back into my color-palette wheelhouse.

This card started with a Crumb Cake Cut and Ready card base, with the corners rounded.  I sponged the edges of a piece of Typeset DSP with my Crumb Cake ink, and then SNAIL’d it to an Old Olive Cardstock mat.  Using a couple of the stamps in the Butterfly Basics set, I inked the Typeset with some honeycomb and frond images, using Crushed Curry and Old Olive respectively (I stamped each one off on scrap paper first and then stamped twice without re-inking).  I rounded the corners and SNAIL’d the whole thing to the card base.  Then, I colored two pieces of the Irresistibly Yours DSP – one with the lightest Wild Wasabi Blendability Marker and the other with the lightest Crumb Cake Blendability – and wiped the excess off the “resist” areas with a paper towel.  This DSP is so cool and versatile – you can make it be any color you want it to be (sponge ink on, spritz it on, use a Blenadability, etc), and it’s also pretty in it’s natural white-on-white state.  And, because it’s a Sale-a-Bration item, you can still get a stack FREE with a $50 purchase through 31 Mar!  Each piece was matted to the opposite color – the Old Olive on a Crumb Cake mat and the Crumb Cake on an Old Olive mat. I put these on with SNAIL as well, since I knew I wanted to pop my sentiment and the butterfly.

Happy Birthday Butterfly Outside Card 5 watermarked

I stamped my sentiment in Old Olive on a piece of Vanilla Cardstock and then added a Crumb Cake flower.  Both of these are in the Butterfly Basics set – this one gives you a lot of stamping power for your money – and was the first thing I ordered when the Occasions catalog came out.  Please note that, sadly, it was far from the ONLY thing I ordered! LOL  After I lightly edged the CS with some more Crumb Cake, I popped it onto the card with some Stampin’ Dimensionals.  My Butterfly was stamped twice in Old Olive (on Very Vanilla) and cut out twice with the Thinlit Die that matches it.  I colored in one butterfly with my lightest Crumb Cake Blendability.  Then I layered them on the card front with SNAIL – the top one, I only attached the center third or so of the butterfly, and then put a little tiny piece of Stampin’ Dimensional under each wing – I wanted them to stay up even after going into an envelope.  I finished off the front with some Pearl Basic Jewels on the butterfly and in the center of the flower.

For the inside, I inked the edges of a piece of Vanilla CS with the honeycomb stamp, again with the Crushed Curry, and lightly sponged it with more Crumb Cake.  The sentiment is in Old Olive, from the Good Greetings Hostess set.

Happy Birthday Butterfly inside card 3 watermarked

I must say, I really like working with this color combo – and this card turned out to be one of my very favorites!  You can find the card cuts below.  But first, on to card two – my Occasions Catalog share!  Everyone stand up, stretch a little – maybe get a snack or another cuppa ….  long blog post today!

Thinking of You Butterfly Outside Card 3 watermarked

This one started with another great sketch from Mojo Monday – this time is was #381.  And, since I wanted to use the Painted Blooms DSP, I let it drive the colors.

This color combo is very spring-y and feminine, and I like it – it’s just a little harder for me to work with than the more earthy tones in the first card.  But, I’m learning and trying to expand my comfort zone and I think it turned out well.  I started out with an Old Olive Cut and Ready Card Base (Annual Catalog).  I cut a 2 3/4″ circle from the top part of the Whisper White Mat, and then cut a slightly larger (next size up in the Circles Collection dies) round of the Painted Blooms DSP (Occasions catalog).  That stack has many beautiful paper patterns, but this one is my favorite.  I SNAIL’d the DSP circle to a Pink Pirouette CS mat.  I wanted a little more detailing on my white mat, so I used the fine-point end of my Pistachio Pudding Stampin’ Write Marker to make “stitches”.  I wanted it to look hand-stitched – which, for me, means not-so-even-and-perfect.  Pretty sure I nailed that one!

Thinking of You Butterfly Outside Card 4 Watermarked

I adhered the white mat with Stampin’ Dimensionals to the Pink Pirouette mat, making sure the DSP was under the opening, and centered so the edges of the DSP weren’t visible.

I made my sentiment banner by SNAIL-ing my Whisper White CS to a Pink Pirouette mat and then stamping the sentiment from the Sassy Salutations set in Blackberry Bliss.  I gave that the hand-stitched treatment as well.  The banner is SNAIL’d to the larger white mat – obviously there’s only SNAIL on the ends that actually TOUCH the mat!

Then came the really fun part!  I’d been itching to use the gorgeous, detailed dies in the Butterfly Thinlits set.  I ran the medium butterfly through the Big Shot, using wax paper and my Magnetic Platform.  The beauty of this butterfly means there are a lot of little pieces to clean out of the die cut.  With the wax paper, I was easily able to push them all out with my craft pick.  Tip:  leave the die cut IN the die while you push out all the little pieces.  It stabilizes the cut and helps a lot.  Then, I ran that die cut BACK through the Big Shot, this time in my Lovely Lace Textured Impressions Embossing Folder.  I think it adds a subtle little sump’n-sump’n to the butterfly.  I repeated the cutting and pushing-of-pieces on a second butterfly, this time with white CS.  Then I layered them onto the card with SNAIL – a little offset from each other, just to add a little more depth.  He got a few little Pearl Basic Jewels and the front was finished!

Thinking of You Butterfly Outside Card 2 watermarked

On the inside, I “stitched” a white CS liner, and SNAIL’d a few (okay – this time, 4 just looked right – please excuse me for decorating with an EVEN number – no need to call the Decoration Police!) Bitty Butterflies, made with the SU punch of the same name, in Pink Pirouette.  I stitched all of THEM, too.  Appears I got on a sewing binge, which is quite odd, considering I can’t really sew a stitch! I once tried to make a t-shirt and cut two backs out.  Yea – sewing is not my thing!

Thinking of You Butterfly Inside Card 2 watermarked

So – if you made it all the way to this point, pat yourself on the back!  I’m sorry for the novella, y’all, but….two cards takes some words.  (According to WordPress, 1675 so far!).  All the card cuts are below, as is the supply list for each card.  And, those stalwart souls who kept slogging on, will now get to read about the….

BLOG CANDY!!

Embellishing “makes” and “finishes” your card.  So, for this hop’s Blog Candy, I have a package of SU Calypso Coral Baker’s Twine, a package of Old Olive Simply Styled Embellishments, and a package of Santa & Co Washi tape.  One lucky winner will receive all three items!

Jan 2015 Blog Candy pic 2 watermarked

Simply leave me a comment on this post before 7 AM ET on Monday 2 Feb 15 and you’ll be entered to win.  I’ll have the random number generator pick a comment on Monday morning and I’ll announce the winner on my blog that morning!  Please note, anyone is welcome to leave me a comment but I am only able to ship the blog candy items to addresses within the United States.  Thanks for your understanding.

There’s only a few days left to use my January Hostess Code, so now’s the time.  Don’t forget that you’ll also get a free gift from me and you may qualify for Punkin Head Peppermints!  And, if you’ve been waiting for the Textured Impressions Embossing Folders  – this is a good week.  There are 6 TIEFs on sale right now – including the Lovely Lace folder I used on my second card.  Check out the Weekly Deals below and stock up on all your favorite folders.

Hope you enjoyed my blog hop shares – I sure had fun making them!

Mary

Okay, on with the hop!  To hop back to Heather Van Looy’s Blog, click the Back arrow button.  To move forward to Amy Koender’s Blog, click the Forward arrow button.

Happy Stampers Jan 2015 Blog Hop Back Button Happy Stampers Jan 2015 Blog Hop Forward Button

In case you get lost along the way, here is a list of the Happy Stampers Team Members who are joining in this blog hop:

JANUARY 1 – 31 HOSTESS CODE:  RMQE9AEQ Use this hostess code when you order and receive a free gift from me!  But, if your order is over $150, please do not use this code (you’ll miss out on your own Stampin’ Rewards/Hostess $$ if you use it) but you’ll still get the free gift.  The free gift for January is your choice of any item valued up to $4.95 in either the 2014-15 Annual Catalog or the 2015 Occasions Catalog!

Here are the card cuts for today’s project

Happy Birthday Butterfly (starts with Crumb Cake Cut and Ready Card base)

Old Olive Card Stock: 4 1/8″ x 5 3/8″ (bottom mat); 4 1/8″ x 2 1/8″ (Top rectangular mat)

Crumb Cake Card Stock: 4 7/8″ x 1 5/8″ (Bottom rectangular mat)

Typeset DSP: 4″ x 5 1/4″

Irresistibly Yours DSP: 4 3/4″ x 1 1/2″ (Bottom rectangle with Wild Wasabi); 4″ x 2″ (Top rectangle with Crumb Cake)

        Very Vanilla Card Stock: 3 1/3″ x 1 1/2″ (Sentiment banner); 5 1/4″ x 4″ (Inside liner); Butterfly (stamped with Old Olive and then Butterfly die cut)

Thinking of You Butterfly (starts with Old Olive Cut and Ready Card base from 2014 Holiday Catalog):

Pink Pirouette Card Stock: 4 1/8″ x 5 3/8″ (Bottom Mat); 4″ x 1 1/8″ (Sentiment banner mat); Medium Butterfly Thinlits; Bitty Butterfly punches

Whisper White Card Stock: 5 1/4″ x 4″ (Card front with 2 3/4″ circle cutout); 3 7/8″ x 1″ (Sentiment banner); 5 1/4″ x 4″ (Inside liner); Bottom Butterfly

Painted Blooms DSP: 3″ circle cutout for card front

STAMPIN’ UP! ITEMS USED IN BOTH PROJECTS:

STAMPIN’ UP! ITEMS USED IN HAPPY BIRTHDAY BUTTERFLY:

Supply List

Built for Free Using: My Stampin Blog

 STAMPIN’ UP! ITEMS USED IN THINKING OF YOU BUTTERFLY:
 WEEKLY DEALS 27 Jan – 3 Feb 15 Click here to see the Weekly Deals from Stampin’ Up! in my online store.  The Weekly Deals are only while supplies last and only available at these great prices through 3 Feb.

Visit my online store here
Shop the Clearance Rack here.
Earn FREE Stampin’ Up! Products – Join my Punkin Head Peppermint Rewards – My online customer thank you program!

Categories: Any Occasion, General, Happy Birthday, Sympathy | Tags: , , , , , , , , , , , , , , , , , , , , , , , , , , | 63 Comments

Lotus Blossom Love

Good morning!  Happy Tuesday – My share today uses the 2015 Sale-a-Bration Lotus Blossom stamp set.  I chose this as one of my FREE items when I spent $50  – and you can, too!  Sale-a-Bration runs through 31 March.  Don’t miss this opportunity to get some exclusive Stampin’ Up! products.

Lotus Petal Love You 3 Watermarked

To tell you the truth, I’ve been a little afeered of this particular stamp set.  It’s a Two-Step set (well, it actually has 3 steps), and every time I tried to make a beautiful, artistic lotus blossom, I ended up with a blob.  An uneven, weird-looking, blob.  And then, I finally remembered a tip I’d seen about photopolymer stamps.  Are you taking notes?  Photopolymer stamps don’t have a built-in cushion like the clear or wood-mount stamps.  So, if you stamp directly onto your hard crafting surface, you’re likely to get less-than-ideal results (that’s code for “uneven, weird-looking, blob”).  The trick is to place your cardstock on a cushioned mat – like….a piercing mat.  So – I did that. And, guess what?  Yup.  A lotus blossom emerged!

I once again went to a Whisper White note card from the Note Cards and Envelopes set.  I SNAIL’d a Whisper White mat onto a Basic Black mat, and my art piece was ready to go.  I had this vision in my head of a very monochromatic card with just a bare pop of color.  So, I used my Basic Black ink and my Blackberry Bliss for the lotus blossom.  The first two steps, I did with the black.  The third step, I inked up and then stamped off once on scrap paper with the Blackberry Bliss ink before I applied it to the flower image.  And – I loved how it looked!  Okay – I did that like 3 times on scrap cardstock before I girded my loins (sorry for saying loins on the internet) and stamped my card front.  And breathed a sigh of relief, cause it looked great.  It’s a little hard to see in the picture below, but the flower really DOES have a lovely Blackberry tint.

Lotus Petal Love You 2 Watermarked

For the stem, I did the first stamp (the stem has two parts, too) in black.  Then I hemmed and hawed a while – green?  Stay with black?  More blackberry bliss –  that’s crazy talk!!  Oh – the decisions.  I finally settled on Mossy Meadow – which I stamped off lightly once and then barely, lightly, oh-so-delicately stamped over the black stem.  And then I did it a little harder, cause I didn’t want it to be THAT delicate!  Oh yea – still holding my breath with every stamp I make!

I cut a “You” out of Basic Black with the Hello You Thinlits Die (remembering to use my wax paper – see my previous post “Hello You” for directions) and adhered it with a little Liquid Glue.  Then, I used a sentiment from the Crazy About You stamp set (2015 Occasions) in Blackberry Bliss.  And also Basic Black.  Dip a little in the Black, dip a little in the Blackberry Bliss.  Stamp with the piercing mat.  And then barely, lightly, oh-so-delicately traced the words with my Blackberry Bliss Stampin’ Write Marker – cause I didn’t want THAT to be quite so delicate either!  I’m so sorry this color is hard to see in the picture – I promise my next purchase will be an Ott Lite so that my photography “studio” does a little better job of re-creating the colors.  Promise.

A few Rhinestone Basic Jewels finished off the front and I popped it onto the card base with some Stampin’ Dimensionals.  For the inside, I used the Good Greetings hostess set sentiment “I Love Us” – but I only inked the “Love Us” part, using the Blackberry Bliss marker again.  And I stamped an irregular row of little tiny Blackberry Bliss hearts along the bottom (the heart is part of the Holiday Home stamp set).  And finally, because it just…needed….something else, I made little teensy stems and grass with my Mossy Meadow Stampin’ Write Marker.  And – I resolutely pushed away all my tools and decided to leave well enough alone!

Lotus Petal Love You Inside 2 Watermarked

This would be a great Valentine’s Day card.  Or a nice little note tucked away for your spouse or significant other to find.

Hope you enjoyed it!

Shameless plug – the Happy Stampers are doing a blog hop on Thursday, 29 Jan.  Be sure to check back here around 9am Eastern to see my contribution and those of all the talented stampers in this group.  There’ll be some blog candy, too!

There’s only a few days left to use my January Hostess Code, so don’t tarry too long.  Don’t forget that you’ll also get a free gift from me and you may qualify for Punkin Head Peppermints!  And, if you’ve been waiting for the Textured Impressions Embossing Folders  – this is a good week.  There are 6 TIEFs on sale right now.  Check out the Weekly Deals below and stock up on all your favorite folders.

TTFN

Mary

Here are the card cuts for today’s project, starting with a Note Card from the Stampin’ Up! Set:

Basic Black Card Stock: 4 7/8″ x 3 3/8″

        Whisper White Card Stock:  4 3/4″ x 3 1/4″

JANUARY 1 – 31 HOSTESS CODE:  RMQE9AEQ Use this hostess code when you order and receive a free gift from me!  But, if your order is over $150, please do not use this code (you’ll miss out on your own Stampin’ Rewards/Hostess $$ if you use it) but you’ll still get the free gift.  The free gift for January is your choice of any item valued up to $4.95 in either the 2014-15 Annual Catalog or the 2015 Occasions Catalog!

STAMPIN’ UP! ITEMS USED IN THIS PROJECT

Price: $99.95

Supply List

Built for Free Using: My Stampin Blog

 WEEKLY DEALS 27 Jan – 3 Feb 15 Click here to see the Weekly Deals from Stampin’ Up! in my online store.  The Weekly Deals are only while supplies last and only available at these great prices through 3 Feb.

Visit my online store here
Shop the Clearance Rack here.
Earn FREE Stampin’ Up! Products – Join my Punkin Head Peppermint Rewards – My online customer thank you program!


Categories: Any Occasion, General, Love, Valentine's Day | Tags: , , , , , , , , , , , , , , , , , , , , , , , , , , | 4 Comments

Hello You

For today’s card I used the 2015 Occasions catalog Crazy About You stamp set, which I have in the photopolymer version, along with the complementary Hello You Thinlits Dies.  Stampin’ Up! very kindly bundles them up for us, and let’s us save some money! I used the Freshly Made Sketches Sketch #170 as my inspiration.

FMS170

I like note cards like this – ones that can be sent or given for almost any reason.  Maybe just because it’s a beautiful, crisp day in January, the days are getting longer and there’s the promise that maybe a person could go outside without putting on a thousand layers of clothes!  Or not – heck, it’s still only in the 50’s here.  For me (and my poor hubs, who puts his insulated covers on when it’s any cooler than 45!) it’s still chilly.  My mom would just smile and look at the thermometer on her deck, where it’s likely reading 20 or so today.  But, I digress.  As I was saying, these are good kinds of cards to have in your card stash – to send whenever the mood strikes!  Make this one today!

Hello You Card Front 1 watermarked

This one took me a minute – I started with a note card from the Stampin’ Up Note Cards and Envelopes set in Whisper White.  This is a great deal – you get 20 cards and 20 envelopes for under $6!  And they’re nicely weighted cardstock, making for a classy feel for your masterpiece.  But, they’re a little smaller than the cards I’ve been making, so my card cuts were different.  And the sketch I started with asked for some unusual proportions – for me.  As it turns out, I’m not sure I actually GOT the proportions “right” – but, hey! if I hadn’t mentioned it, no one would know the difference, right?!?  So, this card challenged my math skills and, total disclosure, I now have several pieces of white and Pink Pirouette CS that will be ready to use on another project – if you catch my drift!  But, I’ve worked the numbers out and all the cuts are down below, so this one will be easy-peasy for you to CASE.

I Cut my two Whisper White CS pieces, and embossed the larger of them with the Lovely Lace Textured Impressions Embossing Folder.  The bottom piece I left plain – I went back and forth, but finally decided to go with a simpler look.  I layered those pieces on the Pink Pirouette mats and then SNAIL’d them both to a piece of Wild Wasabi CS to create the front of the card.  Play around with the placement of the pieces, until it makes you happy.  Then – stick it down!

Hello You inside card 2 watermarked

Then, I stamped one of the flowers from the Petal Potpourri stamp set in Crushed Curry on a piece of white CS and punched it out with the Flower Medallion Punch.  Yes – I got these as a bundle, as well.  Do you see a purchasing trend for me?  It helps me to say “But, Wayne – I saved quite a bit of money by buying them together.  You DO understand the idea of SPENDING money to SAVE money, right?!?”  He buys that about….never….but, oh well!  Stampin’ Up! gives us a 15% discount when we take advantage of the bundled sets – so, it’s a good deal.  That’s my story and I’m stickin’ to it.  But wait, I’m not done with my incredible money-saving prowess yet.  Read on!

I pulled out a piece of scrap white CS and stamped it with Mossy Meadow ink, using my Crazy About You photopolymer stamp set.  If you haven’t seen it, it’s in the 2015 Occasions catalog and has a HUGE number of sentiments included – and, if you pair it with the… say-it-with-me… bundled Hello You Thinlits dies…well, the possibilities are almost endless!  I punched the banner end with my Hexagon Punch and then edged the banner with some Old Olive ink.  The sponge daubers work great for edging.

I made the “You” by running the Hello You Thinlit through my Big Shot three times – twice with black CS and once with Pink Pirouette CS, and then I layered the three pieces with liquid glue.  Black – Pink – Black.

A couple of words about these thinlits.  These are small cuts, one might even use the word “persnickety”.  That’s not a bad thing – just a thing, as long as you catch a few tips.  On these, wax paper is your best friend!  Stick a piece of it between the die and the cardstock before you run it through the Big Shot.  That makes the cut push right out of the die – use your craft pick or a similar pointy thing to push it out using the conveniently placed holes in the die.

wax paper and thinlits 2

For adhering it, I originally thought I could use some SNAIL, but – not so much.  I tore the thin little pieces.  Liquid glue worked much better – I just used my silicone craft mat under the die cut, to keep the glue off my work surface.  I was also pretty stingy with it, so it wouldn’t seep out everywhere.

With everything inked and cut and punched and glued and layered, all that remained was to put all the pieces together.  I used SNAIL for the sentiment banner and the flower – and more glue for the “You”.  I colored some Rhinestones with my darkest Pink Pirouette Blendability pen and stuck them on.  Okay – some more disclosure.  I started with 3 jewels.  Then I decided that the flower needed one in the center.  That brought me up to 4 jewels.  I’m not sure who decided it, but there’s the old adage that you should decorate in odd numbers, and even with new math, 4 is not an odd number.  I don’t want to say I’m a mindless follower of old adages, but….it looked weird.  So, I added some more until I had an odd number and liked how it looked.  Might be a bit sparkly for your taste, so you could just put one in the center of the flower and two more on the bottom panel.  If that made you happy.  Or you can be like me and go bling-crazy.   It’s your creation, so it’s all about making you happy!

Hello You Card Front closeup 1 watermarked

I didn’t need to put a inner inside the card, since it’s already white and ready to have a note added, but I wanted it to have a little pizzazz, so I inked up a few of the petals in the Painted Petals stamp set (2015 Occasions Catalog) with some Strawberry Slush ink and stamped it twice, without re-inking, across the bottom. And then I repeated that.  I used a little more Old Olive to add a few stems from the same set.  Done!

Hello You inside card 1 watermarked


Hello You inside card 2 watermarked

With the card cuts already figured out, this is a really easy card to put together.  And the design lends itself well to a multitude of sentiment possibilities, many of which are in the Crazy About You stamp set.  You really need to make yourself a set of “just-because-the-sun-was-out-and-I-thought-of-you-today” cards right now! Go!  Start inking! 😉

The January Hostess Code is still open, so get your orders in quick-like-a-bunny!  Don’t forget that you’ll also get a free gift from me and you may qualify for Punkin Head Peppermints!

TTFN

Mary

Here are the card cuts for today’s project, starting with a Note Card from the Stampin’ Up! Set:

Wild Wasabi Card Stock: 4 7/8″ x 3 1/2″

Whisper White Card Stock:  2 5/8″ x 3 1/4″ and 1 3/4″ x 3 1/4″ (this one is embossed); Sentiment banner 1/2″ x 1 1/2″

Pink Pirouette Cardstock: 2 3/4″ x 3 3/8″ and 1 7/8″ x 3 3/8″

JANUARY 1 – 31 HOSTESS CODE:  RMQE9AEQ Use this hostess code when you order and receive a free gift from me!  But, if your order is over $150, please do not use this code (you’ll miss out on your own Stampin’ Rewards/Hostess $$ if you use it) but you’ll still get the free gift.  The free gift for January is your choice of any item valued up to $4.95 in either the 2014-15 Annual Catalog or the 2015 Occasions Catalog!

STAMPIN’ UP! ITEMS USED IN THIS PROJECT

Price: $99.95

Supply List

Built for Free Using: My Stampin Blog

 WEEKLY DEALS 20 – 26 JAN 15 Click here to see the Weekly Deals from Stampin’ Up! in my online store.  The Weekly Deals are only while supplies last and only available at these great prices through January 26.

Visit my online store here
Shop the Clearance Rack here.
Earn FREE Stampin’ Up! Products – Join my Punkin Head Peppermint Rewards – My online customer thank you program!


Categories: Any Occasion, General | Tags: , , , , , , , , , , , , , , , , , , , , , , , , , | 6 Comments

Stampin’ Up! Painted Blooms Create a Spring Garden

This is another “new baby” card, and I used some more of the new Stampin’ Up Occasions Catalog items.  The Painted Petals DSP design are lovely – and this one just looks like a spring garden to me.  What better image to evoke for the birth of a new tiny human?  Once again, I used the creative designs of one of the many blog sites that give us not-so-creative folks a little boost.  This week, I tapped into the Sunday Stamps blog for their SSC92 challenge.

I wanted this card to be suitable for either a boy or a girl, and I think I got there.

Blue Sweet Baby Card Front 1 Watermarked

As you can see, this particular paper would lend itself to the use of many different color combos – and, like so many of them – would be good for other occasions as well.  I decided to use Night of Navy for the card base and Wisteria Wonder for the mat.  I used a Martha Stewart edge punch to create the lacy edging driven by the sketch.  Once I had those two pieces cut and ready (card cuts are listed below), I SNAIL’d the Painted Blooms DSP piece to the Wisteria Wonder.

I cut another piece of Wisteria Wonder CS, inked up my SU Baby We’ve Grown Sweet Baby stamp with Versamark and heat embossed it with white embossing powder.  I cut a banner end out with my SU Hexagon Punch, and sponged the edges of my banner with some Night of Navy ink.  I really like how sponging the edges adds quick depth to a piece of CS, without adding any additional weight like you’d get with another piece of CS behind it.  With the banner/sentiment complete, I SNAIL’d it to the mat.

I used the new Painted Blooms Cotton Twine, wrapped around the mat twice and secured to the back.  I had a cute little crotchet flower in my stash – so I made a little bow with more of the Painted Blooms Twine, and glued it to my flower with a dot of Liquid Glue.  And then I glued all that onto the already-wrapped twine.  I must say I’m a fan of twine when it comes to making bows, for sure!

I adhered the mat to my card base with Dimensionals, and the outside of the card was done!  This one goes together really fast, and would be a super design, IMHO, to use if you were wanting to make a bunch of cards pretty quickly (like, if you were going to give a set of note-cards to someone as a very nice gift!).

Blue Sweet Baby Card Front 2 Watermarked

For my inside liner, I used White CS again.  I reprised the Night of Navy ink on my Baby We’ve Grown bunny stamp (he’s about as cute as he can be!) and (with a flash of unaccustomed whimsy!), stamped him in the very bottom corner, as if he’s peeking in.  I was pretty impressed with myself on that one – I’m having to learn that things don’t have to be where one expects them to be all the time! ;-0  I finished with my Petite Pairs sentiment, and called it a day!

Blue Sweet Baby Card Interior 1 Watermarked

I hope that you liked my share for today.  It just makes me happy to look at it – so cheerful and promising spring is coming!

The January Hostess Code is still open, so get your orders in quick-like-a-bunny!  Don’t forget that you’ll also get a free gift from me and you may qualify for Punkin Head Peppermints!

TTFN

Mary

Here are the card cuts for today’s project:

Night of Navy Cardstock:  Card Base 4 1/2″ x 11″, creased and folded at 5 1/2″

Wisteria Wonder Cardstock: Bottom Mat 5 1/4″ x 4 1/4″ and then edged with edger punch; Sentiment banner 1 1/4″ x 3 1/4″

Painted Blooms Designer Series Paper:  Top Mat 3 3/4″ x 5″

White Cardstock: Inside Liner 4 1/4″ x 5 1/4″

JANUARY 1 – 31 HOSTESS CODE:  RMQE9AEQ Use this hostess code when you order and receive a free gift from me!  But, if your order is over $150, please do not use this code (you’ll miss out on your own Stampin’ Rewards/Hostess $$ if you use it) but you’ll still get the free gift.  The free gift for January is your choice of any item valued up to $4.95 in either the 2014-15 Annual Catalog or the 2015 Occasions Catalog!

STAMPIN’ UP! ITEMS USED IN THIS PROJECT

Price: $29.95

Supply List

Built for Free Using: My Stampin Blog

 WEEKLY DEALS 20 – 26 JAN 15 Click here to see the Weekly Deals from Stampin’ Up! in my online store.  The Weekly Deals are only while supplies last and only available at these great prices through January 26.

Visit my online store here
Shop the Clearance Rack here.
Earn FREE Stampin’ Up! Products – Join my Punkin Head Peppermint Rewards – My online customer thank you program!

Categories: General, New Baby | Tags: , , , , , , , , , , , , , , , , , , , , , , , | 3 Comments

Sweet Baby!

Since I have a few friends who are fixin’ to grow their families in the next couple of months, I decided I need to get on the stick and have some baby cards ready to go when “The Announcement” is made.  For the record, I DO actually have more than a few friends (and they’re actually people I’ve met face-to-face – not just ones I have on Facebook!), but only a few are, well….you-know….preggers.  So, I built a few cards – some are gender-neutral, others not-so-much.  For this one,  I used this week’s Freshly Made Sketches #169 to kick-start my creative juices.  I just love all these sites that help me start to get an idea of what a card will look like.  Once again – I didn’t stray too awfully far from the sketch – I’ll get more wild as I go along!

I also wanted to dive into my new stash of Stampin’ Up Occasions Catalog items  – and the Painted Blooms DSP pack was calling my name.  If you haven’t seen all the gorgeous paper that’s in that stack, you need to.  I think I’ll need to buy another one….  I also got the Petal Potpourri bundle – which included the new coordinating Flower Medallion Punch AND saved me 15%!  Love.

Let me tell you what  – with all the great stamps and punches and TIEFs and inks and Blendabilities that I got with my first GINORMOUS demonstrator order, it wasn’t easy to decide where to start.  You know – too many options – too many fun and pretty things that I wanted to play with all at once.  Thank goodness for the sketch – at least I had a clue to start with!  And, here’s where the clue-bird landed.

Green and Yellow Sweet Baby Card Front 2 Watermarked

I let the green foliage of the Painted Petal DSP lead my color choices.  An Old Olive Cut and Ready Card Base started me out.  I ran the DSP thru my Big Shot with the Lovely Lace Textured Impressions Embossing Folder (aka TIEF) and then cut my circle using a Framelits circle die at 3 1/4″ diameter.  And then, I saw my slight error.  DSP is not cardstock.  Uhm – hello?  By the time I’d embossed the paper and then cut a giant hole in it – it was a bit flimsy around the edges.  So, I stuck in onto a piece of white cardstock that I cut just the tiniest bit bigger than the DSP – making a nice mat and, frankly, looking like I planned it that way all along! 😉 But, don’t be like me – you should stick the DSP to the cardstock BEFORE you cut the circle out!

And – just a little note about Framelits.  I’ve used Framelits for a while now, but only recently bit the bullet and got a Magnetic Platform.  Oh.  My.  Goodness!!  A dear friend of mine is wont to say: “use the proper tool for the proper job.”  No truer words were ever spoken.  The Magnetic Platform let me perfectly place the Framelit and held it in that spot while I maneuvered the cutting plates and ran it through the Big Shot.  Amazing!  If you have a Big Shot and you like to use Framelits – and who doesn’t? – then I highly recommend this addition to your tool chest!

Any-whooo, with the mat ready to go, I stamped and punched out several of the Petal Potpourri flowers.  I used Old Olive, Mossy Meadow and Crushed Curry ink.  And then, because I could, I did one in Night of Navy.  I did several different stamps within the set, but in the end decided I liked the more cohesive look I got with just one flower version.  The card has plenty going on anyway!  You can see I went crazy and stuck that Night of Navy version on the very top.

I SNAIL’d two of the flowers to the card base, then SNAIL’d the mat on top of those.  One yellow flower got attached with dimensionals and the blue one is flat on the mat with SNAIL.  I knew I was going to be adding the button, and wanted to keep the height profile down at least a little bit.  Easier to mail, and all that.

An Itty Bitty Banner sentiment in Crushed Curry (stamped and then cut with the coordinating Framelit), and a Linen Thread bow in a generic wooden button, attached with Liquid Glue,  finished off the front of the card.  You know, right up until I picked the Sweet Baby sentiment from the Itty Bitty Banners, this card could have been used for any occasion.  All from that same stamp set – since it includes “For You”, “Congratulations”, “Love You”, and “Thank You” in addition to “Sweet Baby”.  Handy, huh?  And – that’s another one that Stampin’ Up! bundles together to save you money!

Green and Yellow Sweet Baby Card Front 1 Watermarked

For the inside, I went with a white CS liner, and a couple of strips of leftover DSP to finish things off.  The final touch was a sentiment from the Petite Pairs stamp set.

Green and Yellow Sweet Baby Interior 2 Watermarked

Pretty easy card to build and I like the versatility it offers.  I hope that you’ll take a gander at the Painted Blooms DSP and maybe use this card to fuel your creativity!

More Baby cards to come, but for now….

TTFN

Mary

Here are the card cuts:

Old Olive Cut and Ready Card Base

Painted Blooms DSP: Front Mat 4″ x 5 1/4″; inside embellishment strips 3/4″ x 4″ and 1/2″ x 4″

White Cardstock: Mat 4 1/8″ x 5 3/8″; Inside Liner 4″ x 5 1/4″

JANUARY 1 – 31 HOSTESS CODE:  RMQE9AEQ Use this hostess code when you order and receive a free gift from me!  But, if your order is over $150, please do not use this code (you’ll miss out on your own Stampin’ Rewards/Hostess $$ if you use it) but you’ll still get the free gift.  The free gift for January is your choice of any item valued up to $4.95 in either the 2014-15 Annual Catalog or the 2015 Occasions Catalog!

STAMPIN’ UP! ITEMS USED IN THIS PROJECT

Price: $99.95

Built for Free Using: My Stampin Blog

WEEKLY DEALS 13 – 19 JAN 15 Click here to see the Weekly Deals from Stampin’ Up! in my online store.  The Weekly Deals are only while supplies last and only available at these great prices through January 19.


Visit my online store here
Shop the Clearance Rack here.
Earn FREE Stampin’ Up! Products – Join my Punkin Head Peppermint Rewards – My online customer thank you program!

Categories: General, New Baby | Tags: , , , , , , , , , , , , , | 8 Comments

For All Things Thank you card

Since it’s the time of year to be sending “Thank You” Cards (at least, my mom taught me to do that – I’m not always the most consistent with it, though!) I thought I’d share a card I made this week.   I used the Mojo Monday Sketch 379 as my jumping-off point.  You can see I didn’t jump TOO far, huh?

I chose the For All Things Stamp set – but it would easily work with any thank-you themed sentiment that you have in your arsenal!

Front of card 3 watermarked

I built my card front by starting with a piece of Cajun Craze cardstock.  I started to use the wavy lines stamp from the Chalk Lines set, inking it up with Crushed Curry ink, for a tone-on effect.  Well, guess what?  Chalk Line only comes as a  photopolymer set (which is my preferred option anyway – for multiple reasons) – and, if one is half-blind, then it’s apparently not too hard to stick the stamp UPSIDE DOWN onto the block.  Which is exactly what I did – and I discovered it AFTER I made the first stamp on my cardstock.  Well, I guess I’m cheap FRUGAL enough that it hurt my soul to not use that piece of cardstock.  So, I stamped all the way across with my “new” stamp and then I turned the stamp over to right-ways up and re-did it.  And I decided that it looked like wood-grain and that I LIKED it (Hey, Mike-y….).  Here’s how the background looked when I got done with it:

Background of Mat WatermarkedJust shows – ta- go – ya that sometimes good ideas come from mistakes (I heard that’s how Sticky Notes came to be – this is probably  almost like THAT!).  I’ll be remembering this for future cards where I want to add some subtle background texture.

I pulled some paper from my Color Me Autumn DSP to make my geometric shapes.  The green piece, I ran through my Big Shot (one of my very FAVORITE tools!) with the Pretty Print Textured Embossing Folder.  Then, because I’d just gotten my Daffodil Delight Blendabilities markers, I traced over the “writing” with the lightest colored marker.  I thought it added a little sumpin’-sumpin’ to it.  With the yellow square – which I’d trimmed with a pair of raggedy-edge scissors (pretty sure that’s not the actual name, but you can see what I meant!), I used the wheat stamp from the For All Things set.  I inked it up with Pumpkin Pie ink, and then stamped it off on a piece of scrap paper.  Then I stamped it twice without re-inking – and I did that a couple of times, randomly placed on the square.  And then I decided it was good, and moved on!  My sentiment is stamped with Old Olive and that square also has a Pumpkin Pie stamped-off-once-on-scrap-paper (that should be an acronym S.O3. S.P. or something) wheat sheaf.  Then I sponged the edges of that square with more Pumpkin Pie ink, just to give it a little depth.

Front of card WatermarkedI adhered the three shapes onto the background mat with SNAIL.  Then tied a length of Pumpkin Pie 1/8′ Taffeta ribbon around the whole thing, ending it with the much dreaded bow.  Tacked the bow down with a tiny dot of glue and then added a few rhinestones for some bling.  I used two larger ones and a small one – I don’t know why!  Then I stuck the card front onto my card base with dimensionals.

On the inside, I did some more of my Old Olive S.O3.S.P.-ing with the wheat sheaf and then used a little leftover Pumpkin Pie taffeta to finish off my liner. And I stamped a Crumb Cake Medium envelope a few times with the wheat stamp as well.

Interior of Card 2 watermarked

Et voila!  Done.  Easy peasy – and I hope that you like it as much as I do!

And – on a slightly different note, my gi-hugic first Demonstator order came last night!  Like Christmas all over again – so, I’m off to paw through everything, and pet my new toys.  And start making cards with my Occasions and Sale-a-Bration Catalog items that were in my order.  Whoo-hoo!  If you haven’t seen those catalogs, you really MUST!  Wonderful new items for the Spring – and the Sale-A-Bration (going on through 21 Mar) is a great way to score FREE stuff (I think I’ve mentioned that free is my favorite price!).  So, be sure to check them out!

TTFN

Mary

Here are the card cuts:

Cardstock and paper cuts for the project:  4″ x 5 1/4″ Cajun Craze CS (mat);  2 1/2″ x 3 1/2″ Color Me Autums DSP (green); 3 1/4″ x # 1/4″ Color Me Autum DSP (yellow square); 1 7/8″ x 2 1/2″ Cream CS (sentiment square).

JANUARY 1 – 31 HOSTESS CODE:  RMQE9AEQ Use this hostess code when you order and receive a free gift from me!  But, if your order is over $150, please do not use this code (you’ll miss out on your own Stampin’ Rewards/Hostess $$ if you use it) but you’ll still get the free gift.  The free gift for January is your choice of any item valued up to $4.95 in either the 2014-15 Annual Catalog or the 2015 Occasions Catalog!

STAMPIN’ UP! ITEMS USED IN THIS PROJECT

Built for Free Using: My Stampin Blog


WEEKLY DEALS 13 – 19 JAN 15 Click here to see the Weekly Deals from Stampin’ Up! in my online store.  The Weekly Deals are only while supplies last and only available at these great prices through January 19.


Visit my online store here
Shop the Clearance Rack here.
Earn FREE Stampin’ Up! Products – Join my Punkin Head Peppermint Rewards – My online customer thank you program!

Categories: Thank You Cards | Tags: , , , , , , , , , , , | 4 Comments

My Very Favorite (so far!) Stampin’ Up Stamp Set – Ornamental Pine

This is a card that I made and gave to my mom for Christmas – I gave her 10 of these and 10 of a card I’ll show you later.  My mom lives in the mountains in Colorado and loves all things woodsy – particularly pine cones!  When I saw this set in the 2014 Holiday Catalog – it was the first item I ordered from Stampin’ Up!  While it is certainly great for Christmas cards, it’s got a lot of uses for the rest of the year.  You should probably plan to see more cards using this stamp in the future!

The technique on this card is one that I found on Pinterest (gotta love Pinterest!).  At first blush, it appears pretty complicated, but once you break it down into easy pieces, you’ll see it’s a straightforward technique – and it can be used with all sorts of stamps.  I’ve provided all the card cuts and supplies below.  Not everything in this card is from Stampin’ Up – I was in California on an extended business trip and didn’t have all my SU with me.  So, I made do – but I’ll try to tell you which SU products would work well on this card. I started with a dark chocolate brown cardstock (try Chocolate Chip or Early Espresso in SU), and used my paper trimmer to cut it to 8 1/2″ x 5 1/2″ (keep the trimmings – you can use them for one of your mats!), and then scored and folded it at 4 1/4″.  Use a bone folder to make your crease sharp!  Then, I made all my card cuts at once.  Just cause I like the assembly line process if I’m making a bunch of the same card.  Using the same color cardstock as your card base, for each card, cut a 3 1/4″ x 4 1/2″ mat and a 2 1/4″ x 3 1/2″ mat.  For the light, stamped portion, I used a vanilla/cream cardstock (I’d go with Very Vanilla in SU).  For each card, cut 3 mats:  4″ x 5 1/4″;  3″ x 4 1/4″; 2″ x 3 1/4″.  With all the cutting out of the way you can start stamping and assembling! First, take the 3 Very Vanilla mats and, placing them on top of one another, use a little piece of tape (either double sided or a regular piece rolled inside out – does that make sense?!) to secure them lightly together.  Put the tape right in the middle of the back of the two smaller mats.  When you’re done – you’ll have a stack of mats that looks like this:

Triple mat stack 2 watermarked

First, stamp your sentiment onto the smallest mat.  I used a non-SU “Just a Note” stamp, and inked it with SU Old Olive.  You can put it wherever suits you on that small mat – I liked it in the bottom right corner. (I’m asking myself why I didn’t take a picture of the mats in a portrait orientation….just goofy, I guess!) Then – ink up your background stamp.  For this one, I used SU Old Olive ink on the needles and didn’t really worry about the stem portion.  Stamp it all over your stack-o-mats.  Go off the edges, turn the stamp around – make it random.  You can stamp as many times as you want to – I was looking for the forest-y appearance that I got.

Next, you’re going to randomly stamp with your accent piece.  I used Staz-On Timber Brown because it’s what I had, but SU Chocolate Chip, Early Espresso or even Soft Suede would look very nice.  Heck – go crazy and have a few of each color! 🙂  Again – go off the edges of the mats, turn the stamp around – pine cones don’t all grow exactly the same way in the forest!  Do as many or as few as you like.  You can see I liked “many”! Okay – easy, peasy so far, right?  Now.  Carefully pull the mats apart.  It’ll help to keep them all in the same orientation as you do this part.  Then, layer the mats back together, but stick the “right” size dark mat between each stamped piece.  I did a dry fit with mine – to be sure that I had all the stamps going the right way.  The card base itself is the bottom “layer”. I adhered all the stamped Very Vanilla pieces together with their mats – use SNAIL for this part.  Then, I wrapped some forest-y green twine twice around the layers (in SU think Linen Thread, Thick Baker’s Twine in Baked Brown Sugar, or maybe Gold Metallic Baker’s Twine), and added a button and a little bow.  We’ll talk about bows later – they’re kind of the bane of my crafting existence!  For some reason, I just can’t do them “right”.  To say that it took me forEVER to make 10 cards with little perfect bows on each and every one….yea.  Hello, Captain Understatement! I put a little teensy drop of liquid adhesive under the button/bow combo to keep it all in place.

I then adhered the card front to the card base with SU Dimensionals and – the front was done! I used a piece of my vanilla cardstock (4″ x 5 3/8″) and stamped a corner with the pine needles and the cone and adhered it inside my card.  I did the same corner treatment to a Cream envelope, just to complete the ensemble.

Ornamental Pine interior closeup watermarkedAnd that’s it!  All done!  I’m really happy with this card – love the entire thing, and am really partial to this technique as well. I hope that you’ll give this a try – I think the possibilities are endless!

Card Stock Cuts for the Project: Chocolate Chip/Early Espresso: card base 8 1/2″ x 5 1/2″;  3 1/4″ x 4 1/2″ mat and a 2 1/4″ x 3 1/2″ mat Very Vanilla: Mats 4″ x 5 1/4″;  3″ x 4 1/4″; 2″ x 3 1/4″.  Card inner liner  4″ x 5 3/8″

JANUARY 1 – 31 HOSTESS CODE:  RMQE9AEQ Use this hostess code when you order and receive a free gift from me!  But, if your order is over $150, please do not use this code (you’ll miss out on your own Stampin’ Rewards/Hostess $$ if you use it) but you’ll still get the free gift.  The free gift for January is your choice of any item valued up to $4.95 in either the 2014-15 Annual Catalog or the 2015 Occasions Catalog!

STAMPIN’ UP! ITEMS USED IN THIS PROJECT

Supply List

Built for Free Using: My Stampin Blog


WEEKLY DEALS 6 – 12 JAN 15 Click here to see the Weekly Deals from Stampin’ Up! in my online store.  The Weekly Deals are only while supplies last and only available at these great prices through January 12.

Supply List

Built for Free Using: My Stampin Blog

Categories: Uncategorized | Tags: , , , , , , , , , , | 2 Comments

A New Beginning Begins….Now!

Well, here it is – just barely 2015.  We sit on the very tippy edge of a whole new year – a year to re-invent ourselves. Right?  Maybe “re-invent” is too strong a word.  Makes me think of my usual resolutions – lose weight, get fit, be uber-organized, stop procrastinating, be a better wife/friend/woman/person….the list seems long, because it is.  And pretty much overwhelming and unobtainable.  Doomed to failure – again!  So, this year – I’m going to “tweak” myself….eat a little better at every meal (but the occasional snack’s still okay, right?!?), walk to the barn and take the stairs when I can, put stuff away when I get it out, make a schedule and try to do things when I can….well, you get the drift.  Little things.  Doable things.  And – I’ve also decided to do something new and fun this year.  I’ve started a new business.  And – I’ve started to blog.  “To blog”.  Is that actually a verb?!?

You’ve found yourself at my very first blog post.  Future posts will be centered around that new business I mentioned – I’ve thrown my hat in the ring and I’m now an official Stampin’ Up! Independent Demonstrator.  I had to do it – out of sheer financial desperation – and to help DH be more resigned to the increasingly regular payments to Stampin’ Up! he was seeing in the checking account.  Now – it’s a “business”, right?  Spreadsheets and taxes and all that fun stuff.  Makes it more legitimate in his eyes, I’m suppose.  In truth – I just want to play with the fun toys and stamp and create homemade cards to send to my friends and give as gifts.  If there’s a little income on the side – well, that’s okay, too!

I mentioned I was also new to blogging.  As such, I am – frankly – not even sure how this will end up looking on my shiny new website.  But, I’m going to slog on and tell you a little about myself right quick and then we’ll move on from that, okay?  Consider yourself my guinea pig!  ;0

I live in Fayetteville, GA with my husband, Wayne, two completely rotten miniature panthers (okay – they’re really Domestic Shorthair cats, but…they THINK they’re panthers, so….) – Katy and Leo, one spoiled lab mix – Buck, and three horses.  I didn’t mention that they’re spoiled – but, yea, they are.  Cerah and Cady are Haflingers – mom and daughter, actually.  And Bo is a National Show Horse.  We call him the Whole-linger.  Kind of a play on words….well, maybe you have to see him to understand….

840A0025That’s him – on the left.  He’s about twice the size of the girls and is pretty convinced he’s the lead Stallion, the Main Man, the Quarterback to their Cheerleaders….if truth be told, they totally rule the pasture (but they let him think he’s all that and a bag of chips!). They’re a fun group – and they love being waited on and fed and loved on – and they LOVE peppermints!  A LOT!

My life has encompassed a career in the Air Force, a follow-on (and ongoing) military support job, and a stint as a Pampered Chef consultant.  I’m an aviator, a teacher, a horse trainer, a would-be-chef, a reluctant housekeeper, a Square-Foot Gardener, a prepper (okay – I own a dehydrator and have managed to grow and dry enough food to last about a week when the zombie apocalypse comes….), a card-maker, a reader-of-novels, and (let’s face it) a couch potato.  I’m not one of those people who claim “I just don’t watch TV” or “I just can’t sit around doing nothing” or “I just have to stay busy”.  Nope.  I like watching “my shows”.  Preferably on the DVR without any commercials.  So – I didn’t pick crafting to give my overly busy hands something to do, or to take up my evenings.  I picked it purely because I love the “stuff” that goes with and into it, and I love the end results that I can make with just some paper and ink and a little bling.

So, with that, let’s talk about Stampin’ Up! and what you can expect to find as I get this website developed.  I have a wonderful mentor, Amy Koenders, who became my demonstrator when I first stumbled upon the company.  She’s helped me immensely and I hope to model my business after hers.  If you’d like to pop over to her site, here’s the link:  www.stampwithamyk.com  She’s been doing this a lot longer than I have, and her site is really awesome – you’ll have a lot of fun over there, I promise!  As I get rolling alone, I’ll be posting cards with “recipes” to make them yourself.  You can feel free to CASE them (this is a new term I’ve learned – Copy and Share Everything! – and it seems like a really good idea) as they are or use them as a jumping off point to make them creatively your own.  Amy does such a good job of posting a new (and rockin’!!) card every day.  It’s going to be my goal – but I’ll ask you to be patient with me as I get spun up.  Did I mention that full time outside job?  It still takes up the preponderance of my days and – when I’m TDY – my nights!  So it may take me a while to reach that level.

I’ll also be posting links to other demonstrators who are creating beautiful projects.  And, of course, a link to Stampin’ Up itself, where you can see even more great ideas and browse and shop to your heart’s content!

So – there it is in a nutshell for you.  I hope to see you back here regular-like.  Watch and help me grow! 😉image

Categories: General | Tags: , , , , , | 7 Comments

Powered by WordPress.com.