Good morning and Happy Happy HAWWWWMP DAY! Hope the week’s going well! Before I get going – I want to make sure you’re tracking that we’ve got a ONE DAY ONLY Stamp Sale – tomorrow!! Tomorrow only – stamps and some stamping tools – will be on sale – you’ll save 15%! Yeah! So – be checking what’s going to be available – info is down below – and get your list ready to go! Whoo-hoo!
My card today is a cute little Christmas card using the Jolly Delivery stamp set and bundled dies – plus the coordinating North Pole Delivery Specialty DSP – from the Sep-Dec 2025 Mini Catalog! And – just for ducks – I made a cute treat box to go along with! Take a look-see:
Good morning, y’all! It’s Thursday – which means it’s time for another Happy Inkin’ Thursday Blog Hop. We’ve got a theme challenge to work with and I’m excited to see what everyone brings to the table. I just know you’re going to see a ton of awesome-ness on the hop today!
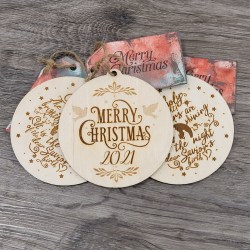
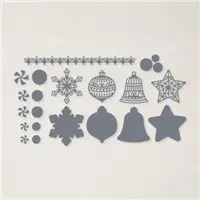
I pulled out a little sumpin’-sumpin’ that some of us demonstrators got to get our hands on WAAAY early! It’s the Square Pillow Boxes from the Jan – Apr 2024 Mini Catalog! Yes. It’s almost time for a NEW catalog! Now – there’s lots of things you can do with these fun 3-D treat holders – but…I decided to turn one into a treat holder/Christmas Ornament. I used the Joy of Noel Dies and some of the Christmas Classics bundle to get it done! Take a look-see:
Good morning, y’all! How goes the weekend!? We had a cooooooool day yesterday. I mean – it ALSO included a good bit of rain (thanks, Leo!) but mostly it was just blessedly cool! Finn had quite the pep-in-his-step when we went for our walk! And we even pulled on a light long-sleeve shirt! YEAH!!
Since last night was Saturday – specifically the 15th-Saturday-before Christmas! – I shared another Christmas project for you! This time it’s a super easy Treat (or small gift!) box made with the Countryside Corners die set! The one I made last night was decorated for Christmas with the Joy of Noel Bundleand Christmas Classics dies – plus the beautiful Joy of Christmas DSP! Take a look-see:
Hello hello! How goes your weekend so far? Wayne’s been busy – he got all the steel up on the sides of the garden shed yesterday – whoo-hoo!! And Finny and I had a playdate with his sister Scout – and Jax, Teddy, Higgins and Reba! So – big day here!
And then, last night – I got on YouTube and shared a cool fun fold – called an Exploding Box! I got to try one at our retreat last weekend – my friend Susan Stanley brought it as her shoebox swap – and I loved it! So…I made another one – this one using the wunnermus Fitting Florets DSP and the Framed Florets Bundle – you can get all these new goodies on 1 Nov! Take a look-see:
Good Monday, y’all! Hope your weekend was great and that your week ahead is smooth and easy! We had a very good visit with my friend Sally and I was sad to see her leave yesterday. She’s that friend that, no matter how much time goes by between visits, it’s like no time has passed at all. I hope each and every one of you has just such a friend! 🙂
My card today isn’t a card at all – it’s a sweet treat holder! I made it with the new Delicate Details Treat Boxes and some pretty die cut flowers from the Hues of Happiness DSP.
Well – November is winding down FAST, huh? It’s already the LAST Sunday of the month. Wow.
Just. WOW! 😳😳😳 Hope the long weekend went well. Tell me….do you have your Christmas tree up yet?? I do not.
Yet! 😉
If you were able to join me for my Facebook live video last evening, I appreciate you spending part of your holiday weekend with me! If not, but you’d like to watch the replay…here ’tis!
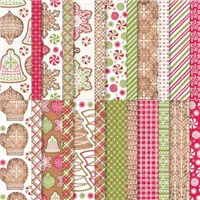
I had a friend – and Critters-N-Creatin’ Krew team member! – ask me to help her figure out how to modify a little gift box that she’d seen over at Nigezza Creates. She wanted something a little bigger that would fit some chocolate. You KNOW I am all about MORE chocolate, so…I stuck my engineer hat on and…came up with a 1 1/2″ Square Treat box with the fun and Christmas-y Gingerbread & Peppermints 6″ x 6″ DSP – plus…a few little tags and sentiments here and there. Take a look-see:
While I was making it, I thought…wonder if I couldn’t just give y’all (and myself!) a handy formula so that you could create whatever size box you needed (within the constraints of your cardstock size, of course!). And…so I did. And made a 2 3/4″ Square Gift Box, too!
The basics are the same for any size – and the Box Size you WANT is the starting point for all the calculations!
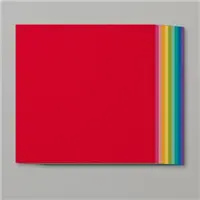
For the 1 1/2″ square, I started with a 5″ x 6 1/4″ piece of Real Red cardstock. Using my Simply Scored Scoring Tool, I scored along the long side at 1 1/2″, 3″, 4 1/2″ and 6″. Then I rotated the cardstock to put the short side up and scored at 1/4″, 1 3/4″, 3 1/4″ and 4 3/4″.
I used scissors to cut flaps and tabs…
..as you can see here (and at about the 7:45 point in the video!).
I used my Paper Snips to trim rounded corners on the large tabs.
In the video, I matted the small DSP squares on Basic White and then adhered them to the square panels of the box base.
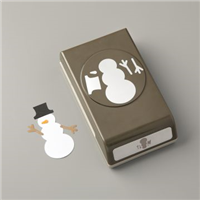
I selected my “top” and used the very top of the head on the Snowman Builder Punch to cut a “thumb” hole.
Then I added Liquid Glue the small tab on the right side of the base in the picture above. I closed the box together – check the video at about the 19 minute mark to see how!
I used a sentiment from the Peaceful Cabin stamp set and stamped it in Old Olive on Basic White. Then I cut it with a small tag die from the Ornate Frames die set. I also cut a Real Red tag. Using Liquid Glue, I adhered the two little tags together – slightly offset but with the tiny holes lined up.
I ran a piece of white Baker’s Twine from the Baker’s Twine Essential Pack thru the hole and tied a little bow. I adhered the tag with a Glue Dot.
Using the small circle die in the Gingerbread Die set, I cut a small Basic White circle. Then I cut the coordinating “peppermint swirl” die cut in Real Red. I adhered the swirl to the circle with Liquid Glue, then popped it on the end of the tag with a Stampin’ Dimensional – and the box was done!
The large box has some Real Red 3/8″ Mini Ruffled Ribbon and a tag made with the Giving Gifts and Tailored Made Tags die sets.
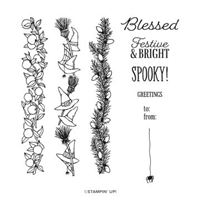
I adhered the Basic White Tailored Made Tag to the back of the Real Red detailed cut with Liquid Glue – adhering “bad” side to “bad” side. That left the nicer “front” side visible on the back – where I stamped an Old Olive sentiment from the Festive & Bright set.
Et Voila! I love this little Square Gift Box – whether it’s 1″, 1 1/2″ or a “huge” (😉) 2 3/4″! Note: 2 3/4″ is about as big as you can get with 12″ x 12″ cardstock!
While I’ve used the Gingerbread & Peppermints DSP here – you can use whatever DSP suits your occasion! Look thru your stamps and dies (although you NEED the Ornate Frames, Tailor Made Tags and Giving Gifts Die Sets – just saying!) and use the sentiments that you’ve got! 🙂
If you’d like to recreate this card, all the products and card cuts you’ll need are down below!
P.S. Want to win some Blog Candy? You’ve got until 5pm Eastern Time on Tuesday, 30 Nov 2021 to get entered to win a Gifts Galore November 2021 Paper Pumpkin Kit from me!! Head over to THIS blog post and tell me your favorite Holiday tradition!! 🙂
I’ve created a printable PDF with written instructions and a list of the products used to create this project. You can download, print and/or save it by clicking this image:
Missed any tutorials? You can check out my past projects right here!
HOST CODE FOR 16 NOV – 30 NOV: 2DBG6ZEX
Use this host code when you order $50 or greater and receive a free gift (AND the Monthly Card Tutorial) from me! If your order is over $150, please do not use this code, but you’ll still get the free gift. The free gift is your choice of any item valued up to $10.00 in any active Catalog! That includes some of the Host Exclusive stamp sets! See my Customer Rewards page for full details.
Note: Make sure that you can see my name on the final checkout page listed as your Demonstrator when you order so that you know that you’re ordering with me and you’ll get my rewards!
You’ll also be getting a link to my ZOOM The Craftroom (an exclusive TWICE-A-WEEK online event for my customers) and the monthly Online Tutorial. The November Tutorial features the Frosted Gingerbread Bundle!
Just TWO More Days!!
The Start with Savings Starter Kit promotion is a super opportunity to purchase your Starter Kit at a great deal! Instead of the standard $99 Starter Kit—which is already a steal of a deal—you can pick up a completely custom Starter Kit for only $75!!! What an absolutely unbeatable bargain for a box with a value of $125!
There’s no better time than November for you to join as a demonstrator! From 4 – 30 November, you’ll be able to purchase your Starter Kit with big savings!
PROMOTION DETAILS:
Promotion Period: 4 – 30November 2021
When a new demonstrator orders their custom Starter Kit, they will be able to redeem $125 of qualifying products for only $75 (normally $99).
New demonstrators who submit their Independent Demonstrator Agreement (IDA) before 4 November or after 30 November will not be eligible for this promotion. Starter Kit orders must be placed between 4 November and 30 November to receive the discount.
Joining Deadline: November 30, 2021; 11:50 PM (MT)
I would LOVE to have you join my awesome Critters-N-Creatin Krew (CNCK) team!
WHY be a Demonstrator?
Get 20%–25% off all Stampin’ Up! products. That’s on….EVERYTHING!
While there’s no requirement to sell, there is the opportunity to do so! You can earn additional income based on your sales and recruiting–just how much extra income is up to you.
Set your own schedule and put in as much or as little or even….NONE at ALL… time as you’d like.
Get support through online training resources, events, and a demonstrator-only online community with thousands of project ideas.
Access to regular promotions, giving you an opportunity to contact customers.
Opportunity to earn incentive trips.
Get early looks at new products – and the chance to add them to your tool chest before anyone else!
Chance to learn creative tips and techniques, share ideas, and come into contact with new friends who love papercrafting as much as you do!
There’s NO commitment and NO penalty if you decide that being a Demonstrator isn’t right for you. Why not give it a try? The CNCK has a fun Facebook page where we chat a lot and share our projects (you can even win fun prizes!). And – we gather up via Zoom once a month, too, for folks that want to do that! Have I mentioned we’re a pretty fun group of folks? No?? Well – we totally are – and we’d love to have you join us!
Got questions about joining? Drop me a note at stamps-n-lingers@comcast.net! I’d be happy to chat with you more about it! You can also get more deets about being a Demonstrator here and then head here to get started and pick up that great deal on the Starter Kit!
Will YOU be the next to join my CNCK Team? I sure hope so! 😉
Jul – Dec 2021 Mini Catalog Last Chance Products Sale!
Starts on 1 Dec 2021!
The July–December 2021 Mini Catalog will be retiring soon! It’s always bittersweet to see a classic Stampin’ Up! catalog take a trip to retirement. But, we’re looking forward to all the new products on their way—and we hope you are, too!
SALES PERIOD:
Starts: 1 December 2021 at 12:00 AM (MT)
Ends: 3 January 2022 at 11:50 PM (MT)
DETAILS:
Each Last Chance Products promotion typically includes a Retiring List (products that will no longer be available once the catalog retires) and a Carryover List (products that will still be available once the catalog retires).
The Carryover List will be available online until the 2022–2023 Annual Catalog launches.
Look for discounts up to 50% on SOME (not all) of the items on the Retiring List.
All products are available while supplies last, and there are no purchase limits.
Discounted items can be added to a Starter Kit and redeemed as a 50% off item or with Stampin’ Rewards.
RETIRING LIST (WITH DISCOUNTS!):
See which products will be on their way out once the July–December 2021 Mini Catalog retires.
Shop now through Monday, 29 November, and you’ll receive 15% OFF STOREWIDE, plus FREE SHIPPINGis available for all domestic U.S. orders over $100.
Regardless of what you need – now’s a great time to get it! 15% off is nothing to sneeze at!! Whoo-hoo!!
Here’s the deets:
🎉🎉🎉🎉15% OFF ANYthing and EVERYthing!! 🎉🎉🎉🎉
Ends Monday, 29 Nov 2021 at 11:59pm CT.
No coupon code is needed.
Discounts are automatically applied during the checkout process.
If you want to see the S-N-S products that have a spot in my craft room, check it out right here! 🙂 And – you’ll also get to see a fun little surprise that they’ve got for us this year!
Hint: it COULD win you a $25 Gift Certificate from S-N-S!
And – there are EXTRA special savings starting right after Thanksgiving!
Get ready for….CYBER MONDAY!!
28 NOVEMBER
PLEASE NOTE: I do receive a small affiliate fee when you use my Stamp-n-Storage shopping links. But – you’ve seen plenty of pictures of my stamping space – both at home and when I’ve traveled! – and you KNOW that I am a HUGE fan and love their quality products!! I recommend them to everyone!
Get the Stampin’ Up! Products Used in this Project:
Real Red Cardstock: Box – cut to dimensions as shown in the template; Giving Gifts die cut (for large box); Ornate Frames Die cut (smaller box); Gingerbread die cut (peppermint on smaller box)
Basic White Cardstock: 2 5/8″ x 2 5/8″ (x6 – mats for large box); Tailor Made Tags die cut (for large box); Ornate Frames Die cut (smaller box); Gingerbread die cut (peppermint on smaller box)
Gingerbread & Peppermints DSP: 1 3/8″ x 1 3/8″ (x6 – for smaller box); 2 1/2″ x 2 1/2″ (x 6 – for large box)
If you need any stamping supplies, I’d be very happy to be your Demonstrator. Just click on the Order Stampin’ Up! Online Now button on the right side of the screen to go directly to my online store or drop me an email if you have any questions. Happy Stamping!
Shop the Clearance Rack here. Earn FREE Stampin’ Up! Products – Join my Punkin Head Peppermint Rewards – My online customer thank you program!
Finn Fan Fix
Wayne was sitting on the end of the couch yesterday afternoon watching the UGA/GT game (or…was it a game or a schooling? 😉 GO UGA!) and made the mistake of getting up to go to the bathroom.
As soon as he cleared the hallway – the Man took advantage of the newly opened “spot” on the sofa.
Wayne returned to find…
…that necessitated some pooch-pouncing!
Finny loves a good pooch-pouncing!
…but they never last NEAR long enough!
Come back, Dad – I’m in your spot and I need pounced!
Good morning and Happy Friday! Wanna hear something REALLY scary!? Hang on to your hat.
There are 93 days until Christmas.
Yes. Ninety. Three.
Less than 100. Three months.
In other words…it’s TOMORROW!!!! 😳😳😳😳😳
To that end, I have a fun stocking stuffer for you today! If you were able to join me yesterday for my YouTube Live then you were able to watch me make it. If not but you’d like to watch the replay here ’tis! I highly recommend that you watch it – this isn’t a terribly difficult box – but…it’s a LOT easier to see how to make it from a video than it is from reading!!
Good morning and happy Friday! I hope your week has gone well! Ours has been pretty ops-normal. Same stuff, different day! Tonight, though, we’ve got company coming – 5 1/2 folks will be coming and we’re going to be making sourdough pizzas! Should be fun! 😉
If you were able to join me yesterday for my YouTube live – I appreciate you spending part of your day with me. If not, but you’d like to watch the replay – here’s the link!
Good morning and happy Friday! It’s been a busy week here – catalogs getting mailed – Catalog Pre-Order – lots going on and I’ve felt like I’ve met myself coming and going! But…today???
Today is a GOOD DAY! Ms. Sonya comes back today!
Did you hear the choir of Angels singing?!? I sure did! I am so ready!
Finny is, too!! He’s missed his friend with the Bacon Bites! 😉
So – if you were able to join me yesterday for my YouTube live, I appreciate you spending some time with me – if not, but you’d like to see the replay, here ’tis! In addition to the project – I gave everyone a sneak peek at my second Pre-Order from the new catalog and….the new Mini Stampin’ Cut & Emboss Machine! 🙂
I made a fun little treat box using products that you’ll be able to get on 5 January in the new Jan – Jun 2021 Mini catalog and 2021 Sale-A-Bration Flyer! The box itself is a Love You Always Treat Box – and it’s very cool! I decorated it with Berry Blessing DSP – which will be bundled with the Berry Blessings stamp set and, as part of the 2021 Sale-A-Bration, will be available for FREE with a $100 purchase! I also used the Sweet Strawberry stamp set and bundled Strawberry Builder Punch. – these are in the Mini Catalog. Take a look-see:
The Love You Always Treat Box goes together pretty easy – once you see it! Do take a peek at the video and you’ll see how easy it is!
Before I assembled the box – I stamped the long side with the leaf outline image from Berry Blessings (this is the stamp set that’s bundled with the Berry Delightful DSP in the Sale-A-Bration flyer!) in Granny Apple Green. Tip – the boxes have a “food safe” side – it’s kind of shiny. The OTHER side – kind of matte – is the one you want on the OUTside of the box if you plan to stamp it. Ink doesn’t dry at all well on the shiny food-safe side. Ask me how I know?
Actually – don’t ask. Watch the video and you’ll see! 😉
I also covered the two short ends of the box and the two long edges of the “sleeve” with some Poppy Parade-matted Berry Delightful DSP before I assembled the box.
For the top of the box, I cut a second design of the Berry Delightful DSP and then laid a strip of the plaid pattern at an angle across it – adhering it with Liquid Glue. I trimmed the excess with my Paper Trimmer and matted the panel on Poppy Parade. Hint: it’s a lot easier to decorate the top of the sleeve/box if you slide the box back into the sleeve – that makes it a little sturdier!
I wrapped a length of Daffodil Delight 3/8″ Ruched Ribbon around the diagonal DSP – securing it in back with Glue Dots. Then I popped the panel onto the top of the box/sleeve with Stampin’ Dimensionals.
To make the strawberries, I stamped the outline image from Sweet Strawberry in Poppy Parade four times on a piece of Poppy Parade cardstock and cut them with the Strawberry Builder Punch. I folded two in half and adhered the “fold” to each of the remaining flat strawberries with Liquid Glue.
I stamped the strawberry hat leaf image from Sweet Strawberry three times in Granny Apple Green ink on Granny Apple Green cardstock and cut them with the Strawberry Builder Punch. I used Liquid Glue to adhere two of them to the tops of my strawberries.
I made some leaves by stamping the image from Sweet Strawberry three times in Granny Apple Green onto Granny Apple Green cardstock and punched them out.
I used Liquid Glue to adhere the leaves and the two strawberries to the top of the box.
On a piece of Daffodil Delight, I stamped the strawberry again in stamped-off-once Poppy Parade. Then I added the Sweet Strawberry sentiment in Granny Apple Green. I punched it with the punch and added a little strawberry hat leaf with Liquid Glue. Then I adhered it with a couple of stacked Stampin’ Dimensionals.
Et Voila! This Love You Always Treat Box is really cool, y’all – it’s about 2″ tall and 4″ long – so it’s got a little room for some goodies! If you do as I suggest and put the non-food-safe side on the inside – then you’ll want to wrap your food gifts if you use it for that! 🙂
I think the Sweet Strawberry bundle – from the Jan – Jun 2021 Mini Catalog is going to be a lot of fun – and it’s REALLY fun that it totally coordinates with the Berry Blessings Bundle from the 2021 Sale-a-Bration catalog!
I hope you like – and are starting to make your list!
I mailed catalogs on Wednesday so…if you’re expecting one from me, be watching your mailboxes this weekend or Monday! If you’re not sure if one is on the way to you – give me a holler!
TTFN
M
HOST CODE FOR 1 DEC – 15 DEC: J4NNCNV7
Use this host code when you order $50 or greater and receive a free gift (AND the Monthly Card Tutorial) from me! If your order is over $150, please do not use this code, but you’ll still get the free gift. The free gift is your choice of any item valued up to $10.00 in any active Catalog! That includes some of the Host Exclusive stamp sets! See my Customer Rewards page for full details. You’ll also be getting a link to my ZOOM The Craftroom (an exclusive online event for my customers) and the monthly Online Tutorial.The December Tutorial features the Arrange A Wreath Bundle!
I’ve got an Online Host Club starting on 1 January (just in time for the new catalog and Sale-A-Bration!) and I’ve got openings. Whoo-hoo!!!
What is an Online Host Club? Glad you asked!
An Online Host Club lets you get some of the benefits of being a host – without doing any of the WORK of being a host! And – it helps you build your crafting tool chest a little at a time. While earning FREE goodies!
A club consists of three folks doing two consecutive three-month terms. Each person commits to buying $50 before shipping and tax each month.
Here’s how it shakes out…this is just an example! As you can see, each member gets to host TWICE during the six months!!
At the end of the club, I let each member select a stamp set up to $25 that I send to them for free.
What are the other bennies of a Host Club?
At least a $150.00 Workshop order during EACH of your host months!
Which means you’ll have at least $15.00 of Stampin’ Rewards dollars to spend on the exclusive Host Stamp Sets, or any other current Stampin’ Up! product during your host months. Stampin’ Rewards are Stampin’ Up!-speak for “free money”!
You’ll earn DOUBLE PEPPERMINTS on your Host Club Orders. Each $50 order earns 4 reward points, a $75 order earns you 6 reward points, etc. You’ll earn at least 24 reward points during your membership, meaning you’ll automatically earn at least ONE $40 Peppermint rewards gift! (Remember – when you gather up 16 Peppermints, you get to select a free reward gift valued up to $40!). You can get more info about my Punkin’ Heads Customer Rewards Program right here.
During Sale-a-Bration – each of your host club orders will earn you AT LEAST one Level 1 ($50 level) Sale-A-Bration reward!
You’ll receive a FREE monthly tutorial with 4-5 projects and access to all previous tutorials for the duration of the club. Right now, there are over FIFTY tutorials available only to Online Host Club members. That’s around TWO HUNDRED FIFTY not-seen-on-our-blogs projects for you to use as inspiration (and they ALL have all the card cuts and instructions!)
Access to my Weekly Zoom The Craftroom online Zoom Party – where you can come craft and chat with me and other customers! YEP – THIS IS NEW!!
FREE catalogs during your membership term
FREE shipping in your TWO Host Months
A FREE STAMP SET of your choice valued up to $25 at the end of each “term”, any current set (excluding host sets)!
At the end of the full 6 months, you’ll get first dibs at signing up for the next 6 month term!
When you join the club – you’ll commit to the full six months – in two consecutive three-month increments. The launch of a new catalog and Sale-A-Bration is ALWAYS a great time to join a club!
Don’t delay – there are limited spaces available!
If you want to join us or if you have ANY questions about how it would work…please drop me a note at stamps-n-lingers@comcast.net!
Get the Stampin’ Up! Products Used in These Projects:
Card Cuts Used in This Project:
Poppy Parade Cardstock: 2 1/2″ x 3 7/8″ (mat for sleeve top); 1 3/8″ x 2 1/2″ (x2 – mats for short ends of box); 1 3/8″ x 3 7/8″ (x2 – mats for long edges of sleeve); Strawberry Builder Punch strawberries
Granny Apple Green: Strawberry Builder Punch leaves and strawberry tops
Starwberry Blessings DSP: 2 3/8″ x 3 3/4″ (box top); 1 3/8″ x 2 3/8″ (diagonal strip on sleeve top); 1 1/4″ x 2 3/8″ (x2 – short ends of box); 1 1/4″ x 3 3/4″ (x2 – long edges of sleeve);
If you need any stamping supplies, I’d be very happy to be your Demonstrator. Just click on the Order Stampin’ Up! Online Now button on the right side of the screen to go directly to my online store or drop me an email if you have any questions. Happy Stamping!
Shop the Clearance Rack here. Earn FREE Stampin’ Up! Products – Join my Punkin Head Peppermint Rewards – My online customer thank you program!
Finn Fan Fix
On Thursday morning, it was in the low 30’s.
AKA – too stinkin’ cold for me!
I pull on my sweatshirt. Buckle up my Carhartt bibs. Wrap my shemagh twice around my neck. Tug my knitted cap (thanks Mom!) over my head and ears. Zip up my insulated hoody and pull up the hood. Pull on my gloves.
Say a sort-of-dirty word under my breath and head out.
Finn?
Just chillin’ in the….chill! Love it, Mom – and no – I do NOT want to come in!!
Good morning, y’all! It’s Thursday – which means it’s time for another Happy Inkin’ Thursday Blog Hop!! We’ve got a theme challenge, today (a really TIMELY challenge!) – and I’m excited to see what everyone brings to the table! I just know you’re going to see a ton of awesome-ness on the hop today!
So – last week I made a cool Christmas card with the Poinsettia Dies and some Poinsettia Place DSP. I thought it would be fun to make a coordinating project that I could use as we head into gift-giving season! So…out came the Poinsettia Petals Bundle, the Beautiful Boughs Dies and more of the pinecone-strewn Poinsettia Place DSP. Then, to hold my gift…a Mini Paper Pumpkin Box (my favorite little gift box from Stampin’ Up! ever!!). Take a look-see:
And here’s our oh-so-timely theme challenge! 🙂
I figured this one was – once again! – perfect for the TGIF challenge this week!
I started with a Mini Paper Pumpkin Box – these are so cool! I love that they’re food-safe on the inside – perfect! – and they’re a super size for gifting homemade goodies! Once you decorate them – they’d be the bomb-diggity as stocking stuffers, too!
I used the Bronze Brushed Metallic cardstock and matted four strips of Poinsettia Place DSP and the large piece for the top of the box using Liquid Glue. Then I adhered the four strips around the edge of the box.
On the top, I used Glue Dots to adhere two lengths of 3/16″ Braided Linen Trim longways and crossways – like ribbon around a present. Then I popped the panel onto the top of the box with Stampin’ Dimensionals.
I pulled out the Poinsettia Dies and got busy. First, I cut a flower from the Poinsettia Place DSP. I also took a minute to fussy cut some of the smaller middle petals from another flower.
I also cut some Bronze Brushed Metallic cardstock berries.
Using the Beautiful Boughs dies, I cut a large Mossy Meadow bough, a medium Old Olive bough, a large and small solid pinecone from the Bronze Brushed Metallic cardstock and the large and small detailed pinecones from Crumb Cake.
Yes, ya’ll – with no “it needs to fit in a Medium Envelope” requirements to hold me back – I shucked the reins and let my collage-freak flag fly! 😉
I adhered a couple of the metallic berries to the box top with Liquid Glue – sliding them under the twine. Then I adhered the large Mossy Meadow die cut.
I tied a big loopy bow with two lengths of 3/16″ Braided Linen Trim and adhered it with a Glue Dot.
I adhered the pine cone pieces together and added them – along with the Old Olive die cut bough and final berry die.
On a couple of strips of Very Vanilla cardstock, I individually stamped the two words in the Poinsettia Petals stamp set in Early Espresso. I snipped banner ends in both pieces and – sliding them into the collage – adhered them with Liquid Glue.
Using some stacked Stampin’ Dimensionals, I added the large die cut poinsettia flower. Then I used more Dimensionals to pop the fussy cut smaller petals onto the flower.
And – y’all? That’s it! AKA….Et Voila!
My collage-loving soul is SOOOO happy with this! And – check out how it looks with that card from last week!
Just enough differences to not be all matchy-matchy! If you’d like to see how I made that one, it’s right here!
I think that the Poinsettia Petals Bundle and Poinsettia Place DSP makes it abundantly obvious that Poinsettias and Pines go together like peanut butter and jelly! Or…the Captain and Tennille! 😉 Thankfully, we’ve ALSO got the Beautiful Boughs dies to make our theme complete!
I hope you LOVE this as much as I do!
If you’d like to recreate this card, all the products and card cuts are listed below!
Now that you’ve seen my card, take a minute to hop thru all our projects today. If you click on the Next Blog button, you’ll go right to Kristi’s page. And you can just click on the names below to go direct to all the blogs!
Use this host code when you order $50 or greater and receive a free gift (AND the Monthly Card Tutorial) from me! If your order is over $150, please do not use this code, but you’ll still get the free gift. The free gift is your choice of any item valued up to $10.00 in any active Catalog! That includes some of the Host Exclusive stamp sets! See my Customer Rewards page for full details. You’ll also be getting a link to my ZOOM The Craftroom (an exclusive online event for my customers) and the monthly Online Tutorial.The December Tutorial features the Arrange A Wreath Bundle!
YouTube Live – After Lunch Bunch!
I’m planning to go live today on my YouTube channel with a new project – and a look at my Jan – Jun 2021 Mini Catalog Second Pre-order. Which….MIGHT (it totally does)….include the new MINI Stampin’ Cut & Emboss Machine!! We’ll start at our normal time of 1pm Eastern. Come on over and see what I’m up to today! Look forward to seeing you then!
Get the Stampin’ Up! Products Used in These Projects:
Card Cuts Used in This Project:
Brushed Metallic Card Stock: 3 5/8″ x 5 3/8″ (mat for box top); 7/8″ x 3 5/8″ (x2 – mats for end strips); 7/8″ x 5 5/8″ (x2 – mats for long edge strips); Poinsettia Dies die cut berries; Beautiful Boughs die cut solid pine cones
Mossy Meadow and Old Olive Card Stock: Beautiful Boughs die cut boughs
Crumb Cake Card Stock: Beautiful Boughs die cut detailed pine cones
Very Vanilla Card Stock: (“Merry” sentiment strip); (“Christmas” sentiment strip)
Poinsettia Petals DSP: 3 1/2″ x 5 1/4″ (box top); 3/4″ x 3 1/2″ (x2 – end strips); 3/4″ x 5 1/2″ (x2 – long edge strips); envelope flap
If you need any stamping supplies, I’d be very happy to be your Demonstrator. Just click on the Order Stampin’ Up! Online Now button on the right side of the screen to go directly to my online store or drop me an email if you have any questions. Happy Stamping!
Shop the Clearance Rack here. Earn FREE Stampin’ Up! Products – Join my Punkin Head Peppermint Rewards – My online customer thank you program!
Mary Deatherage – Independent Stampin’ Up! Demonstrator
Sign Up for My Weekly Customer Newsletter Here
Shop My Retired Products
Click here for more details and to subscribe to Paper Pumpkin – The monthly kit from Stampin’ Up!
Shop Stamp-N-Storage!
Contact Me!
Earn Rewards for Shopping With Me!
Click Here to See the May-Aug 2026 Catalog!
Screenshot
See the Current Month Online Exclusives
Connect With Me!
#17 Overall Demonstrator in the US 2023-2024
#20 Demonstrator in Sales in the US 2023-2024
#13 Demonstrator in Leadership in the US 2023-2024
#21 Demonstrator in Team Building in the US 2023-2024
Incentive Trips shown below represent my individual accomplishments. Please be aware that fewer than 1% of Stampin’ Up! demonstrators earn the incentive trip and there is no guarantee of similar results.


 #20 Demonstrator in Sales in the US 2023-2024
 #13 Demonstrator in Leadership in the US 2023-2024
 #21 Demonstrator in Team Building in the US 2023-2024


 KarensCardCorner
 Stamp with Amy K
 Stampin With Shirley G
 Tarabeth Stamps
 TL's Bright Spot