Good morning – happy Tuesday! I hope your week is going well!
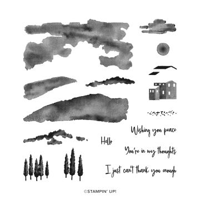
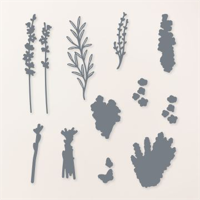
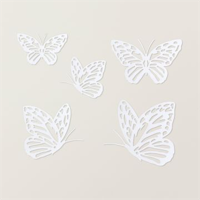
Yesterday was my last Zoom the Craftroom for January (hard to believe but…there you have it!) and, as we talked and chatted and shared projects and the things going on in our lives – I made today’s card! I pulled a few goodies off the shelf – and out of my cabinet drawers and Creative Crates – to do it! The stars of the show are the gorgeous Perennial Lavender DSP and some pretty Paper Butterfly Accents flitting about. The Hills of Tuscany stamp set is a strong supporting actor! Take a look-see:

The layout was loosely inspired by the MFT Wednesday Sketch Challenge this week.

I started by using Liquid Glue to adhere a beautiful piece of Perennial Lavender DSP to a Lost Lagoon mat for the card front.
Then, using the next-to-largest shape from the Nested Essentials Dies, I cut out another design from the DSP and adhered it with Liquid Glue.

I cut three leaves – all the same branch-y shape – using a die from the Painted Lavender die set – two in Fresh Freesia and one in Highland Heather cardstock.

They’re adhered to the Nested Essentials shape with Liquid Glue.
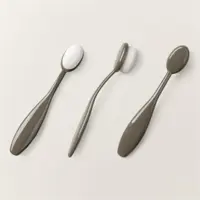
Next, I used Small Blending Brushes to color three Paper Butterfly Accents…

…one each in Fresh Freesia, Highland Heather and Orchid Oasis. Didn’t it make a pretty design on my Grid Paper!? 😎

I adhered the top two butterflies to the card front – adhering them with a little Liquid Glue to the Painted Lavender die cut leaves and then using a small piece of Stampin’ Dimensional underneath (being sure it was hidden by the die cut foliage and the body of the Paper Butterfly).

On a piece of Crumb Cake cardstock, I stamped the Hills of Tuscany sentiment in Orchid Oasis ink and cut it out with the smallest tag/label die in the Nested Essentials set.
Then I adhered it to the card front with Stampin’ Dimensionals.

I adhered the final butterfly to the sentiment with Liquid Glue.
I tied a little bow from Crumb Cake Baker’s Twine and adhered it with Liquid Glue.

I added five Highland Heather Purple Fine Shimmer Gems and the card front was done.
On the inside, I used a few stamps from the Hills of Tuscany to create a little lavender scene in the corner of a Basic White panel. I used Crumb Cake for the ground, Fresh Freesia for the lavender bushes and Highland Heather for the flowers dotted on the ground. I added the trees in Lost Lagoon. And – I want to live right there! 😍

I used Liquid Glue to adhere the panel to a Lost Lagoon mat and into my Crumb Cake card base, popped the card front on with Stampin’ Dimensionals and the card was done!
My Basic White Medium Envelope got the Hills of Tuscany lavender fields on the front…

…and more of the Perennial Lavender DSP on the envelope flap.

Et Voila! The Perennial Lavender DSP and Painted Lavender Dies work with the Hills of Tuscany stamp set like chocolate with peanut butter! In other words – they were just made to go together! And don’t forget about such stand-alone die sets like the – workhorse! – Nested Essentials set. So useful for so many projects!

I hope you like!
If you’d like to recreate this project, all the products and card cuts you’ll need are down below!
I’ve also created a printable PDF with written instructions and a list of the products used to create this card. You can download, print and/or save it by clicking this image:

Missed any tutorials? You can check out my past projects right here!
TTFN
M

Connect with me! https://campsite.bio/stampsnlingers
HOST CODE FOR 16 JAN – 31 JAN: NV72DGEQ
Use this host code when you order $50 or greater and receive a free gift (AND the Monthly Card Tutorial) from me! If your order is over $150, please do not use this code, but you’ll still get the free gift. The free gift is your choice of any item valued up to $10.00 in any active Catalog! That includes some of the Host Exclusive stamp sets! See my Customer Rewards page for full details.
Note: Make sure that you can see my name on the final checkout page listed as your Demonstrator when you order so that you know that you’re ordering with me and you’ll get my rewards!
You’ll also be getting a link to my ZOOM The Craftroom (an exclusive TWICE-A-WEEK online event for my customers) and the monthly Online Tutorial. The January Tutorial features the beautiful Stippled Roses Bundle!


It’s Sale-A-Bration Time!

We ALL look forward to Sale-A-Bration each year and this year is no exception! And – since it coincides with the release of the wonderful new January – April 2024 Mini Catalog, there’s no doubt at all that THIS is the time to SHOP, HOST and JOIN!
Get all the deets at my Stampin’ Up! Promotions page right here!
Get the Stampin’ Up! Products This Project:


Card Cuts Used in the This Project:
Crumb Cake Cardstock: 4 1/4″ x 11″ (card base, scored and folded at 5 1/2″); Smallest Nested Essentials Tag die cut (sentiment)
Lost Lagoon Cardstock: 4″ x 5 1/4″ (x2 – mat for card front and mat for inner liner)
Fresh Freesia Cardstock: Painted Lavender die cut leaves (x2)
Highland Heather Cardstock: Painted Lavender die cut leaf
Basic White Cardstock: 3 7/8″ x 5 1/8″ (inner liner)
Perennial Lavender DSP: 3 7/8″ x 5 1/8″ (card front); Next-to-Largest Nested Essentials die cut shape (under butterflies); 2 1/4″ x 6″ (envelope flap)
If you need any stamping supplies, I’d be very happy to be your Demonstrator. Just click on the Order Stampin’ Up! Online Now button on the right side of the screen to go directly to my online store or drop me an email if you have any questions. Happy Stamping!
Shop the Clearance Rack here. Earn FREE Stampin’ Up! Products – Join my Punkin Head Peppermint Rewards – My online customer thank you program!
Finn Fan Fix 
Finn loves the cold snap we’ve been having.
With one possible exception.

It’s the wait.
For Mom to put on 17 layers in order to survive the arctic blast.

Dang, Mom – the wind chill is only 30! HOW many clothes do you NEED!
Let’s GOOO!!
TTFN
M


 #20 Demonstrator in Sales in the US 2023-2024
 #13 Demonstrator in Leadership in the US 2023-2024
 #21 Demonstrator in Team Building in the US 2023-2024


 KarensCardCorner
 Stamp with Amy K
 Stampin With Shirley G
 Tarabeth Stamps
 TL's Bright Spot
So pretty! Love the delicate butterflies and the colors are perfect! 🙂 Poor Finn…he’s always dressed and ready to go!
That he is – so waiting for me is a REAL chore! Thanks, Amy! 🙂
I do like! What a lovely card to look at from the front, but, WOW, when you open it to see that gorgeous Italian scene…..
Love it.
Poor Finn, having to W..A..I..T!
Waiting is just the WORST, isn’t it?! LOL! Thanks, Julie! 🙂
Beautiful card…I must have a go at that set. Barry and I both had a chuckle at you and Finn and “how many clothes do you have to put on, Mom.” I must admit that I always enjoy Finn’s Fan Club.
He really doesn’t get it – since he is ALWAYS ready to roll! Glad you guys enjoyed it! Thanks, Charlotte! 🙂
Beautiful flutter-byes!
Patience, Finny…
Thanks, Mom! 🙂
Super Smart idea to use Hills of Tuscany as a delightful surprise inside 🙌🏻 It’s absolutely stunning!
Thanks – I love that stamp set! 🙂
Gorgeous card, Mary! Love that paper and those butterflies!
Patience, Finn…patience! 🙂
Thanks, Carol! 🙂