Good morning, y’all! I hope you’re having a wonderful weekend – we have gorgeous Fall weather – it’s warm enough to keep the windows open at night and cool enough to keep them that way all day! I love it! And – there’s leaves on the ground EVERYWHERE – so…it’s got that Fall SMELL, too! My fave!
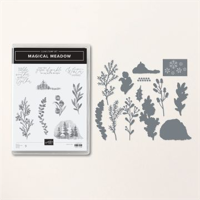
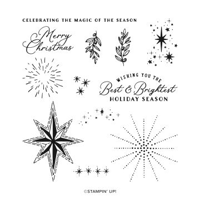
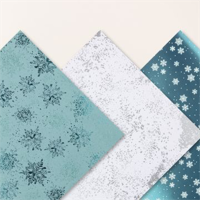
My card today is another one that you might decide you’d like to make to send out this year – and it features the wonderful Magical Meadow bundle and gorgeous Winter Meadow DSP. Y’all have told me you like Christmas cards that have a sentiment on the inside – like…”Merry Christmas” so…the Stars at Night filled the bill! Take a look-see:

This framed-up layout was inspired by the sketch challenge over at Tuesday Morning Sketches.

And the soft and pretty color palette is from the color challenge at the Global Design Project this week.

I started by stamping the large and beautiful bough image from the Magical Meadow stamp set onto the front and inside of the Petal Pink card base in Petal Pink ink for a tone-on-tone look. I only stamped it in a triangle on the bottom portion of the panels – using a piece of printer paper to “mask” the other side of the card base.

Using the largest Deckled Rectangle die, I cut out a Pretty Peacock mat. To save a little cardstock (and weight), I used the second-from-smallest of the dies to cut out a smaller rectangle from the middle of the die cut – and then I set that aside for later.

I used the next-to-largest Deckled Rectangle to cut out a piece of Winter Meadow DSP, which I adhered to the Pretty Peacock mat with Liquid Glue. Then I used Liquid Glue to adhere that smaller rectangle in the middle of the card front.
The next layer is a piece of the Winter Meadow DSP – cut with the next-to-smallest Deckled Rectangle – and adhered with Liquid Glue.

I made a Petal Pink frame, using the fifth- and sixth-from smallest Deckled Rectangle to cut from Petal Pink Three Color Glimmer Specialty Paper (coming on 7 Nov as an Online Exclusive). It’s adhered in place with Liquid Glue.
On a piece of Basic White, I stamped the Magical Meadow sentiment in Pretty Peacock ink and cut it out with the smallest Deckled Rectangle. Then I adhered it with Stampin’ Dimensionals.

I used three of the dies in the Magical Meadow die set to cut out some foliage. I used Basic White, Lost Lagoon paper from the Snowflake Magic Specialty DSP and Pretty Peacock paper from the Three Color Glimmer Specialty Paper. Using Liquid Glue, I adhered the three die cut boughs to the card front.

I tied a small bow from white Baker’s Twine and adhered it with a Glue Dot.
Finally, I added some Petal Pink Pastel Adhesive-backed Sequins and the card front was done!

For the inside, I used the next-to-largest Deckled Rectangle to cut out a Basic White panel. I stamped the Stars at Night sentiment in Pretty Peacock. Then I added the pretty Magical Meadow bough image in the corner in Petal Pink and Lost Lagoon inks.

I used Liquid Glue to adhere the panel to my Pretty Peacock mat (another largest Deckled Rectangle) and then into my Petal Pink card base, popped the card front on with Stampin’ Dimensionals and the card was done!
My Basic White Medium Envelope got the Magical Meadow boughs on the front…

…and more of the Winter Meadow DSP on the envelope flap.

Et Voila! Oh boy – the dies in the Magical Meadow set are some of my favorites – I just love all that pretty, delicate foliage – and I love mixing up the papers that I used to cut them out! The Winter Meadow DSP is characterized by the soft colors and organic images and is just beautiful!

I hope you like!
If you’d like to recreate this card, all the products and card cuts you’ll need are down below! And – this is the card I made yesterday on my YouTube Saturday Nite Live Video! If you’d like to see it – for the first time or again! – here ’tis!
I’ve also created a printable PDF with written instructions and a list of the products used to create this project. You can download, print and/or save it by clicking this image:

Missed any tutorials? You can check out my past projects right here!
TTFN
M

Connect with me! https://campsite.bio/stampsnlingers
HOST CODE FOR 16 OCT – 31 OCT: M2FEYGPH
Use this host code when you order $50 or greater and receive a free gift (AND the Monthly Card Tutorial) from me! If your order is over $150, please do not use this code, but you’ll still get the free gift. The free gift is your choice of any item valued up to $10.00 in any active Catalog! That includes some of the Host Exclusive stamp sets! See my Customer Rewards page for full details.
Note: Make sure that you can see my name on the final checkout page listed as your Demonstrator when you order so that you know that you’re ordering with me and you’ll get my rewards!
You’ll also be getting a link to my ZOOM The Craftroom (an exclusive TWICE-A-WEEK online event for my customers) and the monthly Online Tutorial. The October Tutorial features the beautiful Merriest Trees Bundle!


Stamps-N-Lingers Ordering Special!
JUST TWO MORE DAYS!!
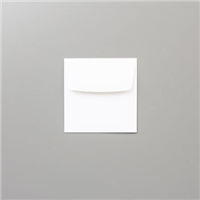
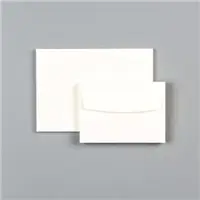
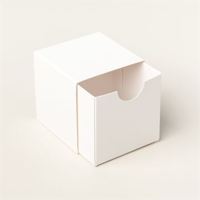
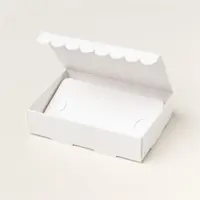
![]() I’m offering an ordering special for Stampin’ Up! orders of $50 or greater placed through me between now and Tuesday, 31 October! You get to choose a free pack of Stampin Up! Envelopes, Note Cards & Envelopes, Gift Boxes, Memories & More goodies, Treat Bags or Treat boxes with your order of $50 or more this week!
I’m offering an ordering special for Stampin’ Up! orders of $50 or greater placed through me between now and Tuesday, 31 October! You get to choose a free pack of Stampin Up! Envelopes, Note Cards & Envelopes, Gift Boxes, Memories & More goodies, Treat Bags or Treat boxes with your order of $50 or more this week!
Here’s the deets:
- For any order of $50 or greater (before shipping and taxes) placed through me, you’ll get to select a pack of Stampin Up! Envelopes, Note Cards & Envelopes, Gift Card Boxes, Memories & More goodies, Treat Bags or Treat boxes of your choice valued up to $12 from me – for free!
- This is IN ADDITION to your normal $10 thank you gift that you get to select when you add my Host Code (for orders under $150 – If your order is over $150, please don’t use this code…but you’ll still get the free gift!).
- You’ll also earn Peppermint Rewards points AND you’ll get my October Card Class Tutorials (featuring the gorgeous Merriest Trees bundle!).
How do you get your free Envelopes, Note Cards & Envelopes, Card Boxes or Treat Packaging?
All you’ve got to do is place your $50 or greater order – don’t forget that Host Code (M2FEYGPH) and then email me your selection! I’ll order everyone’s goodies when I place my Host Order on 1 November and then send them out (along with your thank you gift) to you just as quick as I can!
For quick reference, here are the all the goodies you can choose from:


So – don’t miss out on the chance to pick up some things that might help you a smidge as you get prepped for the holidays!
Happy shopping!
TICK-TOCK-TICK-TOCK….
Starter Kit Promotion Ends TOMORROW
31 October is the Last Day to Cash In!

We’re celebrating our 35th Anniversary IN STYLE – with an amazing Starter Kit joining Special!
Here’s the deets!
Thru 31 October, anyone who joins our fun crafting community as a new demonstrator can choose EITHER 35% OFF the cost of their Starter Kit OR get 35% MORE product with their Starter Kit!
Whoo-hoo!
Here’s the deets!
Promotion Period: 3–31 October
Signing Deadline: 31 October 2023; 11:59 PM (MT)
New demonstrators can choose one of the following options for their Starter Kit:
Select Option 1 – save on your Starter Kit Purchase! – Get 35% OFF the normal cost of a Stampin’ Up! Starter Kit. Those who select this option will still receive $125 worth of SU product but will only pay $64.35 plus tax. And – shipping of the kit is FREE!
OR
Select Option 2 – pick MORE fun Stampin’ Up! Product! – Get 35% MORE product with your Starter Kit. Those who select this option will pay the usual $99 plus tax – but will get to select $168.75 worth of product! And – shipping of the kit is FREE!!
BUT WAIT! There’s MORE!!
You’ll ALSO get FREE OnStage@Home Registration!
Those who sign up for a Starter Kit during this offer will also be automatically registered for FREE* to our virtual OnStage event on 11 November – that’s a $77 value! And – you don’t even have to travel – just do it from home. In your jammies, if you like!
- Those who sign up for this offer have the opportunity to watch the event independently, gathered together with other demonstrators, or with their Team Leader.
- Demonstrators who join during this promotion will be automatically added to the OnStage attendees; you won’t even need to register separately.
- Demonstrators who join during this promotion will also receive an email with all the information about this event.

Whether you’d like to start a little side hustle or simply take advantage of the awesome 20-25% discount, I would very much love for you to join my Critters-N-Creatin’ Krew team! We have a great time together – even though we live all over the country!

Check right here to get more info about joining Stampin’ Up! and why being a “Critter” is a great idea! I mean – look at those faces! 😎

And – you can click the flyer below and print it out if you like. You can scan the QR Code to get started! Yes – I AM that hip! 😎

Get the Stampin’ Up! Products Used in this Project: You’ll want some Three Color Glimmer Specialty Paper when it’s available on 7 Nov 2023!


Card Cuts Used in This Project:
Petal Pink Cardstock: 5 1/2″ x 8 1/2″ (card base, scored and folded at 4 1/4″)
Pretty Peacock Cardstock: Largest Deckled Rectangles die cut (x2 – mats for card front and inner liner); Second from Smallest Deckled Rectangles die cut (behind sentiment)
Basic White Cardstock: Next-to-Largest Deckled Rectangle die cut (inner liner)
Three Color Glimmer Specialty Paper: Frame in Petal Pink (uses 5th and 6th smallest Deckled Rectangles Dies); Magical Meadow die cut bough (in Pretty Peacock)
Snowflake Magic Specialty DSP (in Lost Lagoon): Magical Meadow die cut bough
Winter Meadow DSP: Next-to-Largest Deckled Rectangle die cut (card front); Next-to-Smallest Deckled Rectangle die cut (behind sentiment); 2 1/4″ x 6″ (envelope flap)
If you need any stamping supplies, I’d be very happy to be your Demonstrator. Just click on the Order Stampin’ Up! Online Now button on the right side of the screen to go directly to my online store or drop me an email if you have any questions. Happy Stamping!
Shop the Clearance Rack here. Earn FREE Stampin’ Up! Products – Join my Punkin Head Peppermint Rewards – My online customer thank you program!
Finn Fan Fix 
The pastures have gotten to where there’s a lot to eat but not a lot of “green” – so Cady has been craving green stuff.
So – I took her out in hand the other morning – usually I just let her wander loose while I clean the barn but…the day before she…sort of took advantage of that. So – it’s on the lead or not at all, kid!
Anywhooo….

She’s quite delicate in her eating. Almost…picky…

NOT!
Fortunately – we had overwatch on station.

Is that something??

Is it?!? Should I spook now? I’m chewing fast as I can so I’ll be ready. JIC!!

Nah – we’re okay. We’re fine. I gotchu.

Carry on.
TTFN
M


 #20 Demonstrator in Sales in the US 2023-2024
 #13 Demonstrator in Leadership in the US 2023-2024
 #21 Demonstrator in Team Building in the US 2023-2024


 KarensCardCorner
 Stamp with Amy K
 Stampin With Shirley G
 Tarabeth Stamps
 TL's Bright Spot
Such a pretty card! Love the colors and the layering is perfect! Good think Finn is on duty to make sure that all is good for the little jaunt outside the fence. 😉
Yep – he’s quite the protector!! Thanks, Amy! 🙂
Your card is so pretty. Love the deckle edge frames.Thank you for joining Tuesday Morning Sketches
Thanks much, Donna – appreciate you stopping by!! 🙂
Green is good. Guarded green is better!
Yep! Sure is! 🙂
Okay, first off, I NEED these dies. What a great set! Secondly, your card is amazing. The simple sprig of greenery is just perfect. Thank you joining us at Tuesday Morning Sketches.
Yes – they are wonderful dies – and yes, you DO need them! :). Thank you so much for the kind words, Melissa! 🙂
Just a perfect mash up of the two challenges and I’m so glad ours was one of them! Thank you for creating with us this week at Tuesday Morning Sketches
Oh – thank you so much, Patti – I’m glad you like it! 🙂
This is gorgeous! Love the colors and those frames are fabulous! (Another item to add to my wish list!)
Thanks for playing along this week at Tuesday Morning Sketches
Debbie – TMS DT
Debbie’s Dash of This and That
Thanks much, Debbie – appreciate you stopping by!!