Hello hello! How goes your weekend so far? Wayne’s been busy – he got all the steel up on the sides of the garden shed yesterday – whoo-hoo!! And Finny and I had a playdate with his sister Scout – and Jax, Teddy, Higgins and Reba! So – big day here!
And then, last night – I got on YouTube and shared a cool fun fold – called an Exploding Box! I got to try one at our retreat last weekend – my friend Susan Stanley brought it as her shoebox swap – and I loved it! So…I made another one – this one using the wunnermus Fitting Florets DSP and the Framed Florets Bundle – you can get all these new goodies on 1 Nov! Take a look-see:
So – truth in advertising – the best way to see how to make this is to watch the video – the link is below. But I’ll give you the gist of it here!
I found Heather Forgam’s (a UK Demonstrator) post on doing these boxes – and helped myself to some of her measurements! 🙂
There are about three basic pieces to an Exploding Box. The large outside box. The lid for that. And the three little boxes on the inside!
To create the box:
Score a 5 1/4″ x 8 1/2″ piece of Petal Pink cardstock at 1-3/4″ and 6-3/4″ on the long side, and 1 3/4″ and 3 1/2″ on the short side. Cut out the outside corners.
For the lid, score a 6-1/16″ x 2-13/16″ piece of Petal Pink cardstock at 1/2″ on all four sides. Tip: the Stampin’ Up! Paper Trimmer will be your bestie – cuz…ALL the 1/16″ marks are right there on the tool!! YEAH! 🙂 Snip tabs into the outside corners. Put the lid together using Liquid Glue on the tabs – and tucking them to the INSIDE of the lid. 🙂
Mat the Fitting Florets DSP – I used Balmy Blue designs on the outside of the box! – on Evening Evergreen and Basic White. Then adhered them to the two sides and the top of the lid with more Liquid Glue.
I used a sentiment from Framed Florets – I LOVE this new set!! – on the top, stamped in Evening Evergreen on a strip of Basic White cardstock – with a banner snipped in the left end.
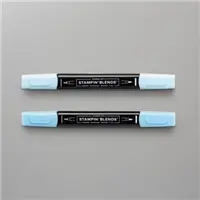
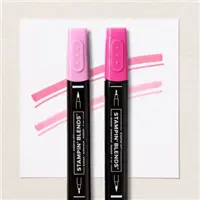
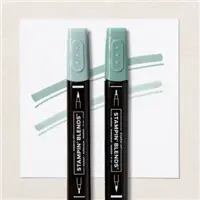
On a piece of Basic White, I stamped the floral from Framed Florets in Tuxedo Black Memento Ink, colored it with my Polished Pink and Soft Succulent Stampin’ Blends, then cut it out with the coordinating die in the Framed Florets Die set. Using dies in the set, I cut a large Balmy Blue and Soft Succulent leaf. And I also cut three small leaves from the Evening Evergreen Glimmer 12″ x 12″ Specialty Paper.
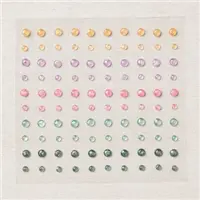
I adhered the leaves with Liquid Glue – popped the floral on with Stampin’ Dimensionals – and slid the sentiment under the flowers with a little more Liquid Glue. Then I added a few Polished Pink 2021-2023 In Color Opal Rounds to complete the lid.
For the inside, I stamped the swag image from Framed Florets in Tuxedo Black on a panel of Basic White and colored it with my Polished Pink, Balmy Blue and Soft Succulent Stampin’ Blends. Next to it, I stamped a second Framed Florets sentiment in Evening Evergreen.
I matted it on Evening Evergreen and then adhered it to the inside of the box.
I made three tiny boxes – they’re PERFECT for a truffle, or a Ferrero Roche, or…a piece of homemade fudge! They’re probably NOT good candidates for…ball bearings. Or…anything else very heavy! 😉
The boxes are 4-1/2″ x 4-1/2″ Petal Pink cardstock scored at 1 1/2″ on all four sides. Then cut tabs in each outside corner.
The lids are 2-9/16″ x 2-9/16″ (yeah Paper Trimmer!) Petal Pink cardstock scored at 1/2″ on all four sides – with tabs cut in each corner.
Assemble the boxes and lids with Liquid Glue – be sure to tuck the tabs INSIDE the box or lid (not the outside – it just looks nicer!).
I added Evening Evergreen-matted DSP squares inside the box – I switched up the DSP design – I love all the gorgeous designs in the Fitting Florets DSP, don’t you?!? – and adhered them inside the box.
The little boxes are all adhered with Liquid Glue – in the video I show you a good way to make sure that the “middle” box fits between the other two so that everything will close properly!
With everything in place, I just folded it all back up and put the sweetly decorated lid back…
…et voila! Exploding Box Fun Fold – featuring the gorgeous Fitting Florets DSP and the Framed Florets bundle! All of which is only a couple days away! Or…join my team now and get it in your Starter Kit – PLUS even more! If you want it all – you can get it – PLUS a little over $55 MORE in Stampin’ Up! products – for just $99 plus tax! But…that great deal ends on the 31st! So…hurry!
I hope you like!
If you’d like to recreate this card, all the products and card cuts are listed below! And – this is the card I made on my YouTube Live last night so -if you’d like to see that – for the first time or again! – here ’tis!
And…I’ve created a printable PDF with written instructions and a list of the products used to create this project. You can download, print and/or save it by clicking this image:
Missed any tutorials? You can check out my past projects right here!
TTFN
Connect with me! https://campsite.bio/stampsnlingers
HOST CODE FOR 16 OCT – 31 OCT: J3BYYVX2
Use this host code when you order $50 or greater and receive a free gift (AND the Monthly Card Tutorial) from me! If your order is over $150, please do not use this code, but you’ll still get the free gift. The free gift is your choice of any item valued up to $10.00 in any active Catalog! That includes some of the Host Exclusive stamp sets! See my Customer Rewards page for full details.
Note: Make sure that you can see my name on the final checkout page listed as your Demonstrator when you order so that you know that you’re ordering with me and you’ll get my rewards!
You’ll also be getting a link to my ZOOM The Craftroom (an exclusive TWICE-A-WEEK online event for my customers) and the monthly Online Tutorial. The October Tutorial features the Leaves of Holly Bundle!
Starter Kit PLUS Joining Special
ENDS 31 Oct 2022!

October is a fabulous time to join Stampin’ Up! You will get even MORE FREE products in your customizable Starter Kit! Between October 4-31, when you join, you will get $155 worth of products in your Starter Kit for only $99!! That’s an EXTRA $30 in FREE product of your choice!! Plus you’ll get free shipping and all the fun of being a part of Stampin’ Up! and our Inkin’ Krew Team!
STARTER KIT+ PROMOTION DATES: 4 – 31 OCTOBER 2022
- When you purchase your Starter Kit, you will be able to redeem $155 of Starter Kit eligible products for just $99!!
- You can select any eligible Stampin’ Up! products up to the stated value of $155.
- Your Starter Kit also includes business resources like catalogs, brochures, order forms, and postcards.
- The Starter Kit also includes a FREE past Paper Pumpkin kit!
- In addition to the amazing added value to your Starter Kit, when you join Stampin’ Up! you get to be a part of our amazing community of crafters. Plus, you get to enjoy sharing simple and fun crafting experiences with others, early access to products, and exclusive access to training events!!
- New demonstrators who submit their Independent Demonstrator Agreement (IDA) before 4 October or after 31 October will not be eligible for this offer.
- Starter Kit+ promotion begins: 4 October 2022
- Starter Kit+ promotion ends: 31 October 2022 at 11:50 PM MT
You can check out more information about joining our team here and more details about the benefits of being a Demonstrator and find the link to join here.
Let me know if you have any questions. We’d love to have you join us and get this great deal on your Starter Kit!
AND – join now and you can add the NEW Fitting Florets products to your Starter Kit!! Click the picture below to see all the new goodies (customers will be able to get these goodies on 1 Nov – demonstrators can get them right now!)
If you’ve been considering joining – now is a great time to jump in! Get the extra $30 in free merchandise in your starter kit AND get this pretty collection as part of your starter kit (or join and get the collection at a 20% discount as a Demonstrator!)! Drop me a note at Stamps-N-Lingers@comcast.net if you have any questions about being a Demonstrator.
Get the Stampin’ Up! Products Used in this Project:
Card Cuts Used in This Project:
Cardstock & DSP to create the box: Download & Print this PDF for the entire list
Glimmer 12″ x 12″ Specialty Paper: Framed Florets die cut small leaves (x3 – in Evening Evergreen – for top of lid)
Balmy Blue Cardstock: Framed Florets die cut large leaf (for top of lid)
Soft Succulent Cardstock: Framed Florets die cut large leaf (for top of lid)
Basic White Cardstock: 5/8″ x 3 1/4″ (sentiment strip on top of lid); 1 1/2″ x 4 3/4″ (sentiment on inside of box)
If you need any stamping supplies, I’d be very happy to be your Demonstrator. Just click on the Order Stampin’ Up! Online Now button on the right side of the screen to go directly to my online store or drop me an email if you have any questions. Happy Stamping!
Shop the Clearance Rack here. Earn FREE Stampin’ Up! Products – Join my Punkin Head Peppermint Rewards – My online customer thank you program!
Finn Fan Fix

This is Finn – sitting in the back seat of the van.
Not sure where we’re going – willing to roll with it – but…
Three minutes later…
…we turned down the gravel road to my friend’s (and his sister’s!) house. OH BOY!!
We had a playdate to be sure the “pack” would all get along so he can stay there when we go to Florida.
Pretty sure he broke his wiggler – and maybe his tongue, too!! LOL!
He pretty much crashed when we got home – tired puppy!!
TTFN
M









 Inky Bee Stampers
 KarensCardCorner
 Stamp with Amy K
 Stamp With Nel
 Stampin With Shirley G
 Tarabeth Stamps
 TL's Bright Spot
Such a beautiful gift box! Love that it all folds up perfectly and that you can add sentiments on the inside too! 🙂 Looks like Finn had a great time! I’m sure that he’ll be happy to go back in a few days!!
Yep – he’d go every day but… 🤷♀️🤷♀️ Thanks, Amy! 🙂
Pretty boxes!
Thanks, Mom!
Great box! Thanks for the measurement and video. So fun. TFS! Glad Finny had a good time with the pack—he’ll be excited to spend more time with them!
I know he will! He MIGHT actually come home with that “waist” that the vet wants! 😉 Thanks, Susan! 🙂