Good morning and happy Tuesday! So…it’s that limbo week between Christmas and New Year. Wayne and I did a little half-tidy-up of the garden this morning – nothing huge. Pulled the tomato cages and teepees. And…what was in the mail? Yup, First SEED CATALOG of the year. That’s the gardening equivalent of stores already having the Valentine’s Day stuff on the shelf. Which they totally do. Is it any wonder that time is flying by?!? Sheesh!
But…getting to be time to start thinking about seed-starting! Whoo-hoo! I mean – if they’re going to make time fly, we might as well flap, huh? 😉
And – that catalog MIGHT be what drew me to the new Hello Ladybug stamp set with its bundled Ladybug Builder Punch. See what I’ve done here? Garden. Fly. Ladybug? 😉 You’ll be able to get this one in less than two weeks when the Jan – Jun 2022 Mini Catalog goes live on 4 Jan. Take a look-see:
This is one of my favorite fun folds – an easel on a side (or book!) fold card! This particular version is thanks to my friend Rosie suggesting it to me at our Zoom the Craftroom meeting yesterday! 🙂
I started with a basic side-fold card. 4 1/4″ x 11″ piece of Poppy Parade cardstock, scored at 5 1/2″ and 6 3/4″ on the long side. Then I scored the 4 1/4″ x 4 1/4″ portion on the diagonal.
I folded the 5 1/2” score line as a “mountain” and at the 6 3/4” score in the opposite direction. Topographically speaking, that would be a “valley” fold! The diagonal fold is a “mountain”.😂
Using Liquid Glue between the 5 1/2” and 6 3/4” score lines, I adhered the front of the card base to the back – just in that 1 1/4” area. This made the “book” or “side” fold.
I used Liquid Glue to adhere a narrow piece of Granny Apple Green Brights 6″ x 6″ DSP to a Basic Black mat and then to the narrow front panel.
I cut a 4″ x 4″ piece of Basic Black and cut it into two triangles – and did the same with a 3 3/4″ x 3 3/4″ piece of the Brights 6″ x 6″ DSP in Granny Apple Green. Then I matted the DSP triangle on the Basic Black triangle and adhered it to the “back” of the easel.
My design for the card front itself was heavily influenced by the catalog sample from the uber-talented SU! designers (round wheel – GOOD. Why reinvent it?!?). 😉
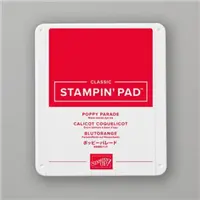
I used the sweet three-flower image from Hello Ladybug and stamped it several times in Poppy Parade ink on a Basic White square. All around the flowers, I stamped the little tiny dots image in Daffodil Delight. Then I embossed the panel in the Tasteful Textile 3D Embossing Folder and matted it on a Basic Black square.
I cut a strip of Daffodil Delight. Using the Tailored Tag Punch – I slid the end of the strip in part-way and punched a banner end. I embossed it in the Tasteful Textile folder and adhered it to the card front with Liquid Glue.
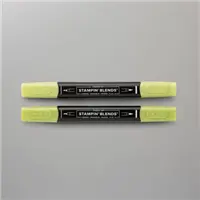
On a piece of Basic White, I stamped the pretty leaf image from Hello Ladybug in Granny Apple Green ink. Using the Granny Apple Green Stampin’ Blends Combo, I added some shading to the leaf.
Then I fussy cut the leaf and popped it onto the card front with Stampin’ Dimensionals.
I stamped a Hello Ladybug sentiment in Poppy Parade on a Basic White strip, matted it on Basic Black and adhered it with Liquid Glue. I added some Iridescent Rhinestone Basic Jewels (also coming in the new catalog on 4 Jan) here and there.
I used Liquid Glue to adhere the panel to the “bottom” triangle on the card base (the one without the DSP already adhered) and the card front was done!
On the inside, I stamped a Basic White square with more of the little Hello Ladybug flowers in Poppy Parade and stamped some of the Daffodil Delight dots around them. I stamped the larger flower in Daffodil Delight in the opposite corner then adhered the panel to a Basic Black mat and adhered it to the inside of the card with Liquid Glue.
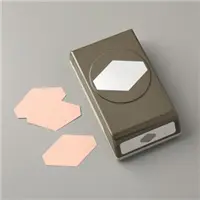
I made a little ladybug for the easel stop. First I stamped the body in Tuxedo Black Memento Ink on a piece of Basic White. In Poppy Parade, I stamped the first part of the wings, then added the “dots fill” image in Tuxedo Black. I cut both out using the Ladybug Builder Punch.
I lightly curled the wings with my Bone Folder, then adhered them to the body with a couple of Stampin’ Dimensionals. I stood the easel up to the angle I wanted, and adhered the ladybug, with Stampin’ Dimensionals, in place to keep the easel upright.
I added one more Iridescent Rhinestone Basic Jewel – and the card was done!
My Basic White Medium Envelope got some Poppy Parade Hello Ladybug flowers on the front…
…and a little more of the Granny Apple Green Brights 6″ x 6″ DSP on the envelope flap.
Et Voila! Okay – seriously?! How. Stinkin’. Cute. Is this new set!? I liked the set when I first saw it – I mean…Hello Ladybug with a Ladybug Builder Punch?? Yes, please. But…now that I see and use it – oh my goodness. The flowers are perfectly sized. The little dots are..wait for it…SPOT on. And the ladybug – that you can punch and make “3D”. Yup. 😉
I hope you like!
Your list is getting long, isn’t it? I get it! And… there might be some REALLY GOOD “help” for that coming your way in January! I’d tell ya, but…can’t just yet! 😉
If you’d like to re-create this card, all the products you’ll need and the card cuts are down below!
TTFN
Connect with me! https://campsite.bio/stampsnlingers
HOST CODE FOR 16 DEC – 31 DEC: 9CCPUSGV
Use this host code when you order $50 or greater and receive a free gift (AND the Monthly Card Tutorial) from me! If your order is over $150, please do not use this code, but you’ll still get the free gift. The free gift is your choice of any item valued up to $10.00 in any active Catalog! That includes some of the Host Exclusive stamp sets! See my Customer Rewards page for full details.
Note: Make sure that you can see my name on the final checkout page listed as your Demonstrator when you order so that you know that you’re ordering with me and you’ll get my rewards!
You’ll also be getting a link to my ZOOM The Craftroom (an exclusive TWICE-A-WEEK online event for my customers) and the monthly Online Tutorial. The December Tutorial features the Plentiful Plants Bundle!
I’ve created a printable PDF with written instructions and a list of the products used to create this project. You can download, print and/or save it by clicking this image:
Missed any tutorials? You can check out my past projects right here!
Stamp-N-Storage After Christmas Sale
Is organizing your craft space on your New Year’s Resolution list? Get an early start and treat yourself to storage solutions that keep your product visible and easy to access! Shop the Stamp-n-Storage After Christmas Sale and save 10% OFF storewide, plus you’ll receive FREE SHIPPING on all orders in the 48 Domestic U.S. Discounts are automatically applied during the checkout process (NO COUPON/CODE REQUIRED!). Sale ends 11:59pm CST, January 3, 2022.
I am QUITE certain that y’all know I’m a Stamp-N-Storage girl – it’s my fave way to keep my room organized!
Regardless of what you need – now’s a great time to get it! 10% off is nothing to sneeze at!! Whoo-hoo!!
Here’s the deets:
- 🎉🎉🎉🎉10% OFF ANYthing and EVERYthing!! 🎉🎉🎉🎉
- Ends Monday, 11:59pm CST, 3 January 2022
- No coupon code is needed.
- Discounts are automatically applied during the checkout process.
I use a TON of their products – you can see the whole shootin’ match right here!
Regardless of what YOU need – heading into a new year is a GREAT time to get a handle on all the goodies floating around your craft room, isn’t it? So…might as well go with the BEST organizing tools going AND get it at 10% off and FREE SHIPPING!
Happy storaging!
PLEASE NOTE: I do receive a small affiliate fee when you use my Stamp-n-Storage shopping links. But – you’ve seen plenty of pictures of my stamping space – both at home and when I’ve traveled! – and you KNOW that I am a HUGE fan and love their quality products!! I recommend them to everyone!
I’m offering a Designer Series Paper share from the January-June 2022 Mini Catalog and I’d love to have you join – it’s a GREAT way to get a little smackerel of all the pretty new papers – Designer Series and Specialty!! I’ll place my share order first jump on 4 January 2022 and use the expedited shipping option so I SHOULD be able to have the shares cut, bundled and back out to you during the week of 10 January!
You can head over to my Jan-Jun 2022 Mini Catalog Shares page here for all the deets and a handy form to complete if you’d like to join!
Jul – Dec 2021 Mini Catalog Last Chance Products Sale
You’ve been waiting and now is the Time! The Last Chance Products are available for you to order!! And – don’t miss the newly refreshed Clearance Rack! 🙂
Click here to go right to the Last Chance Products in my Online Store!
CARRYOVER LIST:
See which products will still be available after the July–December 2021 Mini Catalog retires.
DOWNLOAD SORTABLE EXCEL SHEET – modified for you, removing non-English sets
DOWNLOAD PDF – this is the full list, including non-English sets
Please be sure to note the asterisks, okay? Some of the carryover items will not be available right away – but will be back in the next Mini Catalog next summer!
Get the Stampin’ Up! Products Used in this Project:
Card Cuts Used in This Project:
Poppy Parade Cardstock: 4 1/4″ x 11″ (card base, scored and folded at 5 1/2″ and 6 3/4”);
Basic Black Cardstock: 4 1/8” x 4 1/8” (x2 – mats for card front and for inner liner); 4″ x 4″ (cut on the diagonal – mat for “back” of easel); 1 1/8″ x 4 1/8″ (mat for side-fold); 1/2″ x 2 1/4″ (mat for sentiment)
Daffodil Delight Cardstock: 1 1/2″ x 2 3/4″ (banner)
Basic White Card Stock: 4″ x 4″ (x2 – card front and inner liner); 3/8″ x 2 1/8″ (sentiment); Ladybug Punched shape
Brights 6″ x 6″ DSP (in Granny Apple Green): 3 3/4″ x 3 3/4″ (cut on the diagonal for “back” of easel); 1” x 4” (side fold panel); 3″ x 6″ (envelope flap)
If you need any stamping supplies, I’d be very happy to be your Demonstrator. Just click on the Order Stampin’ Up! Online Now button on the right side of the screen to go directly to my online store or drop me an email if you have any questions. Happy Stamping!
Shop the Clearance Rack here. Earn FREE Stampin’ Up! Products – Join my Punkin Head Peppermint Rewards – My online customer thank you program!
Finn Fan Fix

On Christmas day, we “helped” Finn open his presents from his Grandma Kate.
What’sitWhat’sitWhat’sit?!?
Looks like a TOY!! FOR MEEEEE!
GIMMMMMEEEEE!
And…out! Gotta take it to the living room FAST!
You know how it is – poor little dog. Never EVER gets a toy. ONLY at Christmas!
🤦♀️🤦♀️🤦♀️
TTFN
M













 Inky Bee Stampers
 KarensCardCorner
 Stamp with Amy K
 Stamp With Nel
 Stampin With Shirley G
 Tarabeth Stamps
 TL's Bright Spot
Love this card! I didn’t think I wanted this set but I’m rethinkin’. Finn has a wunnermus grandma!
He DOES! 🙂
Such a cute card! Love the fun fold design, sweet little ladybug too! Yeah, Finn hardly has any toys…I can see why a new one would be such an exciting thing. 😉
Thanks, Amy! 🙂
That kid is something else!! How cute that he waited (sort of patiently) for Wayne to open the package.
What an adorable card. Love the fun fold and that ladybug set is great. Good color scheme too. The yellow just makes it all pop!
Yes – he is very “patient”! 🙂 Thanks so much, Julie – I love this bundle! 🙂
Happy Finn…Happy Grandma Kate! 🙂
Thanks, Mom! 🙂
I love the ladybug card and appreciate the good directions…definitely plan to CASE this one. Sooo cute! Finn is cute too, waiting semi-patiently for his gift to be opened. 😃
I just pulled out my new ladybug stamp and was looking for inspiration. I love easel cards, and this one is adorable. I can’t wait to give it a try. You just get me when it comes to design!
Loved the little story about Finn and his toy. We buy our cockatiel toys for Christmas too, and she gets to eat the gingerbread house. Well, maybe just peck at it a little.
Yeah! So glad that you liked it – and I appreciate the kind words! And a whole gingerbread house?!? Finn would be ALL over that!! I bet she loves it! 🙂