Good morning and Happy Sunday! We’re for sure having a “Georgia Winter”. Which means – in the high 20’s over night last week – and in the mid-60’s this week. With rain. Or not. Make sure your umbrella, your tank top and shorts, insulated covers, mittens, wool socks and flip-flops are all close at hand. That’s just how we roll!
My card today, though, is all about winter and Christmas – with the gorgeous Winter Meadow DSP (happily carrying over!) taking pride-of-place. And the wunnermus Joy of Noel (which, sadly, will NOT be available after this catalog ends in January!) provides a pretty die cut sentiment. All on a great – and easy – fun Z-fold card! Take a look-see:

I got inspiration for this one from my friend and teammie Carol Buckalew’s fun fold card that reminded me how much I like this fold! AND – from the Global Design Project theme challenge this week!

I started with a 5 1/2″ x 8 1/2″ piece of Pretty Peacock cardstock that I scored on the long edge at 2 1/8″ and 4 1/4″.
I folded the 2 1/8″ score as a “mountain” and the 4 1/4″ score as a “valley” to create the “Z”.

I cut three pieces of Winter Meadow DSP and adhered them to the three panels of the card base with Liquid Glue.

For the front panel, I used the third-from-the largest Deckled Rectangle to cut out a piece of the Winter Meadow DSP. It’s matted on Blueberry Bushel and then on a piece of Moody Mauve cut with the second from largest Deckled Rectangle.

Tip: if you like, before matting the DSP – you can do like I did and cut the Joy of Noel sentiment letters from the Blueberry Bushel mat. Save cardstock – thickness – and weight! 😎🤙😎
After cutting out the Joy of Noel sentiment letters – I brushed them with my Clear Wink of Stella Glitter Brush to add just a touch of shimmer.

When the Clear Wink had dried – I used Liquid Glue to adhere the letters to the front panel.
Then, using Liquid Glue on just half of the panel – I adhered it to the small front panel of the z-fold. Tip: close the card up and then adhere the panel so that it’s centered on the card – just be sure to not get glue all over the back! And – if that was clear-as-mud, be sure to check the video! 🙂

I added some Pretty Peacock sequins from the Adhesive-backed Sequins Trio and the card front was done!

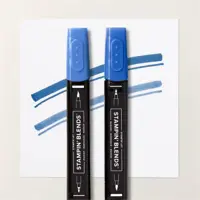
For the inside, I stamped a Joy of Noel foliage swag in Pretty Peacock ink in the corner of a Basic White panel that I’d cut with the third-from-the largest Deckled Rectangle. I colored the image with my Dark Blueberry Bushel, Lost Lagoon and Shaded Spruce Stampin’ Blends. Then I matted it on a Blueberry Bushel mat and a piece of Moody Mauve cut with the second from largest Deckled Rectangle.

I used Liquid Glue to adhere the double-matted panel to the middle of the inside back of the card and the card was done. Tip: I show you a good way to do this in the video below – so that the panel is completely hidden when the card is closed! 🙂
My Basic White Medium Envelope got the Joy of Noel stamped and colored image on the front…

…and more of the Winter Meadow DSP on the envelope flap!

Et Voila! Oh my – the Winter Meadow DSP is just gorgeous – it’s one of my fave faves and I am so tickled that it’s still going to be available to order past the end of the catalog! Joy of Noel, on the other hand, will NOT! 😔 Once it runs out – or the catalog ends in January – your chance to get this gorgeous bundle – LOVE that die cut sentiment! – will be gone-baby-gone! And then you’ll be sad. Don’t let yourself be sad, okay?

If you’d like to recreate this project, all the products and card cuts you’ll need are down below! And – this is the project I made for yesterday’s 3 Saturday’s Till Christmas Saturday Nite Live video. If you’d like to see it – for the first time or again – here ’tis!
I’ve also created a printable PDF with written instructions and a list of the products used to create this project. You can download, print and/or save it by clicking this image:

Missed any tutorials? You can check out my past projects right here!
TTFN
M

Connect with me! https://campsite.bio/stampsnlingers
HOST CODE FOR 1 DEC – 15 DEC: TA2HGJUQ
Use this host code when you order $50 or greater and receive a free gift (AND the Monthly Card Tutorial) from me! If your order is over $150, please do not use this code, but you’ll still get the free gift. The free gift is your choice of any item valued up to $10.00 in any active Catalog! That includes some of the Host Exclusive stamp sets! See my Customer Rewards page for full details.
Note: Make sure that you can see my name on the final checkout page listed as your Demonstrator when you order so that you know that you’re ordering with me and you’ll get my rewards!
You’ll also be getting a link to my ZOOM The Craftroom (an exclusive TWICE-A-WEEK online event for my customers) and the monthly Online Tutorial. The December Tutorial features the beautiful Textured Floral Bundle!


WE HAVE A WINNER!!

Wow – I had SO much fun reading about all your favorite Christmas/Holiday traditions – I have memories of doing many of the same things! Thank you so much for sharing and I hope y’all get to do as many of them as possible this year!!
I put the numbers into the Random picker and….our winner of the Festive Tags Kit – is….

Entry #22 was Aimee Nooney
Aimee wrote: Baking and frosting Christmas cookies. I have memories of standing on a stool with an apron tied under my arms with as much frosting in me as on the cookies.
Aimee – if you’ll send me an e-mail with your mailing address, I’ll get your new kit in the mail ASAPly!
Thanks for playing along, everyone!!
GIFT CERTIFICATES MAKE GREAT CHRISTMAS PRESENTS!!
And – They Don’t Even Require Shipping!

Did you know…I offer gift certificates for Stampin’ Up! merchandise?? They’re redeemable through me and can be for any amount so they’re always the perfect size and color!
I can send the gift certificates electronically via email with same day service!
OR – I can print your gift certificate – and ship it for free to you or directly to your recipient! I’ll give you tracking information for the shipment.
If you’re interested in purchasing a gift certificate, please visit my gift certificate store here. I accept all major credit cards and Paypal for payment!

If you don’t see a gift certificate listed for the specific amount that you’d like, please email me at Stamps-N-Lingers@comcast.net
Get the Stampin’ Up! Products Used in this Project:


Card Cuts Used in This Project:
Pretty Peacock Cardstock: 5 1/2″ x 8 1/2″ (card base, scored and folded at 2 1/8″ and 4 1/4″)
Moody Mauve Cardstock: Second-from-largest Deckled Rectangle die (x2 – mats for card front and inner liner)
Blueberry Bushel Cardstock: 2 3/8″ x 4 1/8″ (x2 – mats for card front and inner liner)
Basic White Cardstock: Third-from-Largest Deckled Rectangle (inner liner)
Winter Meadow DSP: 2″ x 5 3/8″ (x2 – for front and middle z-fold panels); Third-from-Largest Deckled Rectangle Die (card front); 4 1/8″ x 5 3/8″ (back liner of card); 2 1/4″ x 6″ (envelope flap)
If you need any stamping supplies, I’d be very happy to be your Demonstrator. Just click on the Order Stampin’ Up! Online Now button on the right side of the screen to go directly to my online store or drop me an email if you have any questions. Happy Stamping!
Shop the Clearance Rack here. Earn FREE Stampin’ Up! Products – Join my Punkin Head Peppermint Rewards – My online customer thank you program!
Finn Fan Fix 
BIG Stick!

But – Finn’s man enough for the job.
Too fast to even SEE!!

Conquering hero!

TTFN


 #20 Demonstrator in Sales in the US 2023-2024
 #13 Demonstrator in Leadership in the US 2023-2024
 #21 Demonstrator in Team Building in the US 2023-2024


 Inky Bee Stampers
 KarensCardCorner
 Stamp with Amy K
 Stamp With Nel
 Stampin With Shirley G
 Tarabeth Stamps
 TL's Bright Spot
Gorgeous card Mary! Love how frugal you are with the cardstock! 🙂
Pardon me, but did I see a little bit of a strut in his walk when the Man was carrying the big stick?
LOL – well, he’s got a bit of a swagger-sashay going on all the time – but there WAS a little extra pep in the step! Thanks so much, Angie! 🙂
Such a pretty card! Love the designer paper that you’ve used, perfect winter colors. 🙂 Hope that Finn got to bring his “trophy” into the house after all of that work to get it there. 😉
No. No he did not. There has to be a line in the sand – and a giant BRANCH…is the line! LOL! Thanks, Amy! 🙂
Lovely card!
Thanks, Mom! 🙂