Well – happy Sunday, y’all! We’re doing more in the garden today – adding some more tubs to our “huge” Kratky garden. We got a couple of squash plants and a couple of herbs – so we’re going to see how well they work with this method. The tomatoes we planted a couple of weeks ago are doing well – as in…not dead! – so…I’m sort of liking this!
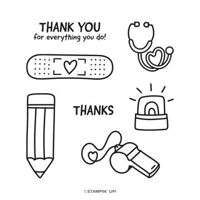
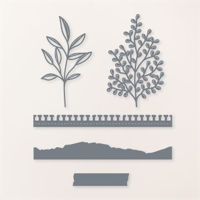
Speaking of sort of liking…I more than SORTA like today’s card! It’s uses a flyover set – called the Everyday Thanks set – plus some fun papers from the Delightfully Eclectic and Bright & Beautiful DSPs – and…the notebook-egde die from the Gorgeously Made Die set. Take a look-see!

For those of you keeping up – those pencils are fussy cut! SOOOPER easy!
My color palette is from the Global Design Project challenge!

I started by stamping the pencil image – and the “Thanks” sentiment – from Everyday Thanks in Bubble Bath ink all over a piece of Bubble Path paper from the Bright & Beautiful 6″ x 6″ DSP pack.
Then I matted the panel on Lemon Lolly cardstock for the card front.

I used the notebook-edge die from the Gorgeously Made Die set to cut a piece of conveniently-notebook-design paper from the Delightfully Eclectic DSP pack. I don’t know if this was PLANNED by Stampin’ Up! but…dang! It’s so perfect! Then I adhered the panel onto the card front with Liquid Glue.
On a piece of Basic White cardstock, I stamped the pencil from Everyday Thanks three times in Basic Gray Ink. I colored all three with a Light Smoky Slate Stampin’ Blend and the Ivory Blend for the wood portion of the pencil.

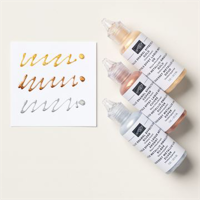
I colored each pencil with a Dark Lemon Lolly, Dark Bubble Bath or Light Parakeet Party Stampin’ Blend. I added a thin line of gold Metallic Enamel Effects on the “band” of each pencil and let it dry thoroughly. Then I cut them out with my Paper Snips and adhered them to the card front with Stampin’ Dimensionals.
On another piece of Basic White cardstock, I stamped the sentiment from Everyday Thanks in Basic Gray ink. I fussy cut the sentiment and added a banner end. For this – I didn’t work very hard to make the corners square or the lines straight – I wanted it to look more “hand crafted” by…maybe kids?!

I tied a little bow with Parakeet Party Baker’s Twine and adhered it with a little Liquid Glue.
I added the sentiment with Stampin’ Dimensionals, added some Lemon Lolly Adhesive-backed Solid Gems and the card front was done!

On the inside, I stamped the Everyday Thanks pencil in Basic Gray up the side of a Basic White panel and then colored them as I’d done on the front!

I used Liquid Glue to adhere the panel to a piece of Lemon Lolly cardstock and into my Basic Gray card base, popped the card front on with Stampin’ Dimensionals and the card was done
My Basic White Medium Envelope in got the colored pencils in Basic Gray across the front…

…and some more of the Bright & Beautiful DSP – stamped with pencils – on the envelope flap.

Et Voila! I know, right? You can’t believe you’ve missed this uber-cute Everyday Thanks set! Fortunately – you can get it right now! And while you’re at it – grab the wunnermus Delightfully Eclectic DSP (it’s a HUGE pack of fun paper!) and the Gorgeously Made dies, too. And – that’ll get you a Bonus Days coupon! Bump up to the Gorgeously Made BUNDLE and…you’ll get TWO coupons! BOOM!

I hope you like!
If you’d like to recreate this card, all the products and card cuts you’ll need are down below! And this is the card I made on my YouTube video yesterday. If you’d like to see it – for the first time or again! – here ’tis!
I’ve also created a printable PDF with written instructions and a list of the products used to create this project. You can download, print and/or save it by clicking this image:

Missed any tutorials? You can check out my past projects right here!
TTFN
M

Connect with me! https://campsite.bio/stampsnlingers
HOST CODE FOR 1 JUL – 15 JUL: KEBTKUKT
Use this host code when you order $50 or greater and receive a free gift (AND the Monthly Card Tutorial) from me! If your order is over $150, please do not use this code, but you’ll still get the free gift. The free gift is your choice of any item valued up to $10.00 in any active Catalog! That includes some of the Host Exclusive stamp sets! See my Customer Rewards page for full details.
Note: Make sure that you can see my name on the final checkout page listed as your Demonstrator when you order so that you know that you’re ordering with me and you’ll get my rewards!
You’ll also be getting a link to my ZOOM The Craftroom (an exclusive TWICE-A-WEEK online event for my customers) and the monthly Online Tutorial. The July Tutorial features the beautiful Earthen Textures Bundle!


BONUS DAYS ARE ON!!

Here’s the Deets!
Earning Period: 6–31 July 2023
Ordering Deadline to Earn: 31 July 2023 at 11:59 p.m. (MT)
- Earn a $5 coupon for every $50 spent (before shipping and tax).
- All coupon codes will be emailed right after a qualifying purchase has been made. Customers can shop, purchase, and earn coupons as a guest if they provide a valid email at checkout. However, customers are encouraged to create an account on our online store.
- If a participant earns multiple codes from a single order, they will receive one email with multiple codes. If they earn multiple codes from multiple orders, they will receive separate emails for each code earned.
- All order types qualify for this promotion. Phone and email orders still require an email address.
- Orders started before the promotion begins will not count toward earning coupon codes. For example, if you add items to your cart before 6 July and wait to purchase until that date or later, then those items will not qualify towards earning coupons. You must add items to your cart and complete your purchase during the earning period.
- There’s no limit to the number of coupon codes you can earn per order or throughout the duration of the earning period.
And – we’ve got some cool spots to look for new goodies and new “deals”! Check these out!


Get the Stampin’ Up! Products Used in this Project:


Card Cuts Used in This Project:
Basic Gray Cardstock: 4 1/4″ x 11″ (card base, scored and folded at 5 1/2″)
Lemon Lolly Cardstock: 4″ x 5 1/4″ (x2 – mats for card front and inner liner)
Basic White Cardstock: Fussy cut sentiment and pencils; 3 7/8″ x 5 1/8″ (inner liner)
Delightfully Eclectic DSP: 3 1/2″ x 4 3/4″ (Gorgeously Made die cut panel on front)
Bright & Beautiful 6″ x 6″ DSP: 3 7/8″ x 5 1/8″ (card front); 2 1/4″ x 6″ (envelope flap)
If you need any stamping supplies, I’d be very happy to be your Demonstrator. Just click on the Order Stampin’ Up! Online Now button on the right side of the screen to go directly to my online store or drop me an email if you have any questions. Happy Stamping!
Shop the Clearance Rack here. Earn FREE Stampin’ Up! Products – Join my Punkin Head Peppermint Rewards – My online customer thank you program!
Finn Fan Fix 
Mom – let me check that, okay?

I think it’s good but….one…little….

lick!
TTFN
M


 #20 Demonstrator in Sales in the US 2023-2024
 #13 Demonstrator in Leadership in the US 2023-2024
 #21 Demonstrator in Team Building in the US 2023-2024


 KarensCardCorner
 Stamp with Amy K
 Stampin With Shirley G
 Tarabeth Stamps
 TL's Bright Spot
Such a cute card! The colors are perfect, love the fun pencil images! Looks like Finn rather enjoyed his little snack. 😉
Thanks so much, Amy! And yep. Pumpkin is almost always a winner! 🙂
Love the pencils and the way you used the challenge colors! So creative and fun. When I saw that stamp set, I thought what would one do with that fat pencil?! Now I know! TFS. Glad to see Finnman interested in licking the pans clean! Such a good helper.
Thanks, Susan – I love the fun images in this set! And yep – there are some things that just say…I’M BAAAACK! 🙂