I’ve gotten some feedback from a few folks that indicate that they’d like to see cards that are….simpler. And take fewer goodies to make. I completely get that! When I first started doing this – heck, even today!! – I’d see posts come thru and think “I’ve got to have that stamp set, and another pack of paper, and a punch or two, maybe a Thinlit set, some different ink…” Usually I’d just buy it – cause I’m weak! But, just as soon as that package came, I’d see another post with another wonderful card and the cycle would start anew!
So, I decided to try to incorporate some card/stamp combos like that. Give you some ideas to maximize your return and keep the budget under control! I’ll try to do it maybe once a week. What do you think? Well – maybe I’ll ask that again at the END of this post! 🙂
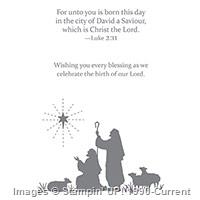
For this first installment, I’m using a brand new Holiday Stamp set – that you can get on 1 Sept – to make two Christmas cards. I’ve also used a limited number of tools and accessories. The stamp set is called Every Blessing – and it’s gorgeous. It’s three stamps – and I’ve used them all on these cards. And that’s the only set I needed! Take a look-see:

The design for this card comes from Freshly Made Sketches, #199:
 Be sure to check out their site and see what your fellow crafters are creating!
We’re going to go simpler/quicker first and then we’ll talk about the ever-so-slightly more involved second card – the black and gold card.
For the first card – it’s a card base and a card front. No mat. Just clean and simple and done! It IS heat embossed – but, to me, that’s easy and quick and has high HIGH impact. One day soon, I’m going to do a post on what I call my “Kitchen”. My Pantry, and Small “Appliances” and “Condiments” – in crafter terms the basics of what I think all card crafters need (or even just WANT!) to have in their arsenal. As my friend Paul used to say “Proper tool for the Proper Job”. Anyway – watch for that, okay? So, for me, the things that go along with heat embossing are part of my Condiments list – but, they’re pretty critical. Like Salt and Pepper. And chocolate. My point is, don’t shy away from gathering the things you need to heat emboss – once you do, they last forever (almost) and give you really big bang for the buck!
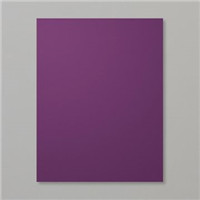
This first card started with a simple piece of Blackberry Bliss card stock. And I thought that color just asked for Silver. Note: this picture doesn’t do the color combo justice – it’s much richer looking in real life! First, I rubbed the card stock with my Embossing Buddy. Don’t forget to do this – it will save you re-do’s. Not saying that happened to me on THIS card, or anything! 😉 Then, I inked up the main image in Every Blessing (avail 1 Sept) with Versamark Ink and stamped it onto my card stock. I did the same with the second sentiment and stamped it along side the Nativity scene.

I sprinkled both images with Silver Stampin’ Emboss Powder, shook off the excess and heat embossed the whole thing. Heat embossing just gives me a little thrill me every time I do it – I really love watching that stuff melt and get all gorgeous!
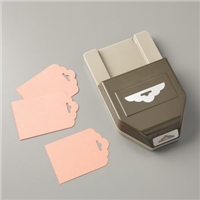
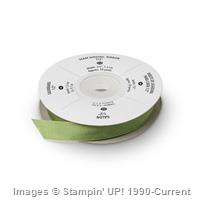
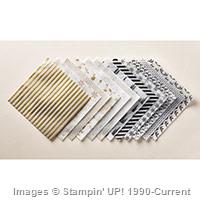
Then, I pulled out my Winter Wonderland Designer Vellum Stack (avail 1 Sept) and cut my strips. This stack is very cool – each design is in silver and gold (front and back) and you get 3 of each design (this is a 6″ x 6″ stack). So it’s quite cost effective, especially for doing accent strips like on this card. Each strip is only 1″ wide and the banner strip is only about 3″ long. I cut the banner with my snips (see? You don’t even NEED the Banner Triple Punch – can’t help it if you WANT it!!). I adhered both strips with little tiny dots of Multi-Purpose Liquid Glue that I put behind the printed areas on the vellum.
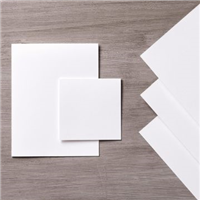
Then, I popped that puppy onto my Whisper White Thick Card Stock card base with Stampin’ Dimensionals. The final touch was a medium sized Rhinestone Basic Jewel in the star. Those jewels are DEFINITELY pantry items for me – I’m NEVER without them and their cousins – the Pearl Basic Jewels. Not. Ever!
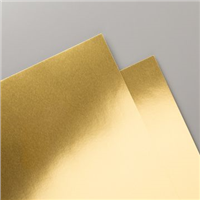
If you want to go just a little bigger and fancier – add a Foil Mat behind your card front. Like in the second card….

Same exact card – only embossed on Basic Black in Gold, not Silver, used the Gold side of the Winter Wonderland Designer Vellum paper (which you can get a sampling of in the Holiday Shares….), and SNAILd the piece to a mat made from a piece of Gold Foil. Or, if you don’t have any Gold Foil sheets – how about making both these cards with opposite colors? Mat the Blackberry Bliss card in Basic Black and the Basic Black card in Blackberry Bliss. Pretty efficient way to make a beautiful stack of Christmas Cards, yes?
The inside of both cards is essentially the same. I just stamped the third sentiment in the Every Blessing set in Tuxedo Black Memento Ink.

Those of you who’ve been following along with me for a while can probably guess why there’s Rhinestones on the inside… But you’re only guessing and you have no proof, so…. 😉
So, with one stamp set you can easily make multiple cards, just by changing a couple of colors around! Easy peasy! Consider the Every Blessing stamp set when it comes available on 1 September! And don’t forget that you can get samplings of the new designer papers – like this Winter Wonderland Designer Vellum – in the Holiday Shares that are open now.
So – let me know. Would you like to see more projects that use fewer items? One-stamp-set-wonders, maybe? Leave me a comment and me know what YOU’D like to see on Stamps-N-Lingers!
TTFN and see you tomorrow!
Mary
WEEKLY DEALS FOR 11 Aug – 17 Aug 15!! Click here to see the Weekly Deals from Stampin’ Up! in my online store. The Weekly Deals are only while supplies last and only available at these great prices through 17 Aug!

Built for Free Using: My Stampin Blog
2015 Holiday Shares are Open!

Shares are a great way to get a little bit of all the new Designer Papers, Ribbons and Embellishments to use in your holiday masterpieces! Go to the 2015 Holiday Catalog Shares page and see what could be coming your way! I’ll order early on 1 Sept, with expedited shipping, and get everything back out just as quick as I can!
One More Tax Holiday
For Massachusetts Residents!
Do you live in Massachusetts?? If you do, you’re in luck! The Massachusetts’ governor has approved a sales tax holiday for August 15-16!!
All catalog items (up to $2500 per line item) are eligible per the state’s sales tax holiday regulations.
Items must be ordered by end-of-day August 16 to qualify–no exceptions.
Learn more at http://www.mass.gov/dor/businesses/help-and-resources/legal-library/tirs/tirs-by-years/2015-releases/tir-15-7.html
Enjoy! 🙂

Paper Pumpkin – the fun comes right to your door! Give it a try today!
Offer Dates: July 23-September 10, 2015
Get the details here!
STAMPIN’ UP PRODUCTS USED IN TODAY’S PROJECT:


Built for Free Using:My Stampin Blog
Built for Free Using: My Stampin Blog
Whisper White Thick Card Stock: 5 1/2″ x 8 1/2″ (Card Base – Scored and folded at 4 1/4″)
Blackberry Bliss Card Stock: 4 1/8″ x 5 3/8″ (card front)
Winter Wonderland Designer Vellum: 1″ x 5 3/8″ (snowflake); 1″ x 2 7/8″ (striped banner)
Card Cuts Used in Today’s Project (Card 2):
Whisper White Thick Card Stock: 5 1/4″ x 8 1/2″ (Card Base – Scored and folded at 4 1/4″) – I totally screwed up my first cut and that’s why this card ended up being a “weird” size! You could definitely use the regular A2 sizing! 🙂
Gold Foil: 4 1/8″ x 5 1/8″ (mat)
Basic Black Card Stock: 4″ x 5″ (card front)
Winter Wonderland Designer Vellum: 1″ x 5 1/4″ (snowflake); 1″ x 2 1/2″ (striped banner)
If you need any stamping supplies, I’d be very happy to be your Demonstrator. Just click on the Order Stampin’ Up! Online Now button on the right side of the screen to go directly to my online store or drop me an email if you have any questions. Happy Stamping!
Shop the Clearance Rack here.
Earn FREE Stampin’ Up! Products – Join my Punkin Head Peppermint Rewards – My online customer thank you program!
BACKORDER LIST AS OF 13 Aug 15
14 August
138296: Washi Label Punch (second shipment)
17 August
104181: 12″ x 12″ Craft Keepers (supply item)
138281: Lots of Labels Framelits Dies
138288: Brick Wall Textured Impressions Embossing Folder (second shipment)
138378: Tin of Cards Project Kit (third shipment)
140406: Watercolor Wishes Card Kit (more information here)
18 August
138395: Expressions Natural Elements (second shipment)
21 August
138135: Bold Butterfly Framelits Dies
28 August
135294: Variety Pack 1 12″ x 12″ Project Life Photo Pocket Pages
7 September
138401: Gold Metallic Thread


 #20 Demonstrator in Sales in the US 2023-2024
 #13 Demonstrator in Leadership in the US 2023-2024
 #21 Demonstrator in Team Building in the US 2023-2024


 Inky Bee Stampers
 KarensCardCorner
 Stamp with Amy K
 Stamp With Nel
 Stampin With Shirley G
 Tarabeth Stamps
 TL's Bright Spot
Beautiful cards Mary! Heat embossing is an awesome technique and it does provide fantastic results with few tools. Perfect for your holiday cards! 🙂
Thanks, Amy! I love the metallic embossing powders – and they work just great with this set!! 🙂
Love it! I might actually get ‘er done!
It’s pretty easy to do, for sure! Thanks!
Stunning cards, Mary! I agree… Heat embossing is so worth it! I really like the idea of simple cards… I tend to make multiples when I have my supplies out. Or maybe a card and a tag, or treat bag, or box… Thanks for sharing your great ideas with us! Love the deep purple and silver… Beautiful!
Me, too – although it was hard to pick a favorite color combo on these! Thanks, Patricia! 🙂
Wowzers…gorgeous color combinations. The embossing is so beautiful with this set.
Thanks for sharing with us!
Thanks, Lynn – this is a great embossing image. Lots of space for that wonderful shiny gold and silver! 🙂
Beautiful card! Love those embossed images! So elegant! Perfect for Christmas! Thanks for joining us this week at Freshly Made Sketches!
Thank you, Jen. And thanks for providing the sketches for us! 🙂
These are beautiful! The embossing is so elegant! So,glad you shared them at FMS!
Thanks very much, Linda! I enjoy the sketches every week – thanks to you all for providing them for us to play with! 🙂