Real quick post today! Why? Cause “quick” is how this mini treat bag aka gift card holder goes together! And – that’s from a person who hasn’t made one of them before. That’s me in case you’re wondering! 🙂
You’ll recall at the beginning of the week I made a card and envelope for Chris – who we’ll go see tomorrow at his UGA Veterinary School “White Coat Ceremony”. Here’s that post if you want to see how I made this card set….

I show you this so you’ll understand why I made the treat holder the way I made the treat holder. Er….gift card holder!

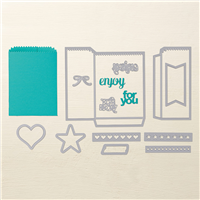
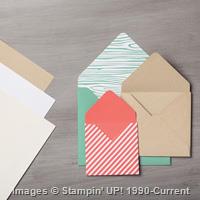
I won’t delve too deeply into the making of the bag itself – check back for a tutorial on that. This one is cut from a piece of Kraft Envelope Paper from the Neutrals Envelope Paper (new in this year’s Annual Catalog). Basically, you cut two shapes with the Mini Treat Bag Thinlits Die:

Fold on the crease lines created by the die:

And use Sticky Tape or Multi-Purpose Liquid Glue (I used the Sticky Tape) to adhere the two pieces together. The final stickier-togethering is to fold the bottom flap up and secure it to the bag.
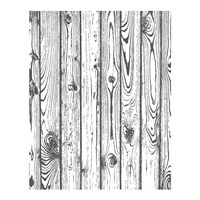
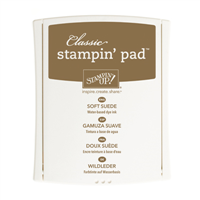
After I cut the two pieces, I stamped them with my Hardwood Stamp in Soft Suede. I did the old lay-the-stamp-down-and-ink-it-and-then-lay-the-paper-on-top-and-carefully-rub-all-over-it-to-transfer-the-image thing. Whew – say THAT 10 times fast! I got everything cleaned off and put away and then realized that the bottom flap was going to actually SHOW – and that I hadn’t stamped it! So…out it all came so that I could remedy that tiny error!
Once it was all stuck together, here’s what it looked like:

That’s the front. Which I sort of screwed up and made my back. Well….it still holds an American Express Gift Card, so I suspect I’ll be forgiven. Folks – the side where the bottom flap is NOT is the front. But, by the time I figured that out – I’d already added my cute little “For You” sign. With SNAIL. On the wrong side. I immediately decided that was the RIGHT side!

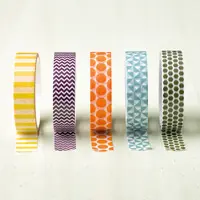
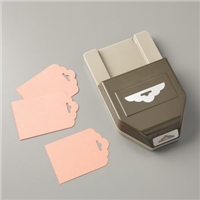
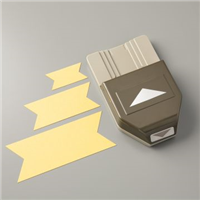
The sentiment is cut from Chocolate Chip card stock – and is a die that comes with the Treat Bag set (there are a LOT of dies in this set – so you can really go kind of hog wild with it!). You’ll definitely want to remember to use your wax paper between these little dies and your card stock – they’re a little persnickety to get out otherwise. With wax paper – easy! I adhered it to a piece of scrap Farmer’s Market DSP that I’d SNAILd to a Chocolate Chip mat. The ends were cut with the Banner Triple Punch. As I mentioned earlier – the sign is SNAILd to the treat bag.
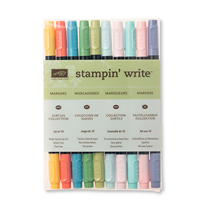
I pondered how to fix my error to make it look like it wasn’t an error at all. I decided that I’d add some “nails” to the bottom flap. After I did that with my Basic Black Stampin’ Write Marker, I kind of liked it, so I added some more – on the bag and on the sign.
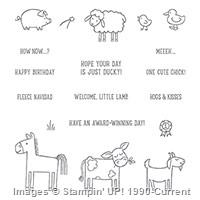
I added one last little surprise. I stamped the little piggy from Barnyard Babies in Tuxedo Black Memento Ink on a piece of scrap Whisper White card stock and then colored him in with my Pink Pirouette and Blushing Bride Stampin’ Write Markers. Then I fussy cut him out and stuck him on the inside of the back of the flap…..to be discovered only upon opening the bag…thusly…..

I know – you want a closer look at his cuteness:

I cut his little corkscrew tail off and added it back on the flap with my Basic Black marker! I did it on purpose, I promise – NO way I could cut that teensy tiny tail and make it look right!! 🙂
I closed the flap with a Clothespin with a bow made from Bermuda Bay Thick Baker’s Twine. And that was pretty much that!
So – he’ll get the card and the gift card in the coordinating holder. I think he’ll like it all – and I KNOW he’ll like the gift card itself! 😉

Check back for a tutorial on making these little bags – it’s too easy peasy!
If you’re reading this in Massachusetts, don’t forget that today and tomorrow are “Sales Tax Holidays” and Stampin’ Up! Products Qualify!!
TTFN and see you tomorrow!
Mary
WEEKLY DEALS FOR 11 Aug – 17 Aug 15!! Click here to see the Weekly Deals from Stampin’ Up! in my online store. The Weekly Deals are only while supplies last and only available at these great prices through 17 Aug!

Built for Free Using: My Stampin Blog
2015 Holiday Shares are Open!

Shares are a great way to get a little bit of all the new Designer Papers, Ribbons and Embellishments to use in your holiday masterpieces! Go to the 2015 Holiday Catalog Shares page and see what could be coming your way! I’ll order early on 1 Sept, with expedited shipping, and get everything back out just as quick as I can!
One More Tax Holiday
For Massachusetts Residents!
Do you live in Massachusetts?? If you do, you’re in luck! The Massachusetts’ governor has approved a sales tax holiday for August 15-16!!
All catalog items (up to $2500 per line item) are eligible per the state’s sales tax holiday regulations.
Items must be ordered by end-of-day August 16 to qualify–no exceptions.
Learn more at http://www.mass.gov/dor/businesses/help-and-resources/legal-library/tirs/tirs-by-years/2015-releases/tir-15-7.html
Enjoy! 🙂

Paper Pumpkin – the fun comes right to your door! Give it a try today!
Offer Dates: July 23-September 10, 2015
Get the details here!
STAMPIN’ UP PRODUCTS USED IN TODAY’S PROJECT:


Built for Free Using: My Stampin Blog
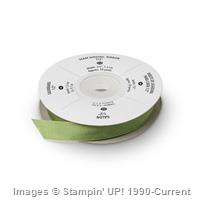
Kraft Neutrals Envelope Paper: treat bag
Farmer’s Market DSP: 1 1/4″ x 2 1/4″ (sentiment sign)
Chocolate Chip Card Stock: 1 3/8″ x 2 1/4-ish” (sentiment sign mat); sentiment die cut
If you need any stamping supplies, I’d be very happy to be your Demonstrator. Just click on the Order Stampin’ Up! Online Now button on the right side of the screen to go directly to my online store or drop me an email if you have any questions. Happy Stamping!
Shop the Clearance Rack here.
Earn FREE Stampin’ Up! Products – Join my Punkin Head Peppermint Rewards – My online customer thank you program!
BACKORDER LIST AS OF 13 Aug 15
14 August
138296: Washi Label Punch (second shipment)
17 August
104181: 12″ x 12″ Craft Keepers (supply item)
138281: Lots of Labels Framelits Dies
138288: Brick Wall Textured Impressions Embossing Folder (second shipment)
138378: Tin of Cards Project Kit (third shipment)
140406: Watercolor Wishes Card Kit (more information here)
18 August
138395: Expressions Natural Elements (second shipment)
21 August
138135: Bold Butterfly Framelits Dies
28 August
135294: Variety Pack 1 12″ x 12″ Project Life Photo Pocket Pages
7 September
138401: Gold Metallic Thread


 #20 Demonstrator in Sales in the US 2023-2024
 #13 Demonstrator in Leadership in the US 2023-2024
 #21 Demonstrator in Team Building in the US 2023-2024


 KarensCardCorner
 Stamp with Amy K
 Stampin With Shirley G
 Tarabeth Stamps
 TL's Bright Spot
Very cute, Mary! Love those little treat bags, and the wood stamp gives them such nice texture and depth! Thanks for sharing a simple, yet beautiful, project with us today. Hope you enjoy the graduation ceremony.
Gotta love those coordinated things. This one is a winner!
Thanks, Mom!
Thanks, Patricia. I’m looking forward to his big day!
totally adorable project Mary I didn’t even notice that little piggy in the set until your post today!…