Well – good morning and Happy Happy Hawwwmp Day! Hope your week is going well! It’s still hot and humid with afternoon thunderstorms each day – so….summer in the South! 🤷♀️. I’m already ready for FALL in the South and I’ve barely got my tomatoes going! Yikes!
My card today sort of reflects the coming of Fall. In that Halloween is in the Fall? I don’t do a lot of Halloween cards, but..I saw a cute home decoration project with the Online Exclusive Potions & Spells Bundle and I played with it a little to turn it into a card! It also used the Delicate Forest Dies and some Full of Life DSP? Yep – the Full of Life DSP for…a Halloween card! Take a look-see:

And – I played along with the Sketch Saturday challenge this week.

I went back to 2015 and worked with the sketch #374!

I started by adhering a piece of Full of Life 6″ x 6″ DSP to the front of a Basic Black card base using Liquid Glue.
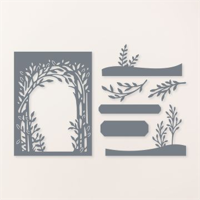
Using the large die in the Delicate Forest Die set, I cut it from the middle of a Basic Black panel for the card front.

I made the bubbling cauldron “scene” next – starting by cutting out a Copper Clay cauldron using the Potions & Spells die. I embossed the die cut cauldron in the Distressed Tile 3D Embossing Folder.
Then, using a Small Blending Brush, I brushed some Versamark Ink onto the raised portions, sprinkled it with Copper Embossing Powder and heat set it with the Heat Tool. Again using a Small Blending Brush, I lightly added some Tuxedo Black Memento ink.

I adhered the cauldron to the card front using Black Stampin’ Dimensionals.
I used the Potions & Spells dies to cut out some “ooze” from Granny Apple Green cardstock and brushed it, and another piece of Granny Apple Green cardstock with Granny Apple Green ink.

From the piece of brushed cardstock, I cut out bubbles – using ALL the bubble dies in the set – and brushed them all with the Clear Wink of Stella Glitter Brush. I used the die again to cut out a bunch of bubbles from Old Olive Glimmer Paper.
I adhered the ooze to the cauldron with Liquid Glue. Then I used Liquid Glue and Black Stampin’ Dimensionals to adhere the die cut bubbles.

At this point, I used Black Stampin’ Dimensionals to adhere the Delicate Forest die cut onto the card front.

I used the Online Exclusive 1 3/4″ Circle Punch to cut out a piece of Online Exclusive Graceful Greenery Vellum Specialty DSP. I brushed the circle with Crushed Curry ink using a Blending Brush and, tucking it under the Delicate Forest die cut in the top left corner, adhered it with a little Liquid Glue.
It’s a full moon.
Tell me you see it! 😉
Look closer.

There. NOW you see it! 🙂
I assembled a broom (had to have one, right?!) by using the dies to cut a Pecan Pie stick and a Crushed Curry broom head and adhering them together with a dab of Liquid Glue. I tied an eensy little bow from Linen Thread and added it with a little dot of Liquid Glue.
Then I adhered the broom to the card front with Liquid Glue.

On a piece of Granny Apple Green cardstock, I stamped a Potions & Spells sentiment in Tuxedo Black Memento Ink and cut it out with a Stylish Shapes die. I adhered it to the card front with Liquid Glue.
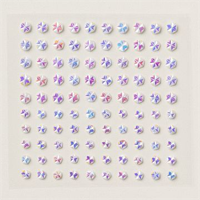
I used a little piece of Black Stampin’ Dimensional to adhere a final little bubble to the sentiment. Then I added some sparkly Iridescent Faceted Gems and the card front was done!

On the inside, I added a second Potions & Spells sentiment in Tuxedo Black Memento ink on a Basic White panel. At the bottom, I stamped the bubbles image in Tuxedo Black (that’s in the bottom right corner). I also placed all three individual bubble stamps on a single block and stamped them a couple times. I colored everything with my Lemon Lime Twist Stampin’ Blends and the Clear Wink of Stella Glitter Brush.

I used Liquid Glue to adhere the panel to the inside of the Basic Black card base and the card was done!
My Basic White Medium Envelope got more Lemon Lime Twist bubbles – with Clear Wink of Stella! – on the front…

…and a little more Full of Life DSP (and bubbles!) on the envelope flap.

Et Voila! Is it surprising that the Full of Life DSP has contributed yet ANOTHER piece of DSP to a project!? It is SO stinkin’ fun and versatile! And Potions & Spells is super cute – love the ooze. Which…isn’t a sentence I ever thought I’d write!! 😂. And the cauldron and broom stick and bubbles…too fun! Finally – don’t forget all the cool die sets – like Delicate Forest – in the Annual Catalog – think outside the box and…figure how you might incorporate them in …unexpected places! 🙂

I hope you like!
If you’d like to recreate this card, all the products and card cuts you’ll need are down below!
I’ve also created a printable PDF with written instructions and a list of the products used to create this project. You can download, print and/or save it by clicking this image:

Missed any tutorials? You can check out my past projects right here!
TTFN
M

Connect with me! https://campsite.bio/stampsnlingers
HOST CODE FOR 1 JULY – 15 JULY: GHWE7ZZR
Use this host code when you order $50 or greater and receive a free gift (AND the Monthly Card Tutorial) from me! If your order is over $150, please do not use this code, but you’ll still get the free gift. The free gift is your choice of any item valued up to $10.00 in any active Catalog! That includes some of the Host Exclusive stamp sets! See my Customer Rewards page for full details.
Note: Make sure that you can see my name on the final checkout page listed as your Demonstrator when you order so that you know that you’re ordering with me and you’ll get my rewards!
You’ll also be getting a link to my ZOOM The Craftroom (an exclusive TWICE-A-WEEK online event for my customers) and the monthly Online Tutorial. The July Tutorial features the wunnermus Seaside Wishes Bundle!


Bonus Days comes just once a year – and it’s a Two-Part Event! Part One – you EARN (aka – SHOP. I mean – you were going to do that anyway, right?!). And…when you shop between 3–31 July 2024 and spend $50 (before shipping & tax) you’ll earn a $5 coupon right from Stampin’ UP!! NOTE: You’re going to get your coupons in an email (see the deets below). You’ll want to make SURE you save all your coupons because you can REDEEM them (and we mean ALL of them) between 1–31 August 2024! That’s Part 2 of the Bonus Days event.
Now – There’s no limit to how many coupons you can earn! So – get busy! Cuz – the way this year is flying by – Bonus Days will be gone before you know it!
Here’s the Deets:
PART 1: EARN
3–31 July 2024 (11:59 p.m. (MT))
- Earn a $5 coupon for every $50 spent (before shipping and tax).
- All coupon codes will be emailed right after a qualifying purchase has been made. You must have a customer account with a valid email address to earn coupons when you shop. NOTE: that means…if you don’t have one already – this would be a GREAT time to set up a Customer Account at Stampin’ UP!
- If you earn multiple codes from a SINGLE order, you’ll get ONE email with MULITPLE CODES in it.
- If you earn multiple codes from MULTIPLE orders, you’ll get SP emails for each code earned.
- Orders started before the promotion begins will not count toward earning coupon codes. For example, if you add items to your cart before 3 July and wait to purchase until that date or later, then those items will not qualify towards earning coupons. You must add items to your cart and complete your purchase during the earning period.
- There’s no limit to the number of coupon codes you can earn per order or throughout the duration of the earning period. WHOO-HOO!!
- You must use a valid email address during checkout in order to receive your coupon code.
- Starter Kit orders are excluded from this offer. All other order types qualify.

PART 2: REDEEM
1–31 August 2024 (11:59 p.m. (MT)) – Just so you can PLAN AHEAD!
- There’s NO LIMIT to the number of coupon codes you can redeem on an order during the redemption period. You’ll see a box to enter your code(s) during checkout – if you’re redeeming multiple codes, you’ll need to separate them by a space .
- Coupon codes may be redeemed one time only. They cannot be redeemed after the 31 August.
- Coupon codes may be redeemed for any product (excluding Starter Kits). They can’t be used on exchanges.
- Bonus Days coupon codes CAN be applied to month-to-month Paper Pumpkin subscriptions and NEW PREPAID subscriptions.
Here’s a printable flyer – you can click the pic to open it up so you’ll have it as a handy reminder!


Stampin’ Up! has added another amazeballs batch of products that you won’t find in any catalog, they’re ONLY listed in the Online Exclusives section of the online store.
Click here to head right to the Online Exclusives section of the online store to see EVERYTHING that’s available for your crafting pleasure! Pro Tip: Sort on “Newest” to see what’s…well….NEW!
Get the Stampin’ Up! Products Used in this Project:


Price: $6.00

Price: $10.00


Card Cuts Used in This Project:
Basic Black Cardstock: 4 1/4″ x 11″ (card base, scored and folded at 5 1/2″); 4 1/8″ x 5 3/8″ (card front)
Copper Clay Cardstock: Potions & Spells die cut cauldron
Crushed Curry Cardstock: Potions & Spells die cut broom head
Pecan Pie Cardstock: Potions & Spells die cut broomstick
Granny Apple Green Cardstock: Stylish Shapes banner die cut (sentiment); Potions & Spells bubbles
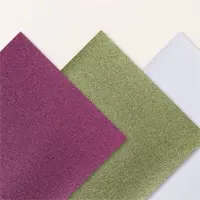
Berry Burst, Old Olive & White Glimmer Specialty Paper: Potions & Spells die cut bubbles
Graceful Greenery Vellum Specialty DSP: 1 3/4″ Circle Punch (moon)
Full of Life 6″ x 6″ DSP: 4″ x 5 1/4″ (behind Delicate Forest die cut panel); 2 1/4″ x 6″ (envelope flap)
If you need any stamping supplies, I’d be very happy to be your Demonstrator. Just click on the Order Stampin’ Up! Online Now button on the right side of the screen to go directly to my online store or drop me an email if you have any questions. Happy Stamping!
Shop the Clearance Rack here. Earn FREE Stampin’ Up! Products – Join my Punkin Head Peppermint Rewards – My online customer thank you program!
Finn Fan Fix 
Just a bowl and its dog.

It’s a beautiful thing!
TTFN
M


 #20 Demonstrator in Sales in the US 2023-2024
 #13 Demonstrator in Leadership in the US 2023-2024
 #21 Demonstrator in Team Building in the US 2023-2024


 Inky Bee Stampers
 KarensCardCorner
 Stamp with Amy K
 Stamp With Nel
 Stampin With Shirley G
 Tarabeth Stamps
 TL's Bright Spot
Such an awesome card Mary! Love the fun die cut images and the framing is perfect! 🙂
Thank you, ma’am! 🙂
This is an awesome card, Mary. I love your cauldron especially…it’s magical. Don’t you wonder what Finn is thinking with that expression? Have a blessed day.
I sort of think it’s along the lines of….really?! With the camera AGAIN!?! LOL. Thanks, Karen – glad that you like it! 🙂
Awesome card! Love the scene you created! Great colors and textures!
Thank you, Denise – it’s such a fun bundle! 🙂
Such a CUTE card! Love it!
Thanks very much, Pat! 🙂
Love the card!! No video?? I do better CASEing a card visually. You are so inspiring with all your demonstrations. Thank you for your endless contribution to the crafting world.
Thank YOU, Patricia – that is very kind! Sorry there’s no video for this one! Hope you can follow it with all the photos! Have fun! 🙂
Stunning. So many fabulous details. I really like the cauldron.
Thanks so much, Nel – it’s a lot of fun! 🙂
Love your interpretation of the sketch – the colors are so vibrant! Thanks for sharing with us at Sketch Saturday 🙂
Thanks much, Alyson – appreciate you stopping by!! 🙂
Your card is so much fun, Mary, and a great way to use that sketch. Thanks for sharing your card with us at Sketch Saturday.
Thank you so much, Christina – I’m so glad that you liked it. Appreciate you stopping by!! 🙂