Good morning and…Happy Friday! It’s the 2nd of December – which means that Christmas is ON! Three weeks from tomorrow is…Christmas Eve!! 😳😳😳 Where did 2022 go??
My card today is a fun fold – that I blatantly stole from my friend – teammate and downline – Tara Carpenter (at TarabethStamps)! It’s called a Reverse Easel and…it’s totally cool! Tara made one the other night and – I knew I needed to make one, too – and so…here ’tis! Mine is a Christmas card and it features the Sweet Candy Canes bundle and the wunnermus Decorated Pine Dies. Sweetest Christmas DSP brings ALL the traditional Christmas color! Take a look-see:

The layout for the easel front is from The Paper Players sketch challenge this week!

And – being that it’s a fun fold and all…I’ve entered it in the Creative Creases Anything Goes With A Fun Fold challenge! 🙂

Now – this card is pretty easy once your brain accepts the fact that it is REVERSE!
I started with a 5 1/2″ x 8 1/2″ piece of Shaded Spruce cardstock that I scored at 4 1/4″ and 6 3/8″ along the long side.

I folded the 4 1/4″ score as a valley and the 6 3/8″ fold as a mountain. This established the reverse easel structure.

On a piece of Basic White cardstock, I stamped the small leaf from the Sweet Candy Canes in Pool Party ink. Using Liquid Glue, I adhered the panel to a Pool Party mat and then to the back of the card base. This is a great spot to write a personal message!

I used Liquid Glue to adhere a Real Red piece of the Sweetest Christmas DSP on Pool Party cardstock and then adhered it to the “inside” of the card. This will eventually be where the easel stop is placed.

I matted two candy-cane strewn pieces of Sweetest Christmas DSP on Pool Party mats and adhered them with Liquid Glue to the two narrow panels of the card base.
I adhered a piece of Snowflake Specialty Vellum to a Real Red striped piece of the DSP using little dots of Liquid Glue behind the printed snowflake design (to hide the glue). Then I matted the layered panel on a piece of Pool Party cardstock.

I matted a smaller Real Red (polka dotted) piece of Sweetest Christmas DSP on Pool Party and adhered it to the card front with Liquid Glue.
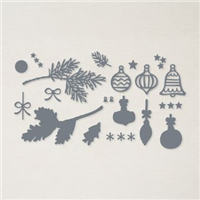
Using the best pine bough die EVER (the one in the hugely discounted Decorated Pine Die set – y’all, this set is $17 right now. You read that right!!) – I cut out a Shaded Spruce bough. On Basic White, I stamped the leaf image from Sweet Candy Canes three times in Pool Party and cut them out with the matching die in the Candy Cane die set.

Using Liquid Glue, I adhered the pine bough to the front of the easel panel. Then I used Liquid Glue to adhere a candy cane that I’d cut right from a piece of Sweetest Christmas DSP using a die from the Candy Canes dies (I love that!).
On a piece of Basic White, I stamped a Sweet Candy Cane sentiment in Shaded Spruce and cut it with the next-to-smallest narrow Stitched Rectangle die. I popped it onto the easel panel with Stampin’ Dimensionals. Then I tucked the three stamped/die cut leaves in – adhering them with Liquid Glue. I added some Red Rhinestones here and there cuz…every card needs a little bling!

I used Liquid Glue on the “top” narrow easel panel and then adhered the top of the easel to it.

For the easel stop, I stamped another Sweet Candy Canes sentiment in Shaded Spruce on a piece of Basic White. I added the little leaf image in Pool Party Ink and matted the panel on Pool Party. Then I used Stampin’ Dimensionals to adhere the stop in place and added a Red Rhinestone to finished off the card!
My Basic White Medium Envelope got the Sweet Candy Canes leaf on the front…

…and more of the Sweetest Christmas DSP on the envelope flap.

Et Voila! I hope you’re not totally bamboozled by the written explanation on how to make this fun fold – cuz…it’s really pretty easy! And it’s so fun in Sweetest Christmas DSP and Sweet Candy Cane sentiments and images! Almost all these goodies are leaving us soon – and are in the Last Chance Sale – I already mentioned the crazy-good price on the Decorated Pine die set! So…THAT means that they could be gone SOON! LOTS of things are selling out and…it’s all while supplies last! If you’re wanting these products – tarry not!

I hope you like!
If you’d like to recreate this card, all the products and card cuts are listed below! And – this is the card I made yesterday on my Facebook live! If you’d like to watch it – for the first time or again! – here’s the link on YouTube!
I’ve also created a printable PDF with written instructions and a list of the products used to create this project. You can download, print and/or save it by clicking this image:

Missed any tutorials? You can check out my past projects right here!
TTFN
M

Connect with me! https://campsite.bio/stampsnlingers
HOST CODE FOR 1 DEC – 15 DEC: AZNMRGQT
Use this host code when you order $50 or greater and receive a free gift (AND the Monthly Card Tutorial) from me! If your order is over $150, please do not use this code, but you’ll still get the free gift. The free gift is your choice of any item valued up to $10.00 in any active Catalog! That includes some of the Host Exclusive stamp sets! See my Customer Rewards page for full details.
Note: Make sure that you can see my name on the final checkout page listed as your Demonstrator when you order so that you know that you’re ordering with me and you’ll get my rewards!
You’ll also be getting a link to my ZOOM The Craftroom (an exclusive TWICE-A-WEEK online event for my customers) and the monthly Online Tutorial. The December Tutorial features the Sweetest Cherries Bundle!


The July–December 2022 Mini Catalog will be retiring soon! It’s always bittersweet to see a classic Stampin’ Up! catalog take a trip to retirement. Stock up on your favorite products before they’re gone for good!
Save up to 60% on essential craft supplies now thru 4 Jan 2023 – and ONLY WHILE SUPPLIES LAST…so order early as retiring items are already selling out!
Last Chance Sale Details:
- Not all products on the Retiring List are on sale.
- All products are available while supplies last, and there are no purchase limits.
- Discounted items can be added to a Starter Kit and redeemed as a 50% off item or with Stampin’ Rewards.
- Stamp Sets are not guaranteed during this promotion and are while supplies last.
- Sale Starts: 1 December 2022 at 12:00 AM (MT)
- Sale Ends: 4 January 2023 at 11:59 PM (MT)
You can find the retiring list PDF right here.
If you prefer to download the list in an Excel format, you can find that right here.
You can find the list of items that will be available through at least April 2023 here.
If you prefer to download that carryover list in Excel format, you can find that here.
AND –
CLEARANCE RACK UPDATE
Stampin’ Up! has added NEW ITEMS to our Clearance Rack, including the dies that were offered during the Perfect Partners Promotion! Whoo-hoo!!


With discounts up to 60% off, you can get the die sets that coordinate with still-available stamp sets at a great price!
This is an amazing chance to pick up the Perfect Partners dies and Clearance Rack products (available while supplies last!!) – and…
…don’t forget the coordinating stamps!
Here’s a link to my Online Store and the Last Chance Sale! Happy shopping & Saving! 😎😎😎
Get the Stampin’ Up! Products Used in this Project:


Price: $12.00


Card Cuts Used in This Project:
Shaded Spruce Cardstock: 5 1/2″ x 8 1/2″ (card base, scored and folded at 4 1/4” and 6 3/8″): Decorated Pine die cut pine bough
Pool Party Cardstock: 4 1/8″ x 5 3/8″ (x2 – mats for card front and for back panel); 2″ x 5 3/8″ (x2- mats for easel panels); 1 7/8″ x 4 1/2″ (mat for easel stop); 3 7/8″ x 5 1/8″ (mat for art panel/easel on front); 1 7/8″ x 3 5/8″ (mat for DSP rectangle under sentiment on front)
Snowflake Specialty Vellum: 3 3/4″ x 5″ (art panel/easel)
Basic White Cardstock: 7/8″ x 2 7/8″ Stitched Rectangle Die cut (sentiment); 1 3/4″ x 4 3/8″ (easel); 4″ x 5 1/4″ (back panel); Stamped and die cut Sweet Candy Canes leaves (x3)
Sweetest Christmas DSP: Die cut candy cane; 1 7/8″ x 5 1/4″ (x2 – easel panels); 1 3/4″ x 3 1/2″ (DSP rectangle under sentiment on front); 3 3/4″ x 5″ (art panel/easel on front); 4″ x 5 1/4″ (inner panel – with easel stop); 2 1/4″ x 6″ (envelope flap)
If you need any stamping supplies, I’d be very happy to be your Demonstrator. Just click on the Order Stampin’ Up! Online Now button on the right side of the screen to go directly to my online store or drop me an email if you have any questions. Happy Stamping!
Shop the Clearance Rack here. Earn FREE Stampin’ Up! Products – Join my Punkin Head Peppermint Rewards – My online customer thank you program!
Finn Fan Fix 
He gives housework his all, doesn’t he?!?

Yes. Yes he IS holding the tray down with his hand.
Gotta get ALL the crumbs off – he’s quite the dedicated professional! 🙂
TTFN
M


 #20 Demonstrator in Sales in the US 2023-2024
 #13 Demonstrator in Leadership in the US 2023-2024
 #21 Demonstrator in Team Building in the US 2023-2024


 Inky Bee Stampers
 KarensCardCorner
 Stamp with Amy K
 Stamp With Nel
 Stampin With Shirley G
 Tarabeth Stamps
 TL's Bright Spot
Such a cute card! Perfect layering and fun design! Yeah, Finn is the guy for the job if you need dishes to be spotless. 😉
Yes he is! 🙂
Mary, this is great! I’ll have to go look at Tara’s now. If you have time, you should enter it in the Creative Creases Challenge 🙂 Oh, Finn, doesn’t quite live up to Miss Sonja, but he’s close…lol!
True – totally different skill set! And – good idea! I’ll do that, thanks Karen! 🙂
Such a pretty card Mary! I love fun fold cards, especially when they are a little different!! Thanks for sharing. Have a great weekend🙂
Thanks, Pam – this is a fun one! 🙂
Such a sweet card and I love the fun fold…very clever! Have a great weekend!
Thanks, Carol – and you, too! 🙂
Love the combination of Shaded Spruce, Pool Party and Real Red with the two tone candy cane paper.
Thanks, Charlotte! 🙂
What a gorgeous card, and such a fun fold, Mary! I love how you used the vellum over the die cut. The greenery around the candy cane is a beautiful touch. Thank you for playing with The Paper Players this week!
Thanks so much, Ann – appreciate you coming by! 🙂
Yay, Mary, thank you for entering this sweet fun fold at the Creative Creases Challenge! Thank you for the pdf and video too!
Karen, DT
Thanks for reminding me, Karen! 🙂
What a great holiday fun fold card, Mary! Love the mix of papers. I have to smile because you reminded me that my very first easel card was – accidentally – made in this reverse style! I just couldn’t wrap my head around the front panel standing up without support at the top. LOL Thank you for playing at Creative Creases Challenge and hope you can join in again soon.
Debbie DT
Secrets To Stamping
Thank you so much, Debbie – I’ll be back!! Love a fun fold too much NOT to play 🙂