Good morning and happy happy Friday! Whatcha got planned for the weekend? We’re planning a trip to the Costco/Sam’s – they’re right across the street from each other so it always seems silly to go to one and not the other! I’m out of lettuce AND cauliflower rice so…that’s a borderline emergency here.
Who’m I kidding?!? It’s a STRAIGHT UP Emergency! 😳😳😳😳 So…go we will!
So – I’ve got a fun fold for you today and if you were able to join me yesterday for my YouTube live, I appreciate you spending part of your week with me! If not, but you’d like to see the replay – here ’tis!
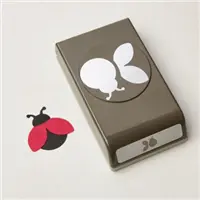
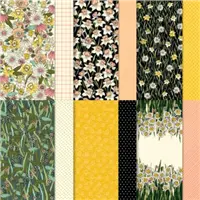
I first saw this fold on the Splitcoast Stampers site – there was a good video by Robyn Rasset, which I watched to get the gist of the fold. Then…I took off and used my fave new paper (no – I am sure you could NOT guess which one!) – the Daffodil Afternoon DSP (which has the not-insignificant advantage of being FREE during Sale-A-Bration!!) and the Ladybug Builder Punch. To make a bumble bee! 🥰 Then I added a Happy& Heartfelt sentiment on the inside. Take a look-see:

That’s quite the stack of punches!! 🙂
Now – the best and easiest way to see how to make this card is to watch the video! Just sayin!
I started by scoring and folding the card base at 2 1/8″ and again at 4 1/4″ along the long side. I folded the 2 1/8″ score line as a “mountain” and the 4 1/4″ as a “valley” – to make a “Z”.

I matted the two flower-design pieces of Daffodil Afternoon DSP (FREE with a $50 purchase during Sale-a-Bration!!) on Basic Black and adhered them to the two narrow panels.
I cut each of the following squares into triangles (see the video for how to make sure you get a directional pattern right – or use a non-directional one so it won’t matter!).
- 1 3/4″ x 1 3/4″ Daffodil Afternoon DSP – the ones with the hearts
- 2″ x 2″ Basic Black squares
I adhered the DSP triangles to their Basic Black mats and then adhered them to the back panel of the card base.

I adhered one of the 2 7/8″ x 2 7/8″ pieces of Basic Black onto the back of the card base – tipped up as a triangle.
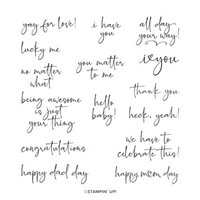
On a piece of Very Vanilla, I stamped the Happy & Heartfelt sentiment in Evening Evergreen and adhered it to the black mat.
Next, I made the bumble-bee. I cut a ladybug body using the Ladybug Builder Punch. With Liquid Glue, I adhered three narrow strips of Bumblebee colored paper from Daffodil Afternoon across the body. Then I trimmed the excess with my Paper Snips.

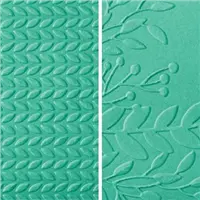
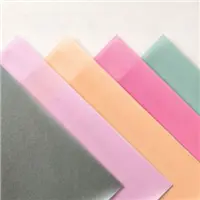
I cut her wings, using the punch, from a piece of Pale Papaya 2021 – 2023 In Color Shimmer Vellum. Then I embossed the wings in the leafy folder from the Greenery Embossing Folders set. I curled them lightly with a Bone Folder and adhered them to the bee with a little piece of Foam Adhesive Strip. I added a black Classic Matte Dot to the wings. Boom. Err….BUZZ! She’s a beeeeeeeee! 🙂

To make the pop out mechanism, I scored on the diagonal on the second 2 7/8″ x 2 7/8″ piece of Basic Black. Then I put the score line on the 1 7/8″ mark on my Paper Trimmer keeping it in the “diagonal” orientation (I TOLD you it was easier to visualize on the video. Didn’t I tell you?!? 🤷♀️🤷♀️🤷♀️) and snipped the end off the corner.

I folded the square – then set it right over the back matted square. I put Liquid Glue just on the left side of the square – then closed the card over the top of the glued side.

I adhered the striped 1 3/4″ x 1 3/4″ Daffodil Afternoon squares to their Basic Black mats in preparation for decorating the front of the card.
Using the Medium Daisy Punch, I cut two Very Vanilla and two Pale Papaya flowers (from the 2021-2023 In Color Shimmer Vellum). I adhered the vellum flowers to the Very Vanilla flowers with Liquid Glue.

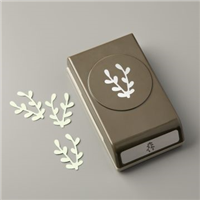
I used the Sprig Punch to cut two Evening Evergreen and two Pear Pizzazz sprigs.
I adhered two sprigs and a flower to each of the squares – then I adhered the squares to the front of the card with Liquid Glue. Tip: be sure to only get your adhesive on the LEFT side of the squares so they’ll “pop” out! 🙂
I colored a couple of Opal Rounds with my Dark Pale Papaya Stampin’ Blend marker and adhered them to the middle of the flowers.

I cut the 2 3/4″ x 2 3/4″ piece of plaid Daffodil Afternoon DSP into a two triangles and used Liquid Glue to adhere one of them onto the visible portion of the pop-mechanism.
Finally – I used a couple of Stampin’ Dimensionals to adhere the bee to the pop-mechanism, making sure that the wings didn’t interfere with the opening and closing of the card. And..that was it for this fun card! 🙂
My Very Vanilla Medium Envelope got the Happy & Heartfelt stamp set “congratulations” sentiment stamped several times in Evening Evergreen on the front…

…and more of the Daffodil Afternoon DSP on the envelope flap.

Et Voila! Look. It looks – and SOUNDS! – hard when it’s written out. I PROMISE it’s not – trust me. If I can make it work, you for sure can! USE the video! 🙂 I love that we can make a totally adorable buzzy bee with the already-pretty-stinkin’-cool Ladybug Builder Punch, don’t you? 🙂 And she’s perched on Medium Daisies and…DAFFODIL AFTERNOON DSP! Yes – I YELLED that! It’s FREE. And GORGEOUS. And you NEED it! 🙂

I hope you like!
If you’d like to recreate this card, all the products and card cuts are listed below!
And…I’ve also created a printable PDF with written instructions and a list of the products used to create this project. You can download, print and/or save it by clicking this image:

Missed any tutorials? You can check out my past projects right here!
TTFN
M

Connect with me! https://campsite.bio/stampsnlingers
HOST CODE FOR 16 JAN – 31 JAN: ABK32SQ6
Use this host code when you order $50 or greater and receive a free gift (AND the Monthly Card Tutorial) from me! If your order is over $150, please do not use this code, but you’ll still get the free gift. The free gift is your choice of any item valued up to $10.00 in any active Catalog! That includes some of the Host Exclusive stamp sets! See my Customer Rewards page for full details.
Note: Make sure that you can see my name on the final checkout page listed as your Demonstrator when you order so that you know that you’re ordering with me and you’ll get my rewards!
You’ll also be getting a link to my ZOOM The Craftroom (an exclusive TWICE-A-WEEK online event for my customers) and the monthly Online Tutorial. The January Tutorial features the Honeybee Home Bundle!


As is the case with ALL our Stampin’ Up! Sale-a-Brations, the January – February Sale-a-bration event has a SHOP, HOST and JOIN promotion! Check it out!
SHOP!

- There are 7 new products (4 stamp sets and 3 paper packs) that are available as free items to choose from with a Level 1 order (free with an order of $50+)
- There are 2 new items (1 stamp set and paper BUNDLE and and an amazing Sentiment set!) that are available as free choices with a Level 2 order (free with an order of $100+).

HOST!

- There’s also a great new host exclusive stamp set called Calming Camelia that you can pick up for FREE with either a personal order of $300+ or a party with sales totaling $300+!

- Drop me an email at stamps-n-lingers@comcast.net if you’re interested in setting up a personal host code for you and your friends to use – when you collect orders to reach the $300 retail point then you’ll get this cool sentiment-only stamp set for FREE! And that’s on TOP of the free Sale-A-Bration picks you’ll have!
JOIN – HERE’S THE BEST PART OF ALL!

- There is an AWESOME joining promotion happening! If you purchase the Starter Kit between January 4 and February 28, you’ll get to pick a TWO FREE stamp sets with your Starter Kit!! All stamp sets except for host exclusive and Sale-a-bration stamp sets are can be picked as your free sets!!
- When you purchase the Starter Kit for $99 + taxes (if applicable) before the end of Sale-a-bration, the kit ships for FREE and you get to pick $125 in Stampin’ Up! merchandise and you’ll get TWO additional FREE stamp sets with your kit! Yay!! Two free stamp sets in addition to $125 in merchandise for $99, yes please!!
If you have any questions about joining, please drop me a note at stamps-n-lingers@comcast.net, I’d love to chat with you!
You can also see additional information on my blog here: https://stampsnlingers.com/join-my-team/ and on my Stampin’ Up! site here: https://stampsnlingers.stampinup.net/join_now

Get the Stampin’ Up! Products Used in this Project:

Price: $0.00


Card Cuts Used in This Project:
Very Vanilla Cardstock: 5 1/2″ x 8 1/2″ (card base, scored and folded at 2 1/8″ and 4 1/4″); 2 3/4″ x 2 3/4″ (inside panel); Medium Daisy Punch flowers (x2)
Basic Black Cardstock: 2″ x 5 3/8″ (x2 – mats for two vertical DSP panels); 2 7/8″ x 2 7/8″ (x2 – “pop” mechanism and mat for inner liner); 2″ x 2″ (x2 – mats for inner liner triangles); 1 7/8″ x 1 7/8″ (x2 – mats for front two DSP squares); Ladybug Builder Punch body
2021-2023 In Color Shimmer Vellum: in Pale Papaya to cut wings using the Ladybug Builder Punch.
Daffodil Afternoon DSP: 1 7/8″ x 5 1/4″ (x2 – two vertical DSP panels); 2 3/4″ x 2 3/4″ (plaid pattern on “pop” mechanism); 1 3/4″ x 1 3/4″ (x2 – green hearts pattern – for inner liner triangles); 1 3/4″ x 1 3/4″ (x2 – striped pattern for two DSP squares on front); 1/4″ x 2″ (x3 – stripes to create bumblebee body); 3″ x 6″ (striped pattern – envelope flap)
If you need any stamping supplies, I’d be very happy to be your Demonstrator. Just click on the Order Stampin’ Up! Online Now button on the right side of the screen to go directly to my online store or drop me an email if you have any questions. Happy Stamping!
Shop the Clearance Rack here. Earn FREE Stampin’ Up! Products – Join my Punkin Head Peppermint Rewards – My online customer thank you program!
Finn Fan Fix

My mans.
Off to do farm-mans stuff.

TTFN
M


 #20 Demonstrator in Sales in the US 2023-2024
 #13 Demonstrator in Leadership in the US 2023-2024
 #21 Demonstrator in Team Building in the US 2023-2024


 KarensCardCorner
 Stamp with Amy K
 Stampin With Shirley G
 Tarabeth Stamps
 TL's Bright Spot
Such a sweet card! Love the fun fold design and that little bee is just way too cute!! 🙂 Two boys off to go play with their toys…
Yep. No – wait. That’s…TOOLS!! You had a typo… 😉 Thanks, Amy! 🙂
Great card! Who’d a thunk to use the Ladybug punch to make a bumblebee? Only Mary. I love the idea. Will have to watch the video later. On the road today to visit daughter.
Thanks Julie – appreciate the vote of confidence – but…I’d seen the bee around on the internet – so…all I did was come up with my own version! Hope you had a great day with your daughter! 🙂
Love, Love, Love this Mary!!!! I’m definitely going to have to make this one. Love the fold and the DSP you used and just everything about it 🙂
Thank you so much, Karen! 🙂
I was so happy to catch your YouTube live yesterday to watch you make this beautiful card…yay! Making a bumble bee from the ladybug stamp was genius! Thank you for sharing your talent with us!
Wish I could take the credit – I’d seen her around the interwebs – just came up with my own version of it! Thanks so watching, Carol! 🙂
Wow, what a gorgeous card! Your mind works on a totally different level than mine!
Hope your mans got a lot done!
Well – they rode around a lot, so…there’s that! Thanks so much, Susan! 🙂