Good morning and welcome to half-way-thru-the-weekend! Our day yesterday was chilly (says Capt Understatement) but sunny! We STILL spent most of the day inside. And that included the Finn – although he did “help” his dad run some things up to the mailbox in the van. Any chance for a ride works for Finny – even if it’s just to the gate and back! 🤷♀️🤷♀️🤷♀️
If you were able to join me for my Facebook Live last night – I appreciate you spending part of your day with me. If not, but you’d like to see the replay, here ’tis on YouTube!
I saw a video the other day from Lisa Freeman – she demonstrated a technique she called Whitewashing – using the Calming Camellia stamp set and some of my favorite colors. I loved how it looked so much that I gave it a go! Take a look-see:

I borrowed the layout idea from the Tuesday Morning Sketches challenge!

I started with a panel of Soft Succulent that forms the basis of my card front. In the two diagonal corners, I stamped the largest floral from the Calming Camellia set in Evening Evergreen ink – remember this is the gorgeous Host Set for Sale-A-Bration – you can see the deets on how YOU can get it for free down below!
Then I used an older Blender Pen – kind of dried out! – to color the flowers (not the leaves!) – using my Whisper White ink. I’d tried a couple of ways of getting my ink – but ended up liking the smoosh-the-acrylic-block-into-the-stamp-pad method the best, with the addition of a few drops of the White Refill to “pull” from”, too. The video shows what I mean! 🙂

I colored both flowers until I was happy – the white fades as it dries, so you might want to add more here and there like I did.
Then I cut the middle of the panel out with the largest of the rectangle dies in the Stitched So Sweetly Die set. I adhered the frame to an Evening Evergreen mat for the card front.

I embossed the cut-out-middle in the Tasteful Textile 3D Embossing Folder and popped it back in place on the card front with Black Stampin’ Dimensionals.
I stamped the large Calming Camellia floral in Evening Evergreen again on Soft Succulent and cut it with the second-to-largest Stitched So Sweetly rectangle (two sizes down from the first die cut) die.
Then I colored the flower with the Blender Pen and Whisper White ink – using a little more of the ink to make this floral a little brighter than the ones on the card front. I adhered the die cut to the card front with Liquid Glue.

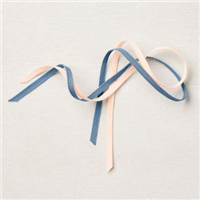
Using a little strip of Stampin’ Seal, I adhered a loose “z” of Petal Pink 1/8″ Cotton Ribbon.
On a piece of Basic White, I stamped the Calming Camellia sentiment in Evening Evergreen and cut it with a Stitched So Sweetly label die.
I popped the sentiment over the ribbon with a few of the Black Stampin’ Dimensionals.

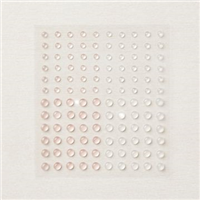
I added some of the light pink Polished Dots – one on the sentiment and a couple out on the card front – and the card front was done.
On the inside, I used my Soft Succulent ink pad and a Sponge Dauber to ink the leaf image from Calming Camellia and stamped it in the corner of a Basic White panel. I added another of the light pink Polished Dots.

I used Liquid Glue to adhere the panel to an Evening Evergreen mat and into my Thick Basic White card base, popped the card front on with Black Stampin’ Dimensionals and the card was done.
My Basic White Medium Envelope got the Soft Succulent Calming Camellia leaf on the front…

…and a little Soft Succulent 2021-2023 In Color 6″ x 6″ DSP on the envelope flap.

Et Voila! Ooooh – I LOVE this coloring technique, don’t you? It is PERFECT with the Calming Camellia set – and I love it in Soft Succulent and Evening Evergreen. But…what other color combinations could you come up with that would be gorgeous? And I bet there are a ton of stamp sets that would ALSO be wonderful with this coloring technique! Like…Hand Penned. Dahlia Days. Flowing Flowers! Pull out your Whisper White ink pad, an acrylic block and one of those old Blender Pens and….get to coloring!

I hope you like!
If you’d like to recreate this card, all the products and card cuts are listed below!
And…I’ve also created a printable PDF with written instructions and a list of the products used to create this project. You can download, print and/or save it by clicking this image:

Missed any tutorials? You can check out my past projects right here!
TTFN
M

Connect with me! https://campsite.bio/stampsnlingers
HOST CODE FOR 16 JAN – 31 JAN: ABK32SQ6
Use this host code when you order $50 or greater and receive a free gift (AND the Monthly Card Tutorial) from me! If your order is over $150, please do not use this code, but you’ll still get the free gift. The free gift is your choice of any item valued up to $10.00 in any active Catalog! That includes some of the Host Exclusive stamp sets! See my Customer Rewards page for full details.
Note: Make sure that you can see my name on the final checkout page listed as your Demonstrator when you order so that you know that you’re ordering with me and you’ll get my rewards!
You’ll also be getting a link to my ZOOM The Craftroom (an exclusive TWICE-A-WEEK online event for my customers) and the monthly Online Tutorial. The January Tutorial features the Honeybee Home Bundle!


STAMP-N-STORAGE SALE THRU 24 JAN 2022!

It’s WEEK 4 of the Stamp-N-Storage 8 Weeks to an Organized Craft Space challenge. And – to help you on your journey to an organized craft space, this week they’re offering a 10% OFF sale on all Ribbon Holders, Ribbon Shelves, Drawer Cabinets and drawer accessories to help you organize those embellishments! For your savings add coupon code 8WEEKS4 during the checkout process.
Sale ends at midnight CST, January 24, 2022 – and it’s on some of my most used favorites! I keep all my 12″ x 12″ DSP in the Drawer Cabinets – I have three of them with 10 drawers each. Add in the 12×12 Paper Sleeves and… you’ve got a winner!
Paper. Inks. Markers. We all have them – and we all need them handy and organized and staying ready-to-go! And, for me – Stamp-N-Storage is the best and highest quality there is!![]()
Don’t forget to use the code: 8WEEKS4 when you checkout, okay??
PLEASE NOTE: I do receive a small affiliate fee when you use my Stamp-n-Storage shopping links. But – you’ve seen plenty of pictures of my stamping space – both at home and when I’ve traveled! – and you KNOW that I am a HUGE fan and love their quality products!! I recommend them to everyone!

As is the case with ALL our Stampin’ Up! Sale-a-Brations, the January – February Sale-a-bration event has a SHOP, HOST and JOIN promotion! Check it out!
SHOP!

- There are 7 new products (4 stamp sets and 3 paper packs) that are available as free items to choose from with a Level 1 order (free with an order of $50+)
- There are 2 new items (1 stamp set and paper BUNDLE and and an amazing Sentiment set!) that are available as free choices with a Level 2 order (free with an order of $100+).

HOST!

- There’s also a great new host exclusive stamp set called Calming Camelia that you can pick up for FREE with either a personal order of $300+ or a party with sales totaling $300+!

- Drop me an email at stamps-n-lingers@comcast.net if you’re interested in setting up a personal host code for you and your friends to use – when you collect orders to reach the $300 retail point then you’ll get this cool sentiment-only stamp set for FREE! And that’s on TOP of the free Sale-A-Bration picks you’ll have!
JOIN – HERE’S THE BEST PART OF ALL!

- There is an AWESOME joining promotion happening! If you purchase the Starter Kit between January 4 and February 28, you’ll get to pick a TWO FREE stamp sets with your Starter Kit!! All stamp sets except for host exclusive and Sale-a-bration stamp sets are can be picked as your free sets!!
- When you purchase the Starter Kit for $99 + taxes (if applicable) before the end of Sale-a-bration, the kit ships for FREE and you get to pick $125 in Stampin’ Up! merchandise and you’ll get TWO additional FREE stamp sets with your kit! Yay!! Two free stamp sets in addition to $125 in merchandise for $99, yes please!!
If you have any questions about joining, please drop me a note at stamps-n-lingers@comcast.net, I’d love to chat with you!
You can also see additional information on my blog here: https://stampsnlingers.com/join-my-team/ and on my Stampin’ Up! site here: https://stampsnlingers.stampinup.net/join_now

Get the Stampin’ Up! Products Used in this Project:


Price: $11.50


Card Cuts Used in This Project:
Thick Basic White Cardstock: 4 1/4″ x 11″ (large card base, scored and folded at 5 1/2″)
Evening Evergreen Cardstock: 4″ x 5 1/4″ (x2 – mats for card front and for inner liner)
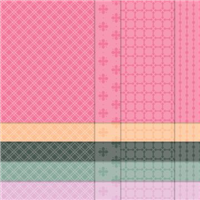
Soft Succulent Cardstock: 3 7/8″ x 5 1/8″ (card front); second-to-the-largest Stitched So Sweetly rectangle die cut (middle panel)
Basic White Cardstock: Stitched So Sweetly label die cut (sentiment); 3 7/8″ x 5 1/8″ (inner liner)
2021-2023 In Color 6″ x 6″ DSP: 3″ x 6″ (envelope flap)
If you need any stamping supplies, I’d be very happy to be your Demonstrator. Just click on the Order Stampin’ Up! Online Now button on the right side of the screen to go directly to my online store or drop me an email if you have any questions. Happy Stamping!
Shop the Clearance Rack here. Earn FREE Stampin’ Up! Products – Join my Punkin Head Peppermint Rewards – My online customer thank you program!
Finn Fan Fix

Last night I was in “his” spot.
Turnabout’s fair play, I guess…

One of these days we’re going to need to have a discussion about who – exactly – has the opposable thumbs in this pack.
TTFN
M


 #20 Demonstrator in Sales in the US 2023-2024
 #13 Demonstrator in Leadership in the US 2023-2024
 #21 Demonstrator in Team Building in the US 2023-2024


 Inky Bee Stampers
 KarensCardCorner
 Stamp with Amy K
 Stamp With Nel
 Stampin With Shirley G
 Tarabeth Stamps
 TL's Bright Spot
I also saw Lisa’s video and I’ve used the white washed technique with Blessings of Home too. I created my sympathy cards this week using three different Cardstocks! The Calming Camellia is a perfect flower for this technique! Your design was lovely! Stay warm! It’s a football weekend with a cozy fire with Meeko!
Oh- I bet they’re gorgeous. And perfect as a sympathy card! Thank you, Kathryn – and you, too! 🙂
Such a pretty card! The whitewash technique is so cool! Love the layering and the colors. 🙂 Yeah, looks like Finn beat you to the best seat in the house fair and square. 😉
He’s fast, for sure! Thank you so much, Amy! 🙂
I’m still marveling at your patience for whitewashing!
I know! But it’s fun to watch the color laydown and pop out the gorgeous flower! Thanks! 🙂
Such a stunning card, Mary. Wishing I had seen your video using the blender pen before I had done this using the chalk marker! Off now to try it your way…
Oh – have fun with this way of doing it! Thank you, Sharon! 🙂
Love your card as is gorgeous——- cannot wait it arrives —-thanks for showing and sharing! Love your news letter full of ideas.
Thanks – have fun with this gorgeous stamp set! 🙂
Jaw dropping gorgeousness! This card is so beautiful and aptly named. Thank you for joining us at Tuesday Morning Sketches.
Thank you very much for the kind words, Melissa – appreciate you stopping by! 🙂
Wow! This is absolutely gorgeous! I’m going to check out this technique right now!!
Thanks for playing along this week at Tuesday Morning Sketches
Debbie – TMS DT
Debbie’s Dash of This and That
Thanks so much, Debbie – it’s a lot of fun! Appreciate you stopping by! 🙂
Another beautiful card. I, too, like monochromatic cards, but sometimes they need just a little….lift? Anyway, the whitewash does it. Love the layers too. And, green is also my FAV.
Thanks – I agree – it’s just enough light! Thanks so much, Julie! 🙂
Just love this card and the White Washed technique! Thanks Mary.
Thank you, Kylie! 🙂