
Good morning, y’all! It’s Thursday – which means it’s time for another Happy Inkin’ Thursday Blog Hop. We’ve got a sketch challenge to work with (my fave!) and I’m excited to see what everyone brings to the table. I just know you’re going to see a ton of awesome-ness on the hop today!
Since we’re just about a month away from the release of the new Sep-Dec 2024 Mini Catalog, I figured it might be a good time for another sneaky peek at the new Winterly Tree Tops stamp set and bundle – and the gorgeous new Nests of Winter DSP with a pretty thank you card. Take a look-see:

And here’s our sketch!

I started by embossing a piece of Copper Clay cardstock in the new Birch 3D Embossing Folder – part of the suite, coming to you on 4 Sept! – and adhered it to the front of a Copper Clay card base with Liquid Glue.

I matted a piece of Nests of Winter DSP on a Shaded Spruce cardstock for the card front.
Next up, I used the third and fourth from largest Deckled Rectangle dies to cut out a Shaded Spruce frame. All I did was place both dies – with the smaller inside the larger die – on a piece of Shaded Spruce cardstock and run it thru the Stampin’ Cut and Emboss Machine.
I adhered the resulting frame to the card front using Liquid Glue.

I used the fourth-from-largest Deckled Rectangle to cut out a Basic White rectangle.
In the corner, I stamped the Winterly Tree Tops sentiment in Copper Clay ink. Then I used Liquid Glue to adhere the panel inside the Shaded Spruce frame.

On a piece of Basic White, I stamped the Winterly Tree Tops swag in Gray Granite ink and cut it out with the coordinating die in the bundled Winterly Tree Tops Die set.
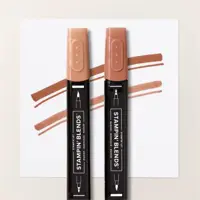
Using the Light Granny Apple Green (pointy leaves), Light Shaded Spruce (other leaves) and Light Copper Clay Stampin’ Blends (berries), I colored the swag. Then I adhered it with Stampin’ Dimensionals.

I tied a simple bow from two lengths of new Natural Tones Linen Thread (oh my – colored Linen Thread?! Yes! And it’s part of the Suite and you can get it on the 4th!). I adhered the bow with a little dab of Liquid Glue.
I added some new Gray Granite Earth Tones Shimmer Gems (available 4 Sept) and the card front was done.
On the inside, I stamped the Winterly Tree Tops swag in Gray Granite on a piece of Basic White cardstock, and colored it as I’d done on the front.

I used Liquid Glue to adhere the panel to a Shaded Spruce mat and into the Copper Clay card base, popped the card front on with Stampin’ Dimensionals and the card was done.
My Basic White Medium Envelope got the Winterly Tree Tops swag on the front…

…and more of the Nests of Winter DSP on the envelope flap.

Et Voila! I feel certain that the Nests of Winter suite – with the DSP and the Winterly Tree Tops bundle – is going to be a massive favorite when it goes live on 4 Sept. I mean – what’s NOT to love?! It’s all stunning!!

I hope you like!
If you’d like to recreate this project, all the products and card cuts you’ll need are down below!
I’ve also created a printable PDF with written instructions and a list of the products used to create this project. You can download, print and/or save it by clicking this image:

Missed any tutorials? You can check out my past projects right here!
Now that you’ve seen my card, take a minute to hop thru all our projects today. If you click on the Next Blog button, you’ll go right to Karen’s page. And you can just click on the names below to go direct to all the blogs!

Mary Deatherage – This is me! 😎
Have fun on the Hop!!
TTFN
M

Connect with me! https://campsite.bio/stampsnlingers
HOST CODE FOR 1 AUG – 15 AUG: HT7SYDP7
Use this host code when you order $50 or greater and receive a free gift (AND the Monthly Card Tutorial) from me! If your order is over $150, please do not use this code, but you’ll still get the free gift. The free gift is your choice of any item valued up to $10.00 in any active Catalog! That includes some of the Host Exclusive stamp sets! See my Customer Rewards page for full details.
Note: Make sure that you can see my name on the final checkout page listed as your Demonstrator when you order so that you know that you’re ordering with me and you’ll get my rewards!
You’ll also be getting a link to my ZOOM The Craftroom (an exclusive TWICE-A-WEEK online event for my customers) and the monthly Online Tutorial – featuring Country Flowers for August orders.


Thursday After Lunch Bunch

I’m planning to go live today on my Stamps-N-Lingers YouTube Channel with a new project for you – whoo-hoo!! We’ll start at our normal time of 1pm Eastern. Come on over and see what I’m up to today! Look forward to seeing you then!
TIME TO START REDEEMING THOSE COUPONS!!

REDEMPTION Period: 1–31 August 2024 (11:59 p.m. (MT)) – that means it starts THIS Thursday, 1 August!
- There’s NO LIMIT to the number of coupon codes you can redeem on an order during the redemption period. You’ll see a box to enter your code(s) during checkout – if you’re redeeming multiple codes, you’ll need to separate them by a space .
- Coupon codes may be redeemed one time only. They cannot be redeemed after the 31 August.
- Coupon codes may be redeemed for any product (excluding Starter Kits). They can’t be used on exchanges.
- Bonus Days coupon codes CAN be applied to month-to-month Paper Pumpkin subscriptions and NEW PREPAID subscriptions!
Here’s a pictorial “How To” for when you’re ready to redeem your coupons!
– Once you’ve entered all your goodies into your cart – click View Cart.
– Step 1 – Enter the Host Code and then Click the little “+” Sign

– Step 2 – Enter your code(s) in the box, separating them with spaces.

– Be sure to hit apply – and then checkout as normal!
REMINDER: Your order total will be the total AFTER the coupon(s) are applied. So..if you’re aiming at an Ordering Gift from me – and extra peppermints! – then that total needs to be $50 or greater!! 😎
PRO-TIP: As you plan out how to spend your coupons, remember that we have a big DSP sale starting on 6 Aug! Just letting you know!

WANT TO JOIN US?
If you’d like to join our team, we’d love to have you! You can become a demonstrator for just $99! We welcome all types of Demonstrators from those only purchasing to get the discount for themselves to those who want to run a business and those anywhere in between! Look at those faces – you KNOW we have a lot of fun! 🙂

When you purchase the Starter Kit for $99 + taxes (if applicable), the kit ships for FREE and you get to pick $125 in Stampin’ Up! merchandise.
Head over to my Join My Team page here to see all the benefits of being a Demonstrator! I’d love to have you on my team and help you get all the discounts, and early goodies, and…ALL THE THINGS! 🙂
If you have any questions about joining, please drop me a note at stamps-n-lingers@comcast.net, I’d love to chat with you!
You can also see additional information on my Stampin’ Up! site here!

Get the Stampin’ Up! Products Used in this Project: You’ll also need the Nests of Winter DSP, Winterly Tree Tops bundle, Natural Tones Linen Thread and Earth Tones Shimmer Gems when they’re available


Card Cuts Used in This Project:
Copper Clay Cardstock: 4 1/4″ x 11″ (card base, scored & folded at 5 1/2″); 4 1/4″ x 5 1/2″ (embossed card front panel)
Shaded Spruce Cardstock: 3 7/8″ x 5 1/8″ (x2 – mat for card front and for inner liner); Deckled Rectangle frame (made with two dies)
Basic White Cardstock: Fourth-from-Largest Deckled Rectangle die cut (sentiment – inside the frame); stamped & die cut Winterly Tree Tops swag; 3 3/4″ x 5″ (inner liner);
Nests of Winter DSP: 3 3/4″ x 5″ (card front); 2 1/4″ x 6″ (envelope flap)
If you need any stamping supplies, I’d be very happy to be your Demonstrator. Just click on the Order Stampin’ Up! Online Now button on the right side of the screen to go directly to my online store or drop me an email if you have any questions. Happy Stamping!
Shop the Clearance Rack here. Earn FREE Stampin’ Up! Products – Join my Punkin Head Peppermint Rewards – My online customer thank you program!
Finn Fan Fix 
No FFFs on Blog Hop Days!
TTFN
M


 #20 Demonstrator in Sales in the US 2023-2024
 #13 Demonstrator in Leadership in the US 2023-2024
 #21 Demonstrator in Team Building in the US 2023-2024


 Inky Bee Stampers
 KarensCardCorner
 Stamp with Amy K
 Stamp With Nel
 Stampin With Shirley G
 Tarabeth Stamps
 TL's Bright Spot
This is so not you, but I like it!!
I know, right?!? LOL! Thanks! 🙂
Such a pretty card! Love the clean design and your layering is perfect! 🙂
Thank you, ma’am! 🙂
Great card n- love this suite!
Thanks, TL! 🙂
Stunning card! I love this suite so much! TFS
Thanks, Tara – it’s one of my faves! 🙂
Beautiful, clean design, Mary! This upcoming set and paper are just gorgeous!
Thanks – yes, it’s going to be a good one! 🙂
Beautiful card! Love the simplicity!
Thanks so much, Akiko! 🙂
Gorgeous card Mary. Love that DSP and your sprigs are just perfect. Love that bow too.
Thanks so much, Karen! 🙂