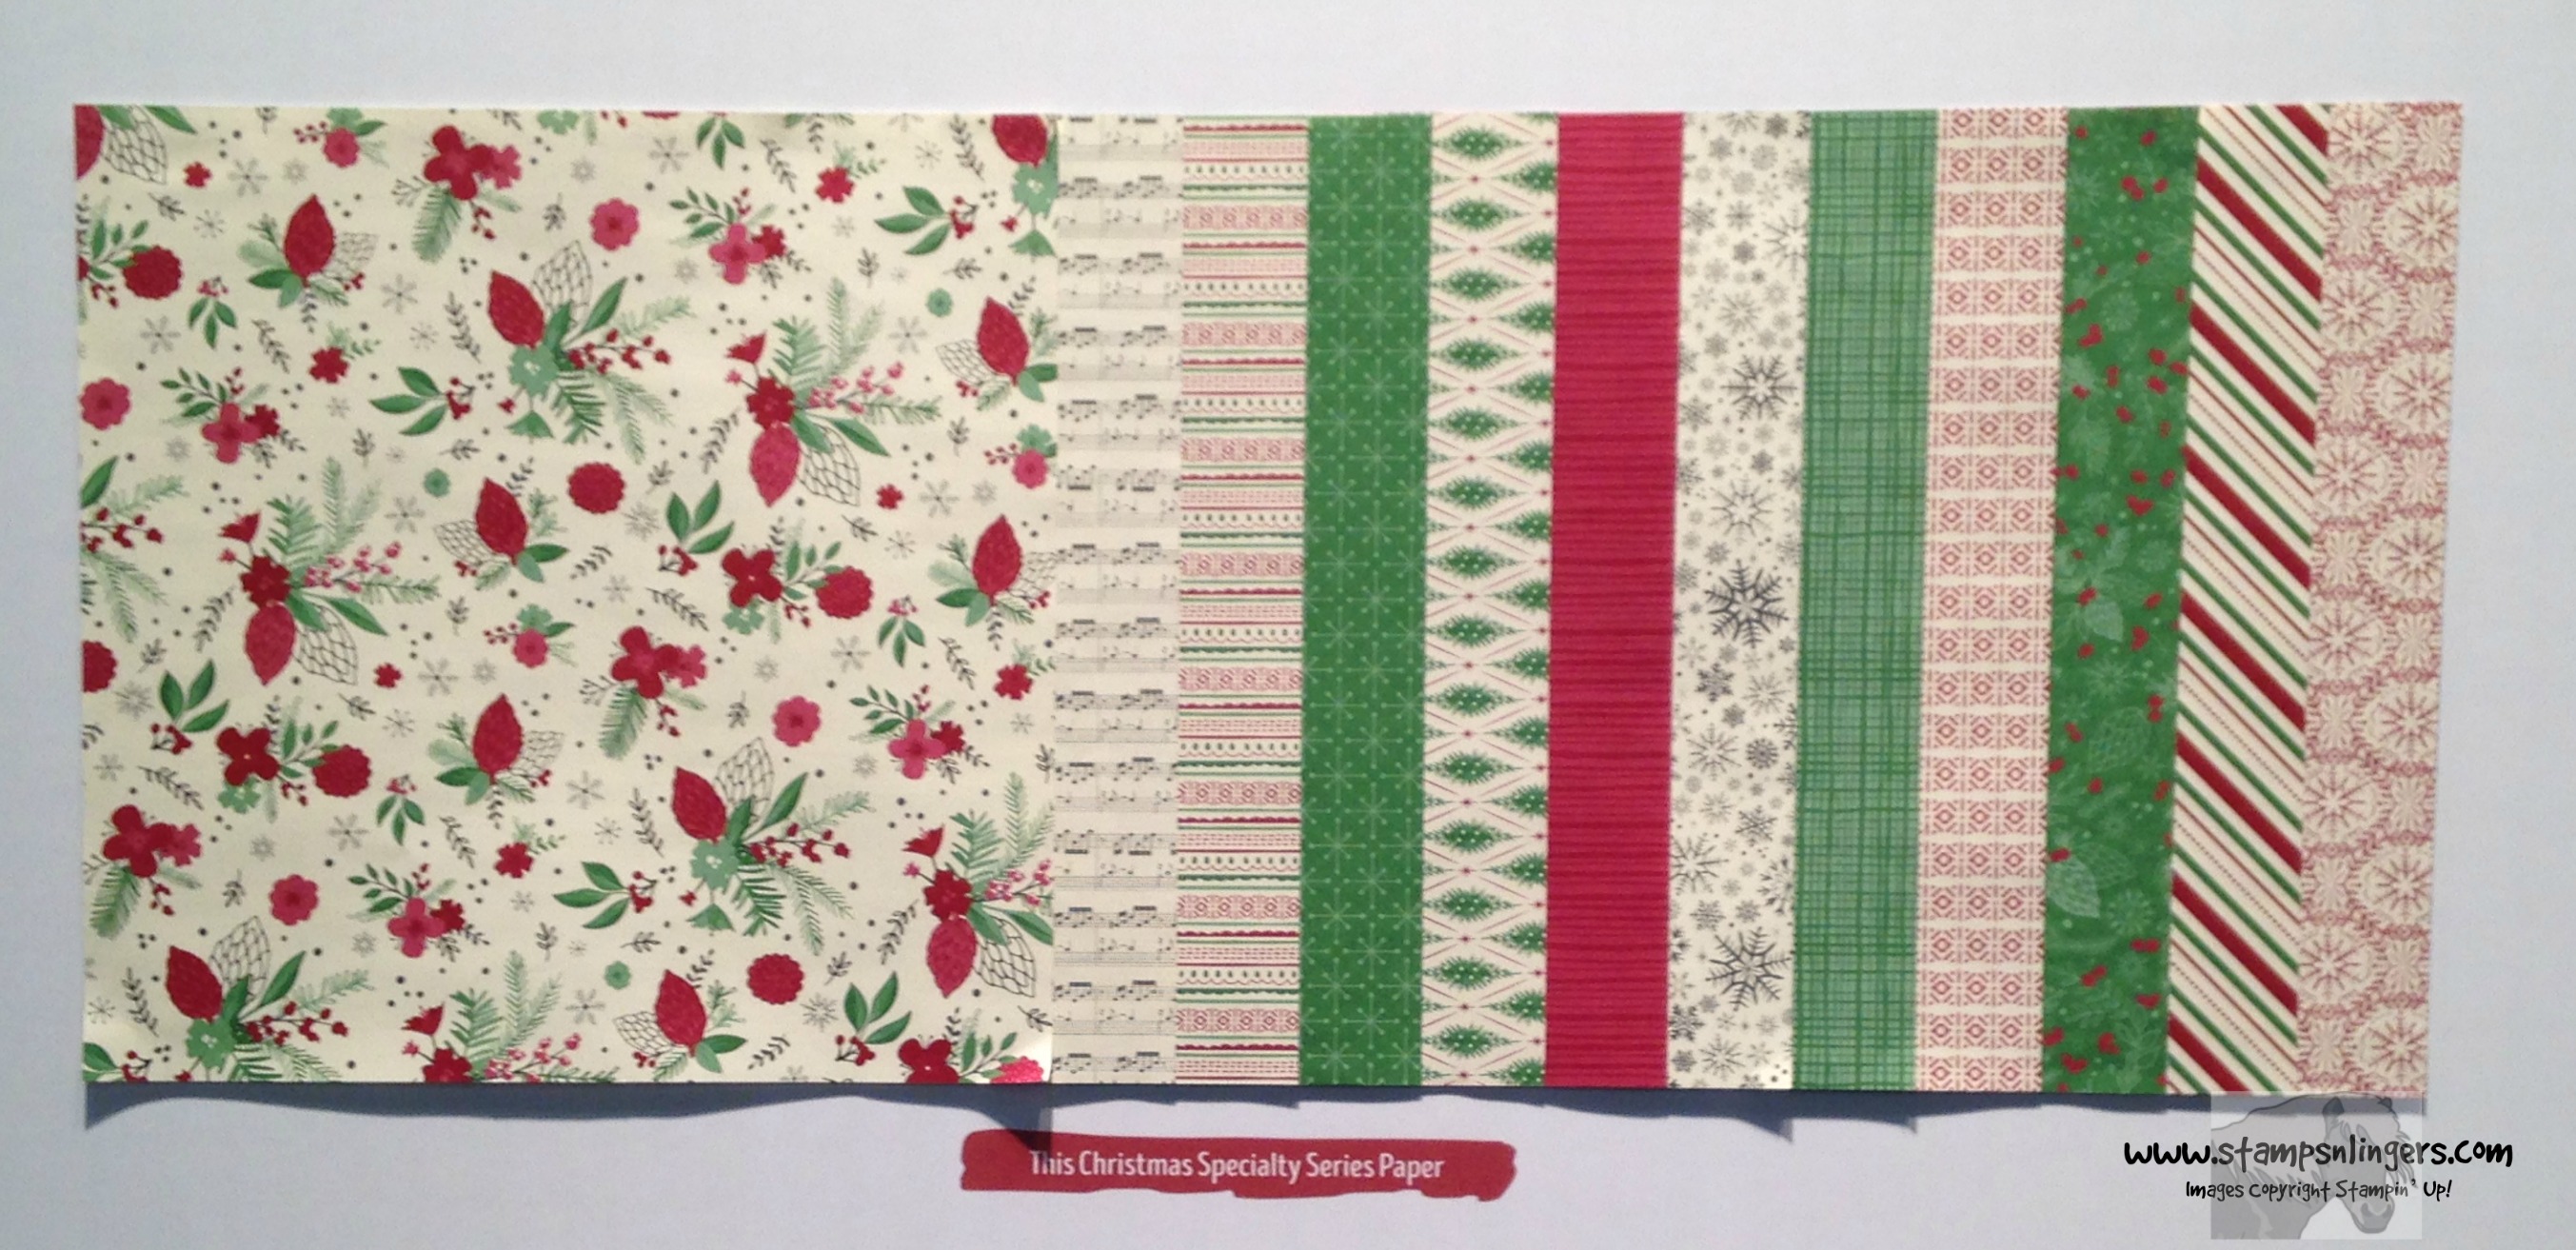
Posts Tagged With: Pretty Pines Thinlits

Stampin’ Up! Christmas Pines Simple Joys for CAS(E) This Sketch

Good morning – again!  This is my second post for the day – if you’re looking for my Happy Stampers Blog Hop card, check it out here!

I was honored and amazed when the talented ladies over at CAS(E) This Sketch asked me to be a Guest Designer for them!  Wow.  That’s kind of a big deal.

I accepted with gratitude – and trepidation!  So, here’s a little life lesson I’ve learned.  When you’re doing something big – like this was for me – you don’t pick this time to think outside of the box.   I mean, yea – there’s a time and a place for getting out of that box, but for me, this wasn’t it!  So, I ran into my wheelhouse, slammed the door behind me and huddled with my back in the corner.  Holding my This Christmas DSP, and the wonderful Christmas Pines bundle in front of me for protection! 🙂

Here’s the sketch they asked me to design to…be sure to head over there and check it out, okay?

cts-192-sketch
And – using the aforementioned protective stamps and thinlits and designer paper – here’s what I came up with.  Take a look-see:

christmas-pines-simple-joys-4-stamps-n-lingers
Continue reading →

Categories: Christmas | Tags: , , , | 12 Comments

Stampin’ Up! Endless Thanks This Christmas Pines!

Happy Saturday, y’all!  Hope you’ve got something fun planned.  My goal – yes, I actually have a goal – is to finish the living room re-arrangement that I started on Friday.

I’ve now officially annexed half of my living room as my craft area.  When Wayne gets home tonight, he’s gonna be….a little surprised. 😉

Now, to be fair, I have a really large living room – so there’s space.  It just doesn’t look like anything you’re likely to see in a design magazine, you know?  And yes – I have an extra bedroom that I could set up in – but…I’m not a fan of being “off in a corner”.  I don’t need quiet to work – I like the television yakking in the background and activity around me.  Keeps me going!

Also – Martha Stewart never comes to visit and it’s my living room.

So…there!

My card for today depends on texture and a fun fold for its interest.  I made a thank you note, using the Endless Thanks stamp set, adding some This Christmas DSP in a fun drapery fold, some Pretty Pines boughs and some texture from the Pine Bough TIEF.  Take a look-see:

endless-thanks-this-christmas-4-stamps-n-lingers
I used a tutorial from the Split Coast Stampers website to make my This Christmas fun fold.  You can check it out right here.

I started by cutting a piece of This Christmas DSP to 7 3/4″ x 3″.  Then I cut the angle, per the tutorial.  I made y’all a template:

drape-fold-template
Make a mark 1 1/2″ down the right side, and 3″ over from the bottom left corner, and use your trimmer to cut from point to point, to create the angle.

Then use your trimmer or Simply Scored Board to score at 3″, 3 1/2″, 5″ and 6 1/8″.  Make an accordion fold – folding the 3″ as a valley and then alternate mountain and valley.  Use a little SNAIL or Fast Fuse to adhere the folds down to the paper.

endless-thanks-this-christmas-1-stamps-n-lingers
I wanted my fold to be card-front sized, so I trimmed the un-folded side to make it be 4″ wide.

For the card front itself, I ran a panel of Garden Green card stock thru my Big Shot in the Pine Bough TIEF.  Then I used SNAIL and Multi-Purpose Liquid Glue to adhere the folded This Christmas DSP to the panel.

I ran a length of Cherry Cobbler 3/8″ Silky Taffeta Ribbon around the panel, topping it with a length of Very Vanilla 1/2″ Lace Trim and securing them both in the back with scotch tape.  Over that, I ran some Linen Thread and Garden Green Baker’s Twine.

endless-thanks-this-christmas-2-stamps-n-lingers
I stamped my Endless Thanks sentiment in Early Espresso in the unembossed portion of the card front.

For my embellishment, I cut a couple of pine boughs with my Pretty Pines Thinlits in Garden Green and Crumb Cake.  I also cut a small “bow” and some berries from Cherry Cobbler.  Then I used Liquid Glue to adhere them to the ribbon…

endless-thanks-this-christmas-8-stamps-n-lingers
The last little touch was to make a bow from Linen Thread and Garden Green Baker’s Twine, capturing a couple of Mini Pinecones as I tied the bow.  I used a Glue Dot to adhere it over top of the card stock bow.  And that was it for the card front!

endless-thanks-this-christmas-3-stamps-n-lingers
On the inside, I took a piece of Very Vanilla card stock and cut two pine boughs from the corner using my Pretty Pines Thinlits.  Then I used SNAIL and Liquid Glue to adhere the panel to my Garden Green mat.  I made sure to get Liquid Glue on each of the little “needles”, to ensure the card stock was thoroughly adhered to the mat.

endless-thanks-this-christmas-5-stamps-n-lingers
I SNAIL the liner into my Crumb Cake card base and added the card front with SNAIL as well, and the card was done!

On my Crumb Cake Medium Envelope, I used the two Very Vanilla pine boughs that I’d cut from the inner liner, and adhered them with Multi-Purpose Liquid Glue to the front…

endless-thanks-this-christmas-6-stamps-n-lingers
…and added some more of the sheet music from This Christmas to the envelope flap.

endless-thanks-this-christmas-7-stamps-n-lingers
Et Voila!  Sorry to keep using this piney set, but… I really love it!  And, I think it really shows that the same bundle can make so very many different kinds of “looks”, don’t you?!  Hope you like! 🙂

Scroll on down for the card cuts and all the goodies you need to make this for yourself!


HOST CODE FOR 16 SEP – 30 SEP: YSUSEQAP

Use this host code when you order and receive a free gift from me! But, if your order is over $150, please don’t use this code (you’ll miss out on your own Stampin’ Rewards if you use it) but you’ll still get the free gift – your choice of any item valued up to $8.00 in the 2015-16 Annual Catalog or the 2016 Holiday Catalog.


You can save 25% on select annual catalog products through from 1 – 21 Sept!  Check out the discounted products for the week of

8 – 14 Sept below.

The sale products will change weekly so check back often – you don’t want to miss out on these great deals!

Click here to go right to them in my Online Store!

8-14-sep-special-offers


CLEARANCE RACK UPDATED!

NEW ITEMS – UP 60% OFF!


You’ll want to check out the Clearance Rack in the Online Store because we’ve updated it with different items that are up to 60% off.

What a deal! Get ’em while they last. 🙂


Have a good Saturday and be thinking strong, positive “organize that house, Mary” thoughts, okay? 🙂

TTFN

Mary


STAMPIN’ UP! PRODUCTS USED IN THIS PROJECT:   

CARD CUTS FOR THIS PROJECT:

Crumb Cake Card Stock: 4 1/4″ x 11″ (card base, scored and fold at 5 1/2″); Pretty Pines die cuts

Garden Green Card Stock:  4 1/8″ x 5 3/8″ (card front and mat for inner liner); Pretty Pines die cuts

Very Vanilla Card Stock: 4″ x 5 1/4″ (inner liner)

Cherry Cobbler Card Stock: Pretty Pines die cuts
This Christmas DSP: 3″ x 7 3/4″ (drapery fold); envelope flap

If you need any stamping supplies, I’d be very happy to be your Demonstrator. Just click on the Order Stampin’ Up! Online Now button on the right side of the screen to go directly to my online store or drop me an email if you have any questions. Happy Stamping!


Shop the Clearance Rack here. Earn FREE Stampin’ Up! Products – Join my Punkin Head Peppermint Rewards – My online customer thank you program!

Categories: Thank You Cards | Tags: , , , , | 16 Comments

Stampin’ Up! Warm & Cheery Holly Jolly Layers

Good morning, y’all!  Yes, it’s true – it’s Friday again!  This week has flown by, hasn’t it?  Not sure why, but…it really has!

I have a new….friend.  Well.  Friend could be an exaggeration, since I’ll likely never see her again.

Meet….Maggie:

little-green-frog
I came across Maggie (named for the Ancho Magnifico peppers she’s cozying up to!) this morning as I picked a peck of non-pickled peppers.  I was able – just barely! – to keep from squealing like a girl (the ponies were watching – there’s an image to uphold, dontcha know?) and just casually greeted her.  And then really watched where I picked next!  She didn’t so much as wiggle!  She’s kinda cute, huh?  Doubt she’ll be there next time – will be off doing whatever frogs do!

My card today channels Outlander.  Do y’all watch that on Starz?  Or – better – have you read the series?  My mom introduced me to Outlander many years ago.  Once I got into that first book – which took me a minute – I read the entire series voraciously!  They.  Are.  Wonderful!  Dianna Gabaldon – the Outlander series.  If you’ve got a Kindle, you can get the entire set on Amazon.

Anywho – card.  A friend asked me what I’d do with the new Mini Tassels.  I hadn’t really figured anything out yet, just sort of figured it would be some kind of Halloween Card.  But when I started making this card….I started to think of the flashes used to hold up kilt hose.  Thus began my card with it’s artistically-licensed kilt-hose-flash!  I used the Holly Jolly Layers host-exclusive stamp set, some Warmth & Cheer DSP, and…a few little surprises.  Take a look-see:

holly-jolly-layers-4-stamps-n-lingers
See the Mini Tassel? 🙂

The card design hails from the Pals Paper Arts design sketch #318:

ppa-318-sketch
This is a square card – so I also made a custom envelope!

The first step was to mat a square of the pretty plaid Warmth & Cheer DSP paper on a double mat of Basic Black and Cherry Cobbler.  

Then I SNAILd that to the front of my 5″ square Whisper White card base.

The sentiment, from Holly Jolly Layers, is stamped on Whisper White in Emerald Envy ink, and cut out with a Circles Layering Framelits die.  I dabbed a little Cherry Cobbler on the berries with my Cherry Cobbler Stampin’ Write Marker.  I used the back of one of the 2015-2017 In Color Doilies, and turned it from White to Black with my Basic Black Stampin’ Write Marker.  I used a little Multi-Purpose Liquid Glue to adhere the sentiment to the doily.

holly-jolly-layers-2-stamps-n-lingers
The next step was to build my flash.  I first heat embossed – in Silver – one of the smaller circle images from the Paisleys & Posies stamp set, and cut it with its matching die in the Paisleys Framelits.  I rounded it up with my stylus on the back of the circle.

Holly Berry Happiness also lent a hand – I stamped a couple of small holly leaves in Versamark on Emerald Envy, heat embossed them in Silver and cut them with the Holly Builder Punch.

The last piece to cut was a short pine bough with my Pretty Pines Thinlits, cut in Silver Foil.

I built the flash with two lengths of 3/8″ Silky Taffeta Ribbon – one each in Cherry Cobbler and Emerald Emvy.  I used my Handheld Stapler to secure them together and some Liquid Glue to add the Silver pine bough and the two holly leaves.  Then a Glue Dot to add the Mini Tassle and a Stampin’ Dimensional for the silver “medallion”.

holly-jolly-layers-8-stamps-n-lingers
I used a Glue Dot to add the flash to the card front, then another Glue Dot to nestle a Mini Pinecone into the decoration.  Finally, I made some “berries” with Cherry Cobbler Enamel Shapes.

I added the sentiment with more Liquid Glue – and the card front was done!

holly-jolly-layers-3-stamps-n-lingers
On the inside, I used a layer stack of Cherry Cobbler, Basic Black and Whisper White, and added a Basic Black-matted strip of the Warmth & Cheer DSP plaid across the bottom.

holly-jolly-layers-5-stamps-n-lingers
I SNAILd it into the card and that was that!

I made a custom sized envelope with a piece of White Envelope Paper (this color is retired now – sorry!).  You can see my Tutorial on how to do this right here.  I used the dimensions for a 5″ x 5″ card on the Envelope Punch Board – plus 1/8″ to accommodate the embellishment on my card – to make a square envelope.  When you add the additional 1/8″, still use the score line measurement that’s on the Punch Board.

I ran a strip of the plaid Warmth & Cheer Designer Washi Tape across the front…

holly-jolly-layers-6-stamps-n-lingers
…and added some more of the Warmth & Cheer plaid paper to the envelope flap!

holly-jolly-layers-7-stamps-n-lingers
Et Voila!  Or….er….Aye!  I may be a Sassenach, but….if you squint your eyes, I think it’s possible that a self-respecting Scottish lad might wear this flash to keep his plaid kilt hose up where they belong.

Maybe… 🙂

Regardless – hope you like!

Scroll on down for the card cuts and all the goodies you need to make this for yourself!


HOST CODE FOR 16 SEP – 30 SEP: YSUSEQAP

Use this host code when you order and receive a free gift from me! But, if your order is over $150, please don’t use this code (you’ll miss out on your own Stampin’ Rewards if you use it) but you’ll still get the free gift – your choice of any item valued up to $8.00 in the 2015-16 Annual Catalog or the 2016 Holiday Catalog.


You can save 25% on select annual catalog products through from 1 – 21 Sept!  Check out the discounted products for the week of

8 – 14 Sept below.

The sale products will change weekly so check back often – you don’t want to miss out on these great deals!

Click here to go right to them in my Online Store!

8-14-sep-special-offers


CLEARANCE RACK UPDATED!

NEW ITEMS – UP 60% OFF!


You’ll want to check out the Clearance Rack in the Online Store because we’ve updated it with different items that are up to 60% off.

What a deal! Get ’em while they last. 🙂


The Holly Jolly Layers stamp set is only available with Stampin’ Rewards – so…you’ll need to host a workshop or place an individual order over $150 in product to get this one!  If you want it – let me help you get it! 🙂

TTFN

Mary


STAMPIN’ UP! PRODUCTS USED IN THIS PROJECT:   

CARD CUTS FOR THIS PROJECT:

Whisper White Card Stock: 5″ x 10″ (card base, scored and fold at 5″); 1 7/8″ circle (sentiment); 4 5/8″ square (inner liner)

Cherry Cobbler Card Stock:  3 1/2″ square (mat for DSP on front); 4 7/8″ square (mat for inner liner)

Basic Black Card Stock: 3 3/8″ square (mat for DSP on front); 4 3/4″ square (mat for inner liner); 3/4″ x 4 3/4″ (mat for inner liner strip)

Warmth & Cheer DSP:  3 1/4″ square (DSP on front); 5/8″ x 4 5/8″ (inner liner strip); envelope flap

Silver Foil:  Pretty Pines bough

Emerald Envy Card Stock: Holly Berry leaves

If you need any stamping supplies, I’d be very happy to be your Demonstrator. Just click on the Order Stampin’ Up! Online Now button on the right side of the screen to go directly to my online store or drop me an email if you have any questions. Happy Stamping!


Shop the Clearance Rack here. Earn FREE Stampin’ Up! Products – Join my Punkin Head Peppermint Rewards – My online customer thank you program!

Categories: Christmas | Tags: , , , | 16 Comments

Stampin’ Up! Vintage Leaves & Pines for the Fall/Halloween Blog Hop

14191940_10210720964928554_1945697424832510820_n

Mornin’, y’all – welcome to another Amy’s Inkin’ Krew Blog Hop. We’re doing a Theme Hop and today celebrates the arrival of Fall and Halloween!  That kind of leaves things wide open, so I’m betting you’ll see all sorts of projects today.   Do take the time to check them all out when you’re done here! 🙂

My ode to Fall has fall leaves – courtesy of Vintage Leaves and the matching Leaflets Framelits – and pine boughs and cones from Christmas Pines and the coordinating Pretty Pines Thinlits.  It gave me a card that really represents Fall at my house!  We’ve got pine trees and oaks and poplars and maples – so we have a good mix of green and fall colors when everything starts to change.  Take a look-see:

vintage-leaves-and-pretty-pines-4-stamps-n-lingers
I based my design on the sketch from Mojo Monday this week.  Sketch #465:

mm-465-sketch
You can see I flipped the sketch upside down…

I started by embossing a Crumb Cake panel in the Woodgrain TIEF and SNAILing it to a Crushed Curry mat.  Over that is a Crumb Cake rectangle embossed in the Petal Burst TIEF.  Before I ran it thru the Big Shot, I inked up the embossing side of the folder with Versamark and then laid my card stock in, and embossed it.  When I pulled it out, I sprinkled Copper Stampin’ Emboss Powder over it and heated it up.  That put Copper in all the spaces between the embossed petals!

vintage-leaves-and-pretty-pines-1-stamps-n-lingers
I rounded the corners with my Project Life Corner Punch and then matted it on a Crushed Curry mat – which had been rounded with the Envelope Punch Board.  I SNAILd that to the card front.

I then wrapped a length of 5/8″ Burlap Ribbon, a length of Rich Razzleberry 3/8″ Ribbon from the Trio Pack in the Holiday Catalog.  Finally, I wrapped some Gold Baker’s Twine around three times – securing it all in the back with scotch tape.

Next came pine boughs, cut with the Pretty Pines Thinlits.  I cut some from Old Olive and some from Always Artichoke, and adhered them with Multi-Purpose Liquid Glue.

vintage-leaves-and-pretty-pines-3-stamps-n-lingers
I made three Vintage Leaves – stamping them in Versamark Ink on Very Vanilla.  Then I sprinkled the two oak leaves with Copper Stampin’ Emboss Powder, and the maple with Gold.  After I heat embossed them, I sponged them with Tangerine Tango, Crushed Curry and Rich Razzelberry inks.  Then I cut them with their matching Leaflets Framelits!  I gathered their stems together, adhering them into the shape I wanted with Liquid Glue and then adhering them over the pine boughs.

I cut a “ribbon” from Rich Razzleberry card stock and adhered it to the top of the leaf cluster.  Then I cut a Pretty Pines pine cone from Copper Foil and added that.  Next came a Mini Pinecone embellishment and a double bow of Gold Baker’s Twine – both adhered with Glue Dots.

vintage-leaves-and-pretty-pines-8-stamps-n-lingers
Finally, I made a sentiment leaf.  I first stamped the leaf in Tangerine Tango (stamped off once) on Very Vanilla and sponged it with some Crushed Curry and Rich Razzleberry.  The sentiment, from Endless Thanks, is stamped in Early Espresso.  I cut it with the matching Leaflets, and nestled it into the leaves with Liquid Glue.

I added three Rich Razzleberry small round Enamel Shapes to the side of the card front, and it was done!

vintage-leaves-and-pretty-pines-2-stamps-n-lingers

On the inside. I stamped the same Vintage Leaves leaf that I’d used for the sentiment in stamped off TWICE Tangerine Tango in the center of a Very Vanilla panel.  I quickly made a sticky note mask and masked the leaf, then I stamped a pine bough cluster from Christmas Pines – the first image is in stamped off TWICE Always Artichoke and the second is in stamped off TWICE Old Olive.  Then I added a second Endless Thanks sentiment in Early Espresso.

vintage-leaves-and-pretty-pines-5-stamps-n-lingers
I cut another – smaller – Pretty Pines ribbon from Rich Razzleberry and adhered it to the panel.  Then I SNAILd it to a Crushed Curry mat and into my Rich Razzleberry card base.  I popped the card front on with Stampin’ Dimensionals and the card was done! 🙂

For my Very Vanilla Medium Envelope, I repeated the stamped off twice leaf and pine boughs – re-using my sticky note mask! – on the front of the envelope, in the exact way I’d done it for the inner liner…

vintage-leaves-and-pretty-pines-6-stamps-n-lingers
…and on the envelope flap, I used the card stock from which I’d cut the Pretty Pines boughs as stencils, and added some Old Olive and Always Artichoke boughs with my Stampin’ Sponges!

vintage-leaves-and-pretty-pines-7-stamps-n-lingers
Et Voila!  This one marries up a couple of my very favoritest bundles – Vintage Leaves and Leaflets and Christmas Pines and Pretty Pines!  Hope you like! 🙂

Scroll on down for the card cuts and all the goodies you need to make this for yourself!

Now that you’ve seen my card, please take a little time to visit all the Amy’s Inkin’ Krew blogs today!

If you click on the Next Blog button, you’ll go right to Linda Geiger’s page. Click Previous Blog to go back to Beth’s page. Or – you can just click on the names below to go direct to all the blogs!

14203207_10210720966648597_3606012235941113516_n14184496_10210720966608596_4506597634058593089_n
Jaime Babarczy
Jari Francis
Beth Hooper
Mary Deatherage – You are Here!
Linda Geiger
Amy Koenders


HOST CODE FOR 1 SEP – 15 SEP: 79MW2XBX 

Use this host code when you order and receive a free gift from me! But, if your order is over $150, please don’t use this code (you’ll miss out on your own Stampin’ Rewards if you use it) but you’ll still get the free gift – your choice of any item valued up to $8.00 in the 2015-16 Annual Catalog or the 2016 Holiday Catalog.


Have fun on the Hop and I’ll see y’all tomorrow!

TTFN

Mary


STAMPIN’ UP! PRODUCTS USED IN THIS PROJECT:     

Glue Dots

$5.25

CARD CUTS FOR THIS PROJECT:

Rich Razzleberry Card Stock: 4 1/4″ x 11″ (card base, scored and fold at 5 1/2″)

Crushed Curry Card Stock: 4 1/8″ x 5 3/8″ (mat for card front);  4″ x 5 1/4″ (mat for inner liner); 2 5/8″ x 3 5/8″ (mat for front embossed panel)

Crumb Cake Card Stock: 4″ x 5 1/4″ (card front); 2 1/2″ x 3 1/2″ (Petal Burst front panel)

Very Vanilla Card Stock: 3 7/8″ x 5 1/8″ (inner panel); Vintage Leaves die cuts

Copper Foil: Pretty Pines pine cone

If you need any stamping supplies, I’d be very happy to be your Demonstrator. Just click on the Order Stampin’ Up! Online Now button on the right side of the screen to go directly to my online store or drop me an email if you have any questions. Happy Stamping!


Shop the Clearance Rack here. Earn FREE Stampin’ Up! Products – Join my Punkin Head Peppermint Rewards – My online customer thank you program!

Categories: Fall, Thank You Cards | Tags: , , , , , | 28 Comments

Stampin’ Up! Seasonal Bells Christmas Wedding

Morning, y’all – Happy Monday!  It is happy, too – cuz I don’t have to work!!

Well – at least not at work work.  I do have to finish the little mess I started yesterday.  Decided to get brutal in the pantry.  Like…if I’d forgotten I had something, it was gone!  Then I happened to notice the cabinets – before I finished the pantry – and sort of went off on a tangent.  My island is wide and has doors on both sides of it.  Unfortunately, it doesn’t have slide out shelves (don’t think they existed in the 70’s….).  So…if you put something at the front of the cabinet – you can see it and even use it.  Put it behind that, though….and it’s lost.  I might even have found the place that socks go when you lose them in the dryer.  Ravioli plate?  Pasta Maker?  Huh.  Extra crock pot crock with no pot?  Yep.

The downside of my sudden end-of-the-contemplation-and-beginning-of-the-implementation is that I ran out of steam before the completion of said implementation.

So I have a kitchen full of stuff that needs to make it’s way to the van.  And I ran out of boxes.

Which means that’s on the agenda for today.  Bleh…. 🙁

But, let’s talk about something fun – like my card for today, shall we?  I made a Christmas Wedding card.  My parents were married at Christmas and I always thought that would be a cool time of year to get married.  With the church all decorated for Christmas.  Beautiful!

So making a card for a Christmas wedding seemed like a really good idea.  I used the new Seasonal Bells – which has both Christmas and Wedding sentiments!  And I added a great sentiment from the Floral Phrases stamp set.  Take a look-see:

Seasonal Bells Christmas Wedding 4 - Stamps-N-Lingers
Continue reading →

Categories: Wedding | Tags: , , , , | 7 Comments

Stampin’ Up! Sneak Peek – Wonder of Christmas for the Happy Stampers Blog Hop

HappyStampersBlogPostBanner-2
Mornin’, y’all –  welcome to another edition of the Happy Stampers Blog Hop. We have a color challenge this week – and it’s a good one. I know it stretched my creativity!  I’m bettin’ all the ladies in the group will have come up with spectacular projects, so be sure to check them all out when you get done here! And we have a new blog hopper with us today – say hey to Jaime Babarczy! 🙂

First off, here are the colors we worked with:

13895519_1495511853808718_7114146217455333470_n
So – a little background on our blog hop.  We all get to see all the challenges well in advance.  Which means we should never be behind.

Well, if you know me, you know that just ain’t the case, don’t you!?  We’re supposed to provide our blog post links to all the hoppers on Tuesday of each week – by 9am Eastern, to be exact.  That’s to let everyone have all the time they need to get their projects done and their posts written.  For all the smart ones in our group who don’t wait until the night before to do their posts. (not me….)

It probably won’t surprise you to know that I’m chronically late with my link.

Were you sitting down? 😉

So this week, a minor miracle occured and I actually got my shiitake together earlier on Tuesday than I normally do.  I sat down and tried to figure out what I’d do for Thursday’s blog hop.  I was so early (early is relative!) that I even pulled out a few stamp sets and started making a card.  Versus my normal – find a stamp set, come up with a really blurry “vision” of what I could do, and then build my link.

I think I’ve also told you that a lot of my cards don’t end up like I first think they’re going to – right?  Well…here’s the first draft I did on Tuesday morning – I took it far enough to convince myself that this Wonder of Christmas stamp set and I could come to an agreement and make this color scheme work.

Wonder of Christmas Pines draft - Stamps-N-Lingers
So on Wednesday, when I pulled up to my crafting table to make my card – that’s what I started with.  Here’s where I ended up – take a look-see:

Wonder of Christmas Pines 4 - Stamps-N-LingersAlmost exactly the same, huh? 😉

Even while I was building this one, the design was sort of evolving in my head.  Until about half way thru, I saw how it was going to look finished – and knew it would end up being one of my favorites!

I started by heat embossing the Wonder of Christmas angel in Copper Stampin’ Emboss Powder on Crumb Cake card stock.  I colored her dress and shoes in Bermuda Bay in with my Blender Pen.  Then I brushed her dress and her wings with my Clear Wink of Stella.  Once I was happy with the coloring, I fussy cut her and set her aside to await her cue.

Wonder of Christmas Pines 8 - Stamps-N-Lingers
The card front began with a piece of the new This Christmas DSP (annual catalog).  I cut it a little bigger than I needed and tore it down to size.  Then I flicked the edges with Old Olive on a sponge.  To age the paper a bit, I lightly sponged the entire piece with Crumb Cake.  Then I SNAILd it to my Crumb Cake card base.

I cut out several Old Olive pine boughs, using my Perfect Pines Thinlits, and a few Bermuda Bay berries and leaves.  Then I dry fit everything onto my card front.

And took a picture so I could re-create it!
Wonder of Christmas Pines in progress 1 - Stamps-N-Lingers
How many of you out there remember when we didn’t have cell phones at all, let alone ones with cameras?  I do – but it’s like a distant nightmare.  I can’t even imagine not having a cell phone anymore.  Remember pay phones?  That only took coins (not credit cards)?!? My gosh – it was like making fire with sticks!! 🙂

So then I used Multi-Purpose Liquid Glue to adhere all my pieces onto the This Christmas paper.  See?  Perfect match!

Wonder of Christmas Pines in progress 2 - Stamps-N-Lingers
After that, it was just a matter of adding my layers.  I used two lengths of 5/8″ Burlap Ribbon, adhering them with Liquid Glue.  Over that I wound some Copper Metallic Thread, using Glue Dots to keep the loops in place.  Finally, I stuck my Wonder of Christmas angel on with a combination of Stampin’ Dimensionals and Liquid Glue.

Wonder of Christmas Pines 2 - Stamps-N-Lingers
And that was it for the card front!

On the inside, I tore another piece of This Christmas DSP down to size and repeated the Old Olive and Crumb Cake sponging.  Over that, I placed a piece of torn and lightly sponged Very Vanilla card stock.  The sentiment, from Wonder of Christmas, is stamped in Old Olive.

Wonder of Christmas Pines 5 - Stamps-N-Lingers

I adhered a couple more Pretty Pines die cuts in Old Olive and Bermuda Bay in the bottom corner, and that was it for the card!

Wonder of Christmas Pines 1 - Stamps-N-Lingers
On the front of my Crumb Cake Medium Envelope, I used the Pretty Pines die cut negatives as a stencil to sponge a couple of Old Olive pine boughs and a Bermuda Bay berry.  Then I adhered a Bermuda Bay die cut bow on top, trimming the excess with my snips…

Wonder of Christmas Pines 6 - Stamps-N-Lingers…and I used a little more of the Crumb Cake-sponged sheet music design from the This Christmas DSP to add a custom envelope flap cover.

Wonder of Christmas Pines 7 - Stamps-N-Lingers
Et Voila!  My final result barely resembles my first draft of Tuesday morning, but I’m a lot happier with this version.  Hope you like!

Card cuts and all the products you need to make this one for yourself are at the bottom of this post…

Now that you’ve seen my card, please take a little time to visit all the Happy Stampers Team blogs today!

If you click on the Next Blog button, you’ll go right to Jari Francis’ page.  And you can just click on the names below to go direct to all the blogs!

12019754_1268896343136938_4462270423043879238_n

Amy Koenders

Shelagh Freemantle

Mary Deatherage – YOU ARE HERE!

Jari Francis

Kristi Gray

Jaime Babarczy

Have fun on the Hop!

TTFN

Mary


HOST CODE FOR 15 AUG – 31 AUG: 2WGEWYF6

Use this host code when you order and receive a free gift from me! But, if your order is over $150, please don’t use this code (you’ll miss out on your own Stampin’ Rewards if you use it) but you’ll still get the free gift. The free gift is your choice of any item valued up to $8.00 in the brand new 2016-17 Annual Catalog.


It’s time to start using those Stampin’ Up! Bonus Days Coupons that you earned in July!  The coupons are valid on any type of order from now through the end of August.  Check my Stampin’ Up! Promotions page for more details! 🙂


Paper Pumpkin BOGO

Offer Dates: August 11–October 10, 2016

When you use promo code “BOGO” at PaperPumpkin.com, you’ll pay the regular price of $19.95 USD/$26.95 CAD and get your second month for FREE!  

If you subscribe with the promo code between now and September 10, you will pay full price for the September kit and get the October kit free. If you subscribe between September 11 and October 10, your first kit will be the October kit and you’ll get the November kit free!  Get all the details over on my Stampin’ Up! Promotions page.


STAMPIN’ UP! PRODUCTS USED IN TODAY’S PROJECT

Almost there, folks – and you’ll get to see things like the Wonder of Christmas and the Pretty Pines Thinlits! 


CARD CUTS USED IN TODAY’S PROJECT:

Crumb Cake Card Stock: 4 1/4″ x 11″ (card base, scored and folded at 5 1/2″); Wonder of Christmas angel

Very Vanilla Card Stock: 3 3/8″ x 4 1/2″ (inner liner)

This Christmas DSP:   3 3/4″ x 4 5/8″ (card front); 3 7/8″x 4 7/8″ (mat for inner liner); envelope flap

Old Olive Card Stock: Perfect Pines die cuts

Bermuda Bay Card Stock: Perfect Pines die cuts


If you need any stamping supplies, I’d be very happy to be your Demonstrator. Just click on the Order Stampin’ Up! Online Now button on the right side of the screen to go directly to my online store or drop me an email if you have any questions. Happy Stamping!


Shop the Clearance Rack here. Earn FREE Stampin’ Up! Products – Join my Punkin Head Peppermint Rewards – My online customer thank you program!


Categories: Christmas | Tags: , , , | 20 Comments

Stampin’ Up! Vintage Leaves, Pines and Paisleys for Thanksgiving!

Made it to another weekend – my, how time does seem to fly!  Is it because I’m getting older…or is it because I have company coming in 27 days?  Or…what do y’all think?  I mean, seriously – it feels like I’m gonna blink and it’s going to be Christmas!

In 2025!! 🙂  Sheesh.

So today’s card is probably going to annoy you guys a little – cuz I called on my new favoritest stamp and Thinlit set – the Christmas Pines bundle from the 2016 Holiday catalog.  I can’t help it very much, y’all – I just flat love this set.  So…I’m gonna use it!  I did combine it with another great set – the Vintage Leaves stamp set and Leaflets Framelits.  And, once again, the new Paisleys & Posies stepped in to give me a sentiment.  Take a look-see:

Vintage Leaves, Pines and Paisleys 5 - Stamps-N-Lingers
Continue reading →

Categories: Thanksgiving | Tags: , , , , , , | 14 Comments

Stampin’ Up! Christmas Pines for a Merry Medley!

It’s….. say it with me!…..HAWWWWMP Day!!!  And I have a Duck-Duck update.  The update is that…there is no update!  Yes, it’s true.  

There’s been not a word.

Not a cackle.

Not a cluck or a chuckle.

Not a Twitter nor a tweet.

She doesn’t write.  She doesn’t call.  She unfriended me on Facebook.  I think she filed for emancipation.

We’ve been totally abandoned.

Ahhh-goose….fickle is thy name.

Sorry, folks – guess the stories about Duck-Duck’s eccentricities are lost and gone forever, dreadful sorry….Clementine…

Whoops – segued into a song there for a second! 🙂

So, on to the card.  It’s another 2016 Holiday Catalog sneak peek – this time you get to see the fun Merry Medley background stamp…

Merry Medley - Stamps-N-Lingers
…and some more of the Christmas Pines bundle.

Christmas Pines Bundle - Stamps-N-Lingers
When I combined them with some Presents & Pinecones DSP and added one Swirly Scribble die cut, here’s what I came up with.  Take a look-see:

Christmas Pines Merry Medley 4 - Stamps-N-Lingers
Continue reading →

Categories: Christmas | Tags: , , , , , | 10 Comments

Stampin’ Up! Blessed by Pines and Paisleys

Good morning, y’all!  Hope you’re enjoying your weekend – we’re in huddle-in-the-house-cuz-it’s-sweltering-outside mode.  Still.  Not again – cuz it hasn’t abated at any point.  So…still.  And I am oh-so-ready for Fall!  This morning, when I stepped out to go feed, I swore – swore! – that I felt just a little tinge of cool underneath the humidity.

I was wrong.  Or if I was right, I was only right for like…2 minutes.  By the time I was done, I was dripping sweat in my usual oh-so-delicate and feminine way.

Now there’s a mind picture you can’t get rid of – sorry!

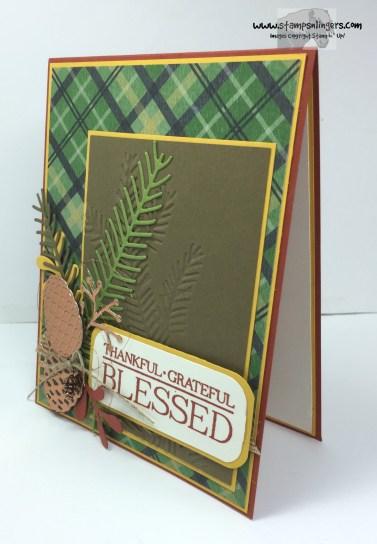
So, now that I’ve put you off your breakfast, let’s take a gander at my card.  My new 2016 Holiday Catalog goodies calling my name, demanding to be used.  It was hard to pick one, but in the end, I went with my heart.  As I foresaw yesterday, I used the brand-new Christmas Pines Bundle and the Pine Bough TIEF.  I added a little touch from the Paisleys & Posies stamp set.  And I even grabbed some paper from the Warmth & Cheer DSP Stack.    But my goal was to not make a Christmas card.  Take a look-see:

PInes and Paisley Blessed 4 - Stamps-N-Lingers
Well?  Does it scream Christmas?  I don’t think so, but…I could be biased.

This layout comes from the sketch challenge #248 at Freshly Made Sketches.

FMS248 Sketch

I started by finding a design from the Warmth & Cheer DSP Stack.  It looks a lot like an unfortunate pair of pants – slacks! – I think I wore in high school.  It definitely doesn’t work as pants – but it works quite well on a card!  Especially when matted on some Crushed Curry.

The middle panel is a piece of Soft Suede card stock, that I ran thru the brand new Pine Bough TIEF.  I mounted it, with the de-bossed side showing, on Crushed Curry as well – then SNAILd it to the card front.

Pines and Paisley Blessed 1 - Stamps-N-Lingers
My sentiment is from the new Paisleys & Posies stamp set – stamped in Cajun Craze on Very Vanilla.  I rounded the corners with the Project Life Corner Punch and matted it on Crushed Curry – with those corners rounded using my Envelope Punch Board.

Then I started to create my pine cone arrangement.  If you’ve been following me at all – you know I like to fussy cut!  But on this one, no fussy cutting was involved – this is all the Pretty Pines Thinlits!

I cut some pine cones – the detailed pieces and the backs from Copper Foil Sheets and some Chocolate Chip card stock.  Take a look at how cool they are!

Pines and Paisley Blessed 8 - Stamps-N-Lingers
They really do a number with the Copper Foil, don’t they?  That bottom pine cone is two-piece – the top is Copper Foil and the bottom is Chocolate Chip – both are cut with the Thinlits.  I also cut a few pine boughs from some Old Olive and Soft Suede.  And a few…berries?…from Crushed Curry and Cajun Craze.

To build the arrangement, I used a little Multi-Purpose Liquid Glue to lay down a length of the 5/8″ Burlap Ribbon.  I used a couple of Glue Dots and wound a few loops of Copper Metallic Thread.  Then I started to adhere the elements I’d cut, using Liquid Glue.  When I got to that last cone, I popped it on with Stampin’ Dimensionals.

Pines and Paisley Blessed 2 - Stamps-N-Lingers
I popped my sentiment on with some Stampin’ Dimensionals – nestling it into the pine cones and boughs.  For a final touch, I tied a length of Linen Thread onto a new Mini Pinecone and made a little bow, which I adhered with a Glue Dot.  And that was it for the card front.

On the inside, I added a second sentiment from Paisleys & Posies in Cajun Craze to a Very Vanilla panel.  Then I adhered another couple of pine boughs and a third pine cone.  And I added a little bow – cut from Cajun Craze with the die in the Pretty Pines Thinlits.

Pines and Paisley Blessed 5 - Stamps-N-Lingers
I SNAILd the panel to a Crushed Curry mat and into a Cajun Craze card base.  I also SNAILd the card front on – there’s plenty of thickness already!  And that was it for the card.
Pines and Paisley Blessed 3 - Stamps-N-Lingers
On my Very Vanilla Medium Envelope, I stamped one of the pine bough images from Christmas Pines.  This is a two-step image.  I stamped the first step in Old Olive that I’d stamped off once, and the second step in full strength Old Olive.  I added a two step pine cone – the first step in stamped-off-once Soft Suede and the second step in full strength Soft Suede.  Then I added a couple of Enamel Shapes in Cajun Craze and Crushed Curry…

Pines and Paisley Blessed 6 - Stamps-N-Lingers
…and I gave the envelope flap a custom look with some more of the Warmth & Cheer DSP stack paper.

Pines and Paisley Blessed 7 - Stamps-N-Lingers
Et Voila!  Who says pine cones have to be for Christmas?  I don’t think so – I think they’re year-round decor! I hope you like this card as much as I do!

Scroll on down for the card cuts and all the goodies you need to make this for yourself! 


HOST CODE FOR 1 AUG – 15 AUG:  2WGEWYF6 

Use this host code when you order and receive a free gift from me! But, if your order is over $150, please don’t use this code (you’ll miss out on your own Stampin’ Rewards if you use it) but you’ll still get the free gift – your choice of any item valued up to $8.00 in the 2015-16 Annual Catalog.


STAMPS-N-LINGERS 2016 HOLIDAY CATALOG SHARES

Catalog shares are a great way to get a sampling of all the new papers, ribbons and embellishments in a new Stampin’ Up! catalog.  I’ve got several options for you – check out the listing here – or head over to the 2016 Holiday Catalog Shares page to see all the new products in the shares, and to get signed up.  Deadline to get your name on my list is 28 Aug!

New Designer Series Paper Shares – $16 plus $6 for Priority Mail shipping

You’ll receive 56 6″ x 6″ sheets of designer paper!

12 total – Halloween Night Specialty DSP (2 6×6 sheet of 5 two-sided designs plus 2 sheets of one-sided Silver Foil designs)
6 total – Candy Cane Lane DSP (1 6×6 sheet of each of 6 two-sided designs)
12 total – Petals & Paisley Specialty DSP  (2 6×6 sheets of 5 designs plus 2 sheets of one sided Copper Foil designs)
2 total – Copper Foil Sheets (2 sheets)
6 total – Presents & Pine Cones DSP  (1 6×6 sheet of each of 6 two-sided designs)
6 total – Fancy Frost Specialty DSP (1 6×6 sheet of each of 6 one-sided designs)
12 total – Warmth & Cheer DSP Stack (1 6×6 sheet of each of 12 two-sided patterns)

New Ribbon and Embellishment Share – $23 plus $6 for Priority Mail shipping

You’ll receive 46 yards of new ribbon and trim, and 51 embellishments (treat bags, treat boxes, Christmas trinkets, pinecones, bells and enamel shapes!)

10 yds total – Candy Cane Lane Baker’s Twine – 1 Real Red and 1 Whisper White with red metallic thread (5 yds of each color)
1 yd total – Real Red 3/4″ Stitched Edge Ribbon (1 yd)
3 yds total – Kraft Rope Trim (3 yds)
15 yds total – Baker’s Twine Tri Pack – Cherry Cobbler, Garden Green and Gold (5 yds of each color)
2 yds total – 3/8″ Silky Taffeta Ribbon – Cherry Cobbler and Emerald Envy (1 yd of each color)
2 yds total – 3/8″ Glitter Ribbon – Sweet Sugarplum and Silver (1 yd of each color)
3 yds total – 3/8″ Ribbon Trio – , Mint Macaron, Delightful Dijon and Rich Razzleberry (1 yd of each color)
10 yds total – Halloween Nights Baker’s Twine – Basic Black Twisted with Basic Gray and Pumpkin Pie (5 yds of each color)
8 total – Mini Pinecones (8 pinecones)
6 total – Christmas Trinkets Embellishments – Gingerbread Man, Bells, Holly Sprig (2 each of 3 designs)
20 total – Mini Jingle Bells – Red and Silver (10 of each color)
12 total – Halloween Night Enamel Dots – Old Olive, Perfect Plum and Pumpkin Pie (4 of each color – in two sizes of dots)
4 total – Mini Tassels – Basic Black and Silver (2 of each color)
2 total – 6″ x 17″ Gusseted Cello Bags – 2 bags
1 total – White Gift Boxes – 1 Box

Want it all? $39 plus $6 for Priority Shipping

You’ll get shares of all of the new Designer Series Papers, Designer Series Paper Stacks, ribbons and embellishments.

And if you’d like double shares of either the designer paper or ribbon, that’s fine too.  I’ll cut the designer paper sheets into 6×12 so that you’ll be able to get 3 full A2 size card fronts from each sheet (except for the Warmth & Cheer DSP Stack, you’ll get double sheets of that since it’s already precut at 6″x6″!).

Anyone is welcome to join in my share (please note, I can only ship to addresses within the US). If you’d like to join us, either complete the form below or email the following information to stamps-n-lingers@comcast.net

Go to my 2016 Holiday Catalog Shares page – here – to see all the goodies and get signed up!  Deadline to get on the list is 28 Aug!


It’s Time to Start Spending Your Bonus Days Coupons!

It’s time to start using those Stampin’ Up! Bonus Days Coupons that you earned in July!  The coupons are valid on any type of order from now through the end of August.  Here are the details:

  • There’s no limit on the number of coupons you can use on an order during redemption.
  • Bonus Days coupons codes can be used in the checkout process during the redemption period.
  • All order types qualify for this promotion.  Coupons can be redeemed on any order type.
  • Bonus Days coupon codes can be redeemed for any product, excluding Starter Kits and Paper Pumpkin subscriptions.  New prepaid Paper Pumpkin codes can be redeemed.
  • During the redemption period, shipping and tax will be calculated based on your order total after your coupon codes have been applied.
  • Coupon codes may only be redeemed once. Codes are redeemed when an order is closed using the codes. If a closed order using a code (or multiple codes) is cancelled, the coupon code(s) cannot be “un-redeemed” for use on a new order.

Dates:

Redemption period: August 2–31, 2016

Redemption Deadlines:  August 31, 2016 by 11:50 PM (MT)

Here’s how to redeem your coupons in my Online Store when your order!

2016 Tax Free shopping logo
There are 12 US states having state sales tax holidays for school supplies. What does that mean for you? Stampin’ Up! products that fall under that category will be tax free for a limited time! If you live in one of the lucky states, make sure to take advantage of the holiday!

You can click on the picture below or check out this PDF to see which states are offering the holiday and relevant information for each state including holiday dates, products that qualify, and dollar limits per item.US Tax Free Chart for 2016
You must place your order with Stampin’ Up! during the tax holiday period in order to receive these items tax-free (midnight on the first day to 11:59 PM on the last day of the tax holiday).
Keep in mind that this is a state sales tax holiday and may not apply to additional county, city, and special jurisdiction taxes. Lastly, Massachusetts normally participates in this holiday but they are not participating this year.

ALABAMA, ARKASAS, FLORIDA, LOUSIANA, NEW MEXICO, OHIO, SOUTH CAROLINA, TEXAS AND VIRGINIA

– YOUR TURN IS THIS WEEKEND! 


Have a wonderful Sunday and I’ll see you tomorrow!

TTFN

Mary


STAMPIN’ UP! PRODUCTS USED IN THIS PROJECT:      

Can’t show you the Christmas Pines Bundle, Paisleys & Posies, Warmth & Cheer DSP Stack, Copper Foil or Mini Pinecones here yet – September! 🙂 

Product List

CARD CUTS FOR THIS PROJECT:

Cajun Craze Card Stock: 4 1/4″ x 11″ (card base, scored and folded at 5 1/2″)

Crushed Curry Card Stock: 4 1/8″ x 5 3/8″  (mats for card front and for inner liner);  3″ x 4 1/4″ (mat for Soft Suede panel); 1 1/4″ x 2 3/4″ (mat for sentiment)

Soft Suede Card Stock: 2 7/8″ x 4 1/8″ (front embossed panel)

Warmth & Cheer DSP Stack: 4″ x 5 1/4″ (card front); envelope flap

Very Vanilla Card Stock:  1 1/8″ x 2 5/8″ (sentiment); 4″ x 5 1/4″ (inner liner)

If you need any stamping supplies, I’d be very happy to be your Demonstrator. Just click on the Order Stampin’ Up! Online Now button on the right side of the screen to go directly to my online store or drop me an email if you have any questions. Happy Stamping!

Shop the Clearance Rack here. Earn FREE Stampin’ Up! Products – Join my Punkin Head Peppermint Rewards – My online customer thank you program!

Categories: Friendship, Thanksgiving | Tags: , , , | 18 Comments

Powered by WordPress.com.