Happy Friday, y’all – when you read this, I’ll probably be on my way back to Utah.
Or not. My jet lag has jet lag – I have no idea what time it’ll be anywhere I’m at today, so…you know what I mean! When next you hear from me, it’ll be from Utah!
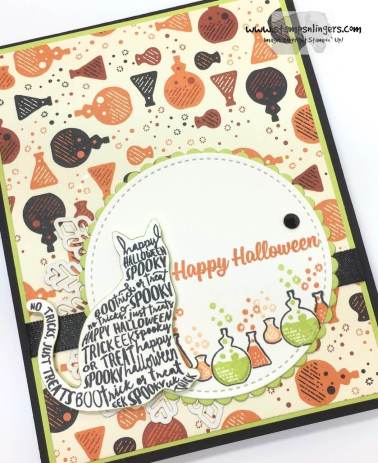
My card today uses an all-time favorite, the Painted Harvest stamp set, and I played with the Eclipse technique. A couple of die cuts from the Patterned Pumpkin set and a few Cat Punches lent a hand. Take a look-see:
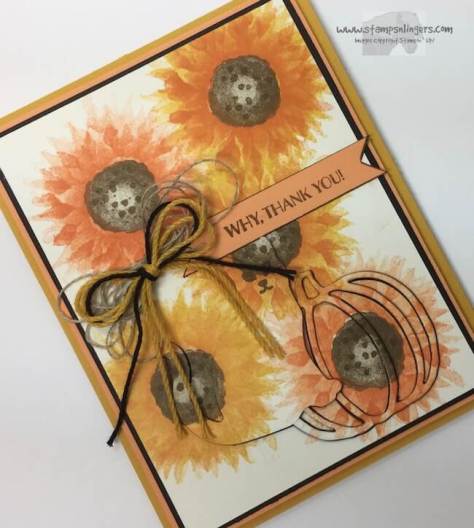
I started with a piece of Very Vanilla card stock and, using the two-step flower image from Painted Harvest, stamped several flowers all across the panel. I used three colors for the petals – Crushed Curry, Peekaboo Peach and Pumpkin Pie. There wasn’t a lot of rhyme or reason behind the color combinations – I just played with the colors.
It’s not like there are any rules – just mix these three colors – two per flower. Stamp each image a couple three times – rotating the image a little for each stamp. And you’ll be a flower-making rock star!! Promise!

For the middles, I used Early Espresso – and stamped the large middle twice per flower, rotating with each stamp. And then I added some little dots – also in Early Espresso – to each flower.
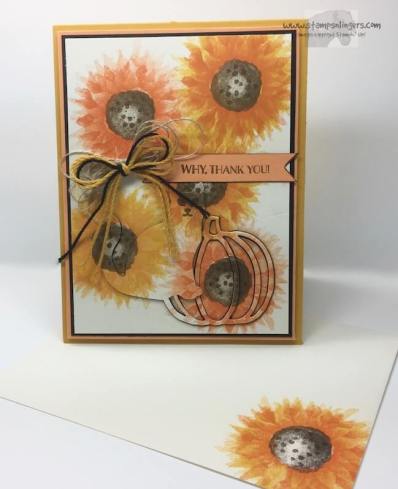
I used the Cat Punch and cut him from the bottom of the panel – and added some eyes in Early Espresso from the Spooky Cat stamp set. Then I cut four more of him from Early Espresso and stacked them all together with Liquid Glue.
Next, I ran the panel thru the Big Shot with the large pumpkin die from the Patterned Pumpkins Thinlits laid on the panel – and slightly overlapping the cut-out cat. I made sure to keep track of the cut out-middle pieces.

Then I cut three more of the pumpkins from Early Espresso – and stacked them all up with Liquid Glue.
I Fast Fuse’d the panel to an Early Espresso and Peekaboo Peach mat and used more Liquid Glue to adhere the stacked pumpkin back into its negative space. Then I added the single-layer of the cut-out pieces back where they went in the die cut. To finish it off, I added the stacked cat back in as well. He sits a little higher than the pumpkin (due to having 4 additional layers versus the three under the pumpkin), giving the impression he’s sitting in front of the pumpkin! 🙂
 I enlisted the help of the Gourd Goodness stamp set for the sentiment, stamping it on a strip of Peekaboo Peach card stock in Soft Suede. I snipped banners in both ends, edged it with my Soft Suede Stampin’ Write Marker, and adhered it to the card front with Liquid Glue.
Finally, I tied a bow with two strands each of Crushed Curry and Basic Black Solid Baker’s Twines and adhered it over a Billie Moan Bow made with Linen Thread, using a Glue Dot. I added it to the card front and it was done!
On the inside, I made three more Painted Harvest flowers across the bottom of a Very Vanilla panel – again from Crushed Curry, Peekaboo Peach and Pumpkin Pie. I added the centers with the Early Espresso.
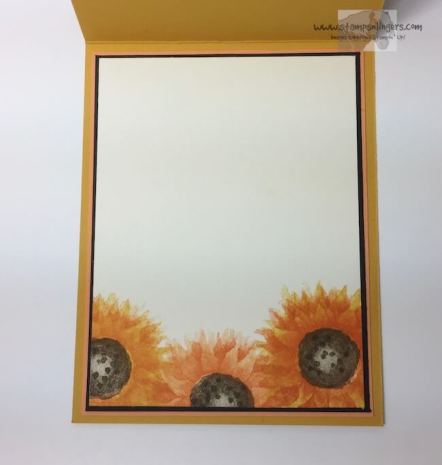
I Fast Fuse’d the panel to an Early Espresso and Peekaboo Peach mat and into my Crushed Curry card base, popped the card front on with Stampin’ Dimensionals and the card was done.
My Very Vanilla Medium Envelope got another Painted Harvest flower on the front…
…and a few more on the envelope flap.

Et Voila! I love it! Painted Harvest never fails to impress!! And I love how it looks like the cat – when you can even see him!! – is sitting in a pumpkin patch, surrounded by beautiful flowers. Hope you like!!
TTFN
Mary
HOST CODE FOR 16 OCT – 31 OCT: 4HQU3GFV
Use this host code when you order and receive a free gift from me! But, if your order is over $150, please don’t use this code (you’ll miss out on your own Stampin’ Rewards if you use it) but you’ll still get the free gift. The free gift is your choice of any item valued up to $10.00 from the 2017-2018 Annual Catalog or the 2017 Holiday Catalog! And – you can even select one of the Host-exclusive sets! See my Rewards page for more details.
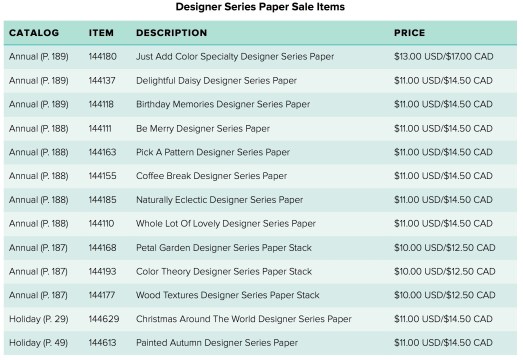
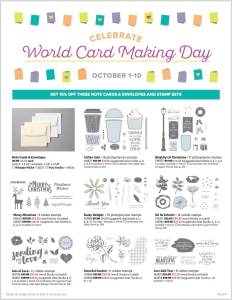
Designer Series Paper Sale…
All Month Long!

Let’s admit it: we all just love gorgeous Designer Series Paper! By popular demand, we are bringing back an incredible offer on Designer Series Paper. We’ll be able to buy three packages of select Designer Series Paper and get one FREE during October! This sale includes Designer Series Paper from both the annual and holiday catalogs. And we’re even including select Specialty and Designer Series Paper Stacks on sale!
So take advantage of this excellent opportunity and gather up lots of pretty paper! Take a look-see at what’ll be up for grabs!! Click the picture to open a handy – and colorful! – flyer!
MERRY PATTERNS HOST PROMOTION STILL AVAILABLE
Host a workshop or place an individual order totaling $300 or more (before shipping and tax) by the end of October, and you’ll earn this cool new stamp set for free! Click the picture to open up a printable flyer!

Get all the details on my Stampin’ Up! Promotions page right….here!
Coming Soon…Stampin’ Blends!

Our new alcohol markers – Stampin’ Blends – will be available to customers on 1 November! Hope you’re excited!! Heck – I’m excited for you! 🙂
Stampin’ Blends Features
- Add just the right amount of color where you need it with the brush tip or fine-point.
- Each color (except Ivory and Bronze) has a light and dark shade marker, available individually or in a combo pack.
- Stampin’ Up! has done in-house testing for evaporation and life testing and they are really happy with the results.
- Press fit seal prevents air from entering the barrel and causing evaporation.
- The nestable lids are easy to keep track of and have a tight fit for long-lasting color.
PRODUCTS USED IN TODAY’S PROJECT:


CARD CUTS USED IN TODAY’S PROJECT:
Crushed Curry Card Stock: 4 1/4″ x 11″ (card front, scored and folded at 5 1/2″)
Early Espresso Card Stock: 4″ x 5 1/8″ (mats for card front and for inner liner); four Cat Punch shapes; three Patterned Pumpkin die cut shapes
Peekaboo Peach Card Stock: 3 7/8″ x 5 1/8″ (second mats for card front and for inner liner); 1/2″ x 2 5/8″ (sentiment)
Very Vanilla Card Stock: 3 3/4″ x 5″ (card front and inner liner)
If you need any stamping supplies, I’d be very happy to be your Demonstrator. Just click on the Order Stampin’ Up! Online Now button on the right side of the screen to go directly to my online store or drop me an email if you have any questions. Happy Stamping!
Shop the Clearance Rack here. Earn FREE Stampin’ Up! Products – Join my Punkin Head Peppermint Rewards – My online customer thank you program!
Finn-Fan Fix (you’ll have to settle for re-runs until I get back home to take fresh photos!!)

TTFN
M


 #20 Demonstrator in Sales in the US 2023-2024
 #13 Demonstrator in Leadership in the US 2023-2024
 #21 Demonstrator in Team Building in the US 2023-2024


 KarensCardCorner
 Stamp with Amy K
 Stampin With Shirley G
 Tarabeth Stamps
 TL's Bright Spot