Good morning and happy Sunday to all y’all! Hope you’ve been having a great weekend! 🙂
If you were able to join me for my Facebook live yesterday, I appreciate you spending part of your weekend with me. If not, but you’d like to watch the replay…here ’tis!
I first saw a Diamond Easel fold when my talented teammate Darryl Robbins posted a gorgeous card in our Critters-N-Creatin’ Krew FB page. I loved his and asked for the instructions – which he kindly sent me! He’d seen the card on List Curcio’s page – and then modified it to work for an A2 card (Lisa’s is a 5″ x 5″ Square card).
I was going to make mine with Darryl’s directions, but then thought…why not do a top-fold card? That way the dimensions for the diamond easel could be based on a square – but…still an A2 card.
By the time I got done whickering the measurements…I should have just taken the easy way out and used Darryl’s instructions! 🤦♀️🤷♀️🤦♀️
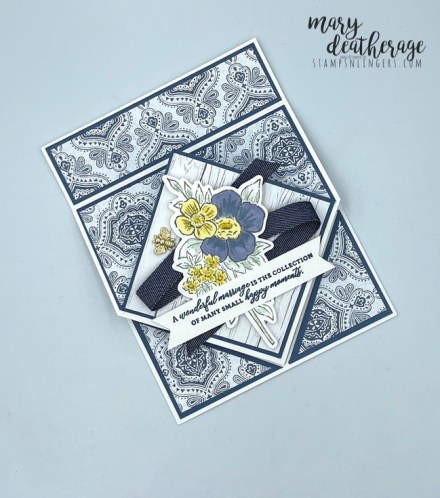
But. I got it figured out and ended up with a really pretty Anniversary card that features a sneak peek at the great new Blessings of Home bundle and coordinating Heart & Home DSP – and the Love & Happiness sentiment set! All these will be available to you on 4 Jan in the Jan – Jun 2022 Mini Catalog. Take a look-see:
I started with a 4 1/4″ x 11″ piece of Basic White Thick cardstock for the card base. I scored it at 2 1/8″, 4 1/4″ and 5 1/2″ along the long side. Then I marked the middle of one short end at 2 1/8″ and cut from the mark to the first score line on a diagonal – to create a handkerchief point.
I folded and burnished each of the score lines – starting with a valley fold at 2 1/8″, mountain at 4 1/4″ and then valley again at 5 1/2″.
Using Liquid Glue between the 4 1/4″ and 5 1/2″ fold, I created the top-fold part of the card.
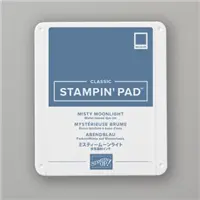
I matted a few pieces of blue-design paper from the new Heart & Home DSP on Misty Moonlight and adhered them to the “front” panels.
I matted two wood-grain squares of the DSP on Misty Moonlight – one for the inside and one for the front sentiment-panel diamonds.
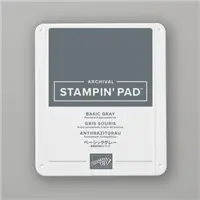
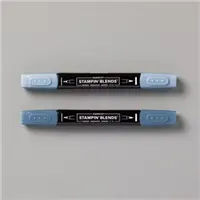
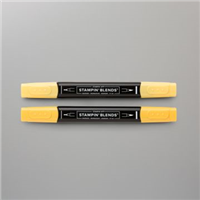
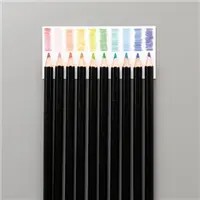
On a piece of Basic White, I used my Stamparatus to stamp the smaller Blessings of Home floral image in Basic Gray. Then I colored the flowers with my Misty Moonlight and Daffodil Delight Stampin’ Blends Combos and the leaves with a Garden Green Watercolor Pencil. Then I cut it with the matching die in the Flowers of Home die set (bundled with Blessings of Home and available on 4 Jan!).
I used Stampin’ Seal to adhere a “Z” of new 3/8″ Denim Ribbon to one of the matted squares (being sure to keep the “diamond” orientation in mind!). I used Stampin’ Dimensionals to pop the die cut flower over top.
The sentiment, from Love & Happiness, is stamped in Misty Moonlight on a strip of Basic White and bannerized with snips. Then I added it over the top of the flowers with Liquid Glue and Stampin’ Dimensionals.
I finished the inside of the card before adhering the front diamond – and recommend you do the same – it’s a LOT easier!
I stamped another Love & Happiness sentiment in Misty Moonlight on Basic White, matted it on Misty Moonlight and adhered it inside the card – on the back panel.
I cut two small Misty Moonlight squares and two small Blue Heart & Home DSP squares – cut them into triangle and adhered them together with Liquid Glue.
I laid out the four triangles and my second matted “diamond” on the back panel and adhered them with Liquid Glue.
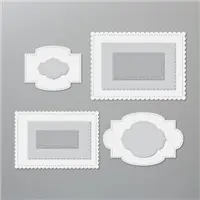
I masked off part of a Love & Happiness sentiment with small sticky notes and stamped the rest of the sentiment in Misty Moonlight on Basic White. Then I cut it with the next-to-smallest rectangle in the Stitched So Sweetly Die set and popped it on the back panel with Stampin’ Dimensionals to create my “easel stop”!
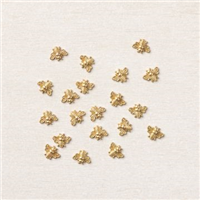
I used Liquid Glue to adhere the front diamond with the sentiment to the handkerchief point on the front. Then I used a Glue Dot to add a Bumble Bee Trinket to the card front and to the “easel stop” and the card was done!
My Basic White Medium Envelope got the Blessings of Home floral on the front…
…and more of the woodgrain Heart & Home DSP on the envelope flap.
Et Voila! Okay – I LOVE how this card turned out! It combines two of my fave fun folds – an easel and a Top-Fold (which can also be a side-fold!). And with the Blessings of Home bundle and the gorgeous Heart & Home DSP, with perfect sentiments from Love & Happiness (of which there are MANY!)
…I think it’s a pretty-near-perfect anniversary card! 🙂
I hope you like!
If you’d like to recreate this card, all the products and card cuts you’ll need are down below!
TTFN
Connect with me! https://campsite.bio/stampsnlingers
I’ve created a printable PDF with written instructions and a list of the products used to create this project. You can download, print and/or save it by clicking this image:
Missed any tutorials? You can check out my past projects right here!
HOST CODE FOR 16 NOV – 30 NOV: 2DBG6ZEX
Use this host code when you order $50 or greater and receive a free gift (AND the Monthly Card Tutorial) from me! If your order is over $150, please do not use this code, but you’ll still get the free gift. The free gift is your choice of any item valued up to $10.00 in any active Catalog! That includes some of the Host Exclusive stamp sets! See my Customer Rewards page for full details.
Note: Make sure that you can see my name on the final checkout page listed as your Demonstrator when you order so that you know that you’re ordering with me and you’ll get my rewards!
You’ll also be getting a link to my ZOOM The Craftroom (an exclusive TWICE-A-WEEK online event for my customers) and the monthly Online Tutorial. The November Tutorial features the Frosted Gingerbread Bundle!
THERE’S STILL TIME TO JOIN AND SAVE BIG!
The Start with Savings Starter Kit promotion is a super opportunity to purchase your Starter Kit at a great deal! Instead of the standard $99 Starter Kit—which is already a steal of a deal—you can pick up a completely custom Starter Kit for only $75!!! What an absolutely unbeatable bargain for a box with a value of $125!
There’s no better time than November for you to join as a demonstrator! From 4 – 30 November, you’ll be able to purchase your Starter Kit with big savings!
PROMOTION DETAILS:
- Promotion Period: 4 – 30 November 2021
- When a new demonstrator orders their custom Starter Kit, they will be able to redeem $125 of qualifying products for only $75 (normally $99).
- New demonstrators who submit their Independent Demonstrator Agreement (IDA) before 4 November or after 30 November will not be eligible for this promotion. Starter Kit orders must be placed between 4 November and 30 November to receive the discount.
- Joining Deadline: November 30, 2021; 11:50 PM (MT)
I would LOVE to have you join my awesome Critters-N-Creatin Krew (CNCK) team!

WHY be a Demonstrator?
- Get 20%–25% off all Stampin’ Up! products. That’s on….EVERYTHING!
- While there’s no requirement to sell, there is the opportunity to do so! You can earn additional income based on your sales and recruiting–just how much extra income is up to you.
- Set your own schedule and put in as much or as little or even….NONE at ALL… time as you’d like.
- Get support through online training resources, events, and a demonstrator-only online community with thousands of project ideas.
- Access to regular promotions, giving you an opportunity to contact customers.
- Opportunity to earn incentive trips.
- Get early looks at new products – and the chance to add them to your tool chest before anyone else!
- Chance to learn creative tips and techniques, share ideas, and come into contact with new friends who love papercrafting as much as you do!
There’s NO commitment and NO penalty if you decide that being a Demonstrator isn’t right for you. Why not give it a try? The CNCK has a fun Facebook page where we chat a lot and share our projects (you can even win fun prizes!). And – we gather up via Zoom once a month, too, for folks that want to do that! Have I mentioned we’re a pretty fun group of folks? No?? Well – we totally are – and we’d love to have you join us!
Got questions about joining? Drop me a note at stamps-n-lingers@comcast.net! I’d be happy to chat with you more about it! You can also get more deets about being a Demonstrator here and then head here to get started and pick up that great deal on the Starter Kit!
Will YOU be the next to join my CNCK Team? I sure hope so! 😉
Get the Stampin’ Up! Products Used in this Project:
Card Cuts Used in This Project:
Basic White Thick Cardstock: 4 1/4″ x 11″ card base, scored and folded at 2 1/8, 4 1/4″ and 5 1/2″ – then cut on the diagonal as shown in the template)
Misty Moonlight Cardstock: 2″ x 4 1/8″ (x2 – mats for larger front non-diamond panel and inside smaller portion of card); 1 1/8″ x 4 1/8″ (mat for narrow top-fold panel); 2 7/8″ x 2 7/8″ (x2 – mats for diamond panels); 2″ x 2″ (x2 – each cut in half on the diagonal – mats for small inside triangles)
Basic White Cardstock: 5/8” x 3 3/4” (front sentiment); Next-to-Smallest Stitched So Sweetly rectangle die cut (inside sentiment – “easel stop”); 1 7/8″ x 4″ (inside “back” sentiment)
Heart & Home DSP (Blue Pattern): 1 7/8″ x 4″ (larger front non-diamond panel); 1″ x 4″ (narrow top-fold panel); 1 3/4″ x 1 3/4″ (x2 – each cut in half on the diagonal – small inside triangles)
Heart & Home DSP (Wood Pattern): 2 3/4″ x 2 3/4″ (for diamond panels); 3″ x 6″ (envelope flap)
If you need any stamping supplies, I’d be very happy to be your Demonstrator. Just click on the Order Stampin’ Up! Online Now button on the right side of the screen to go directly to my online store or drop me an email if you have any questions. Happy Stamping!
Shop the Clearance Rack here. Earn FREE Stampin’ Up! Products – Join my Punkin Head Peppermint Rewards – My online customer thank you program!
Finn Fan Fix

The deer are feeling frisky right now.
It’s chilly – and…the hunters are pushing them. So they gallop and cavort. Finn HATES cavorting. It’s unseemly!
This is the time of year that I hope they’ll stick around and stay close.
Yes – I know. I know. There are too many of them. Got it.
But…I like seeing them cavort and always hope that “my” deer will stick close and make it thru another season.
Finn helps with a routine deer-census. And cavort-quelling.
Every morning, he’s keeping his eyes (BOTH of them – at the SAME time!) on the pond and pasture.
He misses very little.
Okay. He might miss a little “little”.
BUT – if they walk RIGHT behind the house…THEN. THEN he for sure sees them. And lets them know in no-uncertain terms that they have been counted! And quelled! 😉
TTFN
M










 Inky Bee Stampers
 KarensCardCorner
 Stamp with Amy K
 Stamp With Nel
 Stampin With Shirley G
 Tarabeth Stamps
 TL's Bright Spot
Such a pretty card! Love that designer paper and the coloring on your flowers is perfect! Thanks for the restamping tip in the video! Yeah, Ginny has a similar thing with deer…no cavorting allowed. 😉
Deer who cavort are immediately suspect. Up to no good FOR SURE! Thanks, Amy! 🙂
Beautiful card. Probably this bundle is another ‘must have’! Enjoyed the video too, though I don’t often get to see you ‘live’.
It’s awfully pretty – I think you DO need it! 😉 Thank you so much, Julie!:)
Mary, your card is beautiful!
Also, thanks so much for your Finn stories. They always make me smile (sometimes, laugh out loud)
Glad to hear that, Gerri – a good chuckle is a beautiful thing!! Thanks so much! 🙂
You are so talented and I love that you can take something and make it similar with your own measurements. I’m going to email you a special request/challenge should you choose to accept it. I know it’s not a mission impossible…for you anyway…but for me…my brain is still hurting!
Thank you SO much, Karen – hopefully I can figure them out for you and do them on a video soon! 🙂
I watched the replay. Beautiful card! I love your variation and can’t wait to make one! Thanks for sharing. Have a wonderful Thanksgiving 🙂
have fun with it, Pam! Happy Thanksgiving to you and your family, too! 🙂
Hi again Mary. I have been meaning to tell you how amazing your tutorials are!! I really appreciate them! Thank you!!
Awww – thank you so much for saying that, Pam – I appreciate it very much! 🙂
Just cased your beautiful card. It turned out really great. Thanks for the terrific videos.
Oh – yeah!! So happy to hear that, Patricia – thank you!! 🙂
I love Finn’s Fan Club. I look forward to hearing all his escapades, and seeing pictures of him. My husband won’t let me have a dog, so I’m living vicariously through Finn’s life. Thank you!
Awww – I’m sorry you can’t have a dog of your own, Bonnie! Glad that Finn can give you some “doggie time’! 🙂 Thanks very much! 🙂
Mary, I just finished “casing” this card. It turned out beautiful. It’s for my husband. This coming Friday we will celebrate our 55th anniversary AND the fact that I am now cancer-free. I finished Chemo, Surgery, Radiation and more chemo on April 22nd. I absolutely could not have done all that without the loving care from my hubby. We are now keenly aware of the “in sickness and in health” part of our vows. Life is beautiful and I love every single day. Thanks for the perfect card.
Hey Karen – I am so glad that my card tutorial helped you so much and helped you to celebrate your Anniversary. And I am VERY glad that you are cancer-free now! CONGRATULATIONS!! And yeah! for a husband that steps up – mine did the same (multiple times!) for me. They are a blessing! Thank you so much for sharing your story!! And give that hubby a hug for me. 🙂