Hey – it’s Monday! But…it should be a short week for most of you? I hope so – cuz that would mean it’s like…HAWWWMP day! And…if your turkey is still in the freezer….uhm…best get it OUT right this minute! I saw a chart and…this is the last day to stick it in the fridge and have it thawed in time!
You’re welcome for that PSA! 🙂
I recently got the Festive Foliage background stamp – from the 2021-2022 Annual Catalog – and have been wanting to play with it. So.. I did! And I used it along with the Tidings & Trimmings set, a little Tidings of Christmas DSP and…the Playful Alphabets dies to make a Christmas spotlight technique card. Take a look-see:

The layout for this one was inspired by the Freshly Made Sketches challenge!

I started by stamping the Festive Foliage image in Tuxedo Black ink on a Basic White panel. I started with the panel at 4″ x 5 1/4″. Tip – use your Stamparatus with background stamps – they’re a lot easier to use that way. And – you can stamp the image onto the Small Grid Paper and then you can place your cardstock over top to get it lined up correctly!

Once I’d stamped the image, I trimmed it down to my 3 7/8″ x 5 1/8″.
Using a Layering Circles Die, I cut a 2 3/8″-wide circle from the right side of the panel.

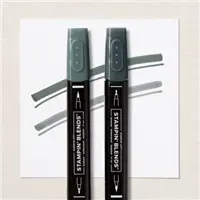
I colored the image on the die cut circle using my Dark Soft Succulent, Evening Evergreen and Polished Pink Stampin’ Blends.
I placed the full panel on a Polished Pink mat (without adhering it – just dry-fitting). Then I adhered the circle to the Polished Pink mat – back in the negative space – lining up the image! – with Liquid Glue.
I cut two strips of silver foil (one “shiny” and one of the more “pewter-y” silver) from the Silver Foil Specialty Pack and embossed them both in the Timber 3D Embossing Folder.

I used Liquid Glue to adhere the two strips all the way across the larger card front – using my Paper Snips to cut out the parts of the strips from the negative space.
Using Stampin’ Dimensionals, I adhered the card front to the Polished Pink mat – keeping the die cut and colored image lined up.
I cut a Polished Pink “frame” by running the same 2 3/8″-wide circle die – with the NEXT LARGEST circle die (2 5/8″ wide) around it – thru the Stampin’ Cut and Emboss Machine. Then I adhered the frame around the opening with Liquid Glue.

I adhered some Foam Adhesive Sheet to a piece of Polished Pink cardstock and then cut out the letters using the Playful Alphabet dies. I lined them up and adhered them to the card front.
I cut the same letters again from an Evening Evergreen piece of Tidings of Christmas DSP and then used Liquid Glue to adhere them over the sentiment – a little bit offset to create a fun pop-of-pink shadow!

I tied a double loop bow from silver twine from the Simply Elegant Trim (I used a Bow-Easy!) and adhered it with a Glue Dot. I finished things off by adding a few Polished Pink gems from the 2021-2023 In Color Jewels and the card front was done.
On the inside, I stamped a Tidings & Trimmings sentiment in Evening Evergreen on a Basic White panel. In the corner, I added some Polished Pink berries and Evening Evergreen leaves, filled in with the Dark Soft Succulent Stampin’ Blend. I added a Polished Pink jewel by the sentiment and a few small Soft Succulent jewels around the foliage.

I used Liquid Glue to adhere the panel to a Polished Pink mat and into my Evening Evergreen card base, popped the card front on with Stampin’ Dimensionals and the card was done.
My Basic White Medium Envelope got more of the Tidings & Trimmings foliage on the front…

…and more of the Tidings of Christmas DSP on the envelope flap.

Et Voila! It is SO easy to lose sight of some of the amazing stamp sets and papers in the Annual Catalog while we’re busy playing with all the goodies in the Mini, isn’t it??
I have no idea why it took me so long to pick up the Festive Foliage set – I LOVE background stamps and usually just get them all! But…I’ve got it now and I love it! And the Tidings & Trimmings stamp set really coordinates perfectly – especially when paired with the pretty Tidings of Christmas DSP! Do you have the Playful Alphabet die set? If not…highly recommend! The size of the letters is darned near perfect – like Goldilocks…JUUUUUUST right! 🙂

I hope you like!
If you’d like to recreate this card, all the products and card cuts you’ll need are down below!
TTFN
M

Connect with me! https://campsite.bio/stampsnlingers
I’ve created a printable PDF with written instructions and a list of the products used to create this project. You can download, print and/or save it by clicking this image:

Missed any tutorials? You can check out my past projects right here!
HOST CODE FOR 16 NOV – 30 NOV: 2DBG6ZEX
Use this host code when you order $50 or greater and receive a free gift (AND the Monthly Card Tutorial) from me! If your order is over $150, please do not use this code, but you’ll still get the free gift. The free gift is your choice of any item valued up to $10.00 in any active Catalog! That includes some of the Host Exclusive stamp sets! See my Customer Rewards page for full details.
Note: Make sure that you can see my name on the final checkout page listed as your Demonstrator when you order so that you know that you’re ordering with me and you’ll get my rewards!
You’ll also be getting a link to my ZOOM The Craftroom (an exclusive TWICE-A-WEEK online event for my customers) and the monthly Online Tutorial. The November Tutorial features the Frosted Gingerbread Bundle!


Tick and Also…Tock!
The Days are Winding Down FAST!

The Start with Savings Starter Kit promotion is a super opportunity to purchase your Starter Kit at a great deal! Instead of the standard $99 Starter Kit—which is already a steal of a deal—you can pick up a completely custom Starter Kit for only $75!!! What an absolutely unbeatable bargain for a box with a value of $125!
There’s no better time than November for you to join as a demonstrator! From 4 – 30 November, you’ll be able to purchase your Starter Kit with big savings!
PROMOTION DETAILS:
- Promotion Period: 4 – 30 November 2021
- When a new demonstrator orders their custom Starter Kit, they will be able to redeem $125 of qualifying products for only $75 (normally $99).
- New demonstrators who submit their Independent Demonstrator Agreement (IDA) before 4 November or after 30 November will not be eligible for this promotion. Starter Kit orders must be placed between 4 November and 30 November to receive the discount.
- Joining Deadline: November 30, 2021; 11:50 PM (MT)
I would LOVE to have you join my awesome Critters-N-Creatin Krew (CNCK) team!

WHY be a Demonstrator?
- Get 20%–25% off all Stampin’ Up! products. That’s on….EVERYTHING!
- While there’s no requirement to sell, there is the opportunity to do so! You can earn additional income based on your sales and recruiting–just how much extra income is up to you.
- Set your own schedule and put in as much or as little or even….NONE at ALL… time as you’d like.
- Get support through online training resources, events, and a demonstrator-only online community with thousands of project ideas.
- Access to regular promotions, giving you an opportunity to contact customers.
- Opportunity to earn incentive trips.
- Get early looks at new products – and the chance to add them to your tool chest before anyone else!
- Chance to learn creative tips and techniques, share ideas, and come into contact with new friends who love papercrafting as much as you do!
There’s NO commitment and NO penalty if you decide that being a Demonstrator isn’t right for you. Why not give it a try? The CNCK has a fun Facebook page where we chat a lot and share our projects (you can even win fun prizes!). And – we gather up via Zoom once a month, too, for folks that want to do that! Have I mentioned we’re a pretty fun group of folks? No?? Well – we totally are – and we’d love to have you join us!
Got questions about joining? Drop me a note at stamps-n-lingers@comcast.net! I’d be happy to chat with you more about it! You can also get more deets about being a Demonstrator here and then head here to get started and pick up that great deal on the Starter Kit!
Will YOU be the next to join my CNCK Team? I sure hope so! 😉
Get the Stampin’ Up! Products Used in this Project:


Price: $11.50


Card Cuts Used in This Project:
Evening Evergreen Cardstock: 5 1/2″ x 8 1/2″ card base, scored and folded at 4 1/4″
Polished Pink Cardstock: 4″ x 5 1/4″ (x2 – mats for card front and for inner liner); Frame around circle die cut (2 5/8″ outside – 2 3/8″ inside); Playful Alphabet die cut letters
Basic White Cardstock: 3 7/8″ x 5 1/8″ (card front and inner liner)
Silver Foil Specialty Pack: 1/4″ x 5 1/8″ (bright silver); 3/8″ x 5 1/8″ (“pewter”)
Tidings of Christmas DSP: Playful Alphabet die cut letters; 3″ x 6″ (envelope flap)
If you need any stamping supplies, I’d be very happy to be your Demonstrator. Just click on the Order Stampin’ Up! Online Now button on the right side of the screen to go directly to my online store or drop me an email if you have any questions. Happy Stamping!
Shop the Clearance Rack here. Earn FREE Stampin’ Up! Products – Join my Punkin Head Peppermint Rewards – My online customer thank you program!
Finn Fan Fix

Looking back, prolly shoulda called him….


….Speedbump. 🤷♀️🤷♀️🤷♀️
TTFN
M


 #20 Demonstrator in Sales in the US 2023-2024
 #13 Demonstrator in Leadership in the US 2023-2024
 #21 Demonstrator in Team Building in the US 2023-2024


 KarensCardCorner
 Stamp with Amy K
 Stampin With Shirley G
 Tarabeth Stamps
 TL's Bright Spot
LOVE, LOVE, LOVE! the colors, the ingredients, it’s like the everything bagel for me!! and that speedbump…that goes without saying!!!
Aww – thank you, Karen! 🙂
So pretty! Love the spotlight technique. Finn Speedbump Deathrage does have a nice ring to it. 😉
Doesn’t it, though?? And so descriptive! 😉 Thanks so much, Amy! 🙂
Such a beautiful use of that background stamp with the sketch – I LOVE how you’ve highlighted a portion of it!
Thanks so much, Kim! Appreciate you stopping by! 🙂
Not only do I LOVE your cards you make, but I absolutely love your Finn’s Fan Club. Your commentary is always bright and fun! Thanks for all the great ideas! Michelle
Oh – thank you so much, Michelle! I really appreciate those kind words! 🙂