Happy happy HAAAAWMMMP Day. And….happy Wednesday-before-Thanksgiving-Eve! Yes. A week from tomorrow you’d best have that turkey thawed! Do NOT wait until next Tuesday. Trust me on this – you’ll be Googling “how to thaw my frozen turkey two days before Thanksgiving.”
Ask me how I know this. 😉
My card today is a fun one (I think!). I saw this Disappearing Nine Patch technique on SplitCoast Stampers and wanted to give it a go. So…I picked my fave DSP – the Whimsy & Wonder Specialty DSP. And I combined it with the Bright Baubles set – for the sentiment – and the Time of Giving Bundle for a cute tag! Take a look see:

I was playing along with the Inspired By challenges…


And I selected many of the design elements based on the Tic-Tac-Toe challenge. I got Gift – Non Traditional Holiday Colors – Patterned Paper. And Holiday – Silver/Gold – Patterned Paper! 🙂

I followed the instructions that Betty Traciak gave on her SCS tutorial – first cutting 9 1″ squares of Whimsy & Wonder Specialty DSP and adhering them to a 3″ x 3″ square of Foam Adhesive Sheet (I decided to use that instead of an Adhesive Sheet).

Using my Paper Trimmer, I cut the square in half – and then cut each half in half.

I re-arranged the squares and adhered them to a 3″ x 3″ square of cardstock. Then I trimmed the whole thing down to a 2 7/8″ x 2 7/8″ square with my Trimmer. And…totally didn’t take a picture of this stage. Sorry! 🙁
I wrapped two lengths of White 3/8″ Glittered Organdy Ribbon around the square – securing it in the back with Glue Dots – to look like a wrapped present. Then I adhered the whole thing to a Blushing Bride mat.

I used Liquid Glue to adhere the gift to a Basic White panel and stamped the Bright Baubles sentiment in Misty Moonlight. Then I matted the panel on a Blushing Bride mat to create the card front.
I used a Tailored Made Tag – with the Gift Giving die centered in it – to cut a Shimmery White cardstock tag. Then I used the same Tailor Made Tag to cut a solid Whimsy & Wonder Specialty DSP tag.

Using Liquid Glue, I adhered the detailed Shimmery White tag to the solid Whimsy & Wonder Specialty DSP tag – then I adhered it to the top of the gift with Liquid Glue.
I tied a fancy bow from the White 3/8″ Glittered Organdy Ribbon and adhered it over the top of the tag with a Glue Dot.

I added some small Blue Adhesive-backed Gems and the card front was done!
For the inside, I stamped a Time of Giving sentiment in Misty Moonlight on a Basic White panel. In the corners, in stamped-off-once Blushing Bride, I added the stylized snowflake image from Time of Giving. I added some Blue Adhesive-backed Gems in the middles of the snowflakes.

I used Stampin’ Seal to adhere the panel to a Blushing Bride mat and into my Misty Moonlight card base, popped the card front on with Stampin’ Dimensionals and the card was done.
My Basic White Medium Envelope got the stamped-off-once Blushing Bride snowflakes from Time of Giving on the front..

…and more Whimsy & Wonder Specialty DSP on the envelope flap.

Et Voila! I love how that Disappearing Nine Patch technique worked to make my “gift” from Whimsy & Wonder Specialty DSP, don’t you? I hope you’ll give it a go. Bright Baubles has lots of fun sentiments, but I really like the size and font on this one that I used on the front. I am also really loving how the Tailor Made Tags dies work so perfectly with the Gift Giving tags – the die set bundled with Time of Giving! Such fun – and so handy as we head into the holidays!

I hope you like!
TTFN
M

Connect with me! https://campsite.bio/stampsnlingers
I’ve created a printable PDF with written instructions and a list of the products used to create this project. You can download, print and/or save it by clicking this image:

HOST CODE FOR 16 NOV – 30 NOV: 2DBG6ZEX
Use this host code when you order $50 or greater and receive a free gift (AND the Monthly Card Tutorial) from me! If your order is over $150, please do not use this code, but you’ll still get the free gift. The free gift is your choice of any item valued up to $10.00 in any active Catalog! That includes some of the Host Exclusive stamp sets! See my Customer Rewards page for full details.
Note: Make sure that you can see my name on the final checkout page listed as your Demonstrator when you order so that you know that you’re ordering with me and you’ll get my rewards!
You’ll also be getting a link to my ZOOM The Craftroom (an exclusive TWICE-A-WEEK online event for my customers) and the monthly Online Tutorial. The November Tutorial features the Frosted Gingerbread Bundle!


GOING ON NOW!

AND…

Want to see how to make TWO great deals turn into a SUPER-HUGEMUNGOUS great deal?? Check my blog with ALL the deets!
![]()
Will YOU be the next to join my CNCK Team? I sure hope so! 😉
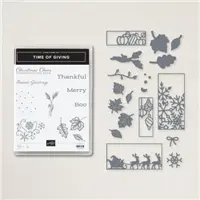
Get the Stampin’ Up! Products Used in this Project:


Price: $15.00


Card Cuts Used in This Project:
Misty Moonlight Cardstock: 4 1/4″ x 11″ (card base, scored and folded at 5 1/2″)
Blushing Bride Cardstock: 4″ x 5 1/4″ (mats for card front and for inner liner); 3″ x 3″ mat behind “gift”
Shimmery White Cardstock: Tailor Made Tags die cut with Gift Giving die cut out of center
Basic White Cardstock: 3 7/8″ x 5 1/8″ (card front and inner liner); 3″ x 3″ (base for “gift”)
Whimsy & Wonder Specialty DSP: 9 – 1″ squares – to create “gift”; Tailor Made Tags solid die cut; 3″ x 6″ (envelope flap)
If you need any stamping supplies, I’d be very happy to be your Demonstrator. Just click on the Order Stampin’ Up! Online Now button on the right side of the screen to go directly to my online store or drop me an email if you have any questions. Happy Stamping!
Shop the Clearance Rack here. Earn FREE Stampin’ Up! Products – Join my Punkin Head Peppermint Rewards – My online customer thank you program!
Finn Fan Fix

The other day while I was cleaning the barn, Wayne pulled the golf cart into the end of the barn aisle.
I looked up and saw that Finn had repositioned.

In position. Ready to roll, Dad! What’s up for the day?
You DO have to call shotgun and be IN the golf-cart – that way the Dad can’t leave without you! 😉
TTFN
M


 #20 Demonstrator in Sales in the US 2023-2024
 #13 Demonstrator in Leadership in the US 2023-2024
 #21 Demonstrator in Team Building in the US 2023-2024


 KarensCardCorner
 Stamp with Amy K
 Stampin With Shirley G
 Tarabeth Stamps
 TL's Bright Spot
I love your version of this technique!! It’s so pretty with those papers and extra special with the pretty tag and wonderful bow!!
Thanks, Akiko – this is some of my favorite paper ever! 🙂
What a fun way to use up those little leftover pieces of designer paper! Cute card! And yep, have to call shotgun before you know where you’re going so that you get the front seat. 😉
Yes – riding in front (only an option on the golf cart – kids have to ride in the back seat in a car! 😉 ) is BEST! Thanks much, Amy! 🙂
Wow! Such a cool technique! I’ll definitely be giving this one a try. Love the Whimsy and Wonder DSP.
Congrats on your SU achievements, you are Awesome, Mary!
Thank you, Pat – I appreciate your kind words so very much! DO give it a go – it’s fun! 🙂
Your commentary just adds so much to the photo! This looks like a fun technique that I’ll have to try. Your card is lovely.
Thanks, Karen – glad you enjoy my ramblings! It IS a fun technique!! 🙂
Mary, my demonstrator quit 2 mo. Ago so, I want to sign up with you. I always made out my order and she received my products and I went to pick it up and paid with my check. My question is how do you do it? I really don’t want to use a credit card would you figure out my total let me know and let me mail you a check? Congratulations on your ranking at StampinUp!
Hey Stella – thank you! Are you wanting to order SU product with me or sign up as a Discount Demonstrator? Sorry for the confusion – but want to be sure I give you a good answer! 🙂
I just want to order products. I’m not interested in becoming a demonstrator.
Oh – perfect! Can you send me an e-mail and we can chat that way about how to get it done? Very doable, for sure! 🙂 stamps-n-lingers@comcast.net Thanks!
Pretty packages all tied up with string, yes please! How inspiring, love your technique and beautiful card! Thank you for inspiring us @IB!
Thank you so much, Danni! I appreciate you stopping by! 🙂