Good morning – it’s Tuesday and Day One of the three-day Seasonal Sale! If you haven’t already been shopping and stocking up on paper, ink and die sets – not to worry! You’ve got THREE DAYS to cash in! But…what if the INTERNET crashes tonight?!?
Good point – don’t risk it! Get after it now!
I’ve got a fun little Christmas card for you today and it might have a ….little tiny sneaky peek of a new goody from the Jan – Jun 2022 Mini Catalog! 😳😳😳
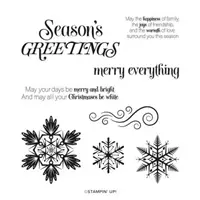
I pulled out the Merry Snowflakes stamp set and some…Pattern Party DSP (this is the cool Host Exclusive Set from the 2021-2022 Annual Catalog – get it FREE with an individual or workshop order over $180 in retail). Take a look-see:

Do you see it? The Sneaky Peek?
Maybe not yet!
The layout for this one is from the Global Design Project sketch challenge this week.

And the color palette is from the Just Add Ink challenge!

I started with…the Sneaky Peek! Let me introduce you to the Gingham Embossing Folder from the Jan – Jun 2022 Mini Catalog!

You’ll be able to get it on 4 Jan (or…join my team this week – TRIPLE DIP cone! 😉 – and pre-order it on 1 Dec as a Demonstrator perk!).
I used this fun new embossing folder to emboss a card-front-sized piece of Basic White cardstock and then adhered it to the front of a Thick Basic White card base with Liquid Glue.

I pulled out the buffalo check paper from the host-exclusive Pattern Party DSP and, using Blending Brushes, colored a piece in Evening Evergreen and a piece in Blushing Bride.
Then I used the next-to-largest die in the Scalloped Contours Die set to cut one in each of the colors.
I adhered the Blushing Bride die cut with Liquid Glue – then popped the Evening Evergreen die cut on with Stampin’ Dimensionals.

I used Liquid Glue to adhere a Wonderful Snowflakes embellishment.
Then I used Stampin’ Seal to adhere a length of Gold 3/8″ Shimmer Ribbon.

I cut a large Tasteful Labels circle die from some gold paper from the Gold & Rose Gold Metallic Specialty Paper. Cuz I could, I embossed the circle in the Gingham Embossing Folder and then used Liquid Glue to adhere it to the card front.
I stamped the Merry Snowflakes sentiment in Blushing Bride on a strip of Basic White, then I snipped a banner end with Paper Snips.

I popped the sentiment over the ribbon with Stampin’ Dimensionals, added an Evening Evergreen gem from the 2021-2023 In Color Jewels and the card front was done!
On the inside, I stamped a second Merry Snowflakes sentiment in Blushing Bride on a Basic White panel and added an Evening Evergreen jewel. In the corners, I stamped some Merry Snowflake snowflakes in stamped-off-TWICE Blushing Bride!

I used Stampin’ Seal to adhere the panel to a Basic White mat and into the Thick Basic White card base and the card was done!
My Basic White Medium Envelope got more stamped-off-TWICE Blushing Bride snowflakes on the front…

…and some more Evening Evergreen-colored Pattern Party DSP on the envelope flap.

Et Voila! So…this card shows how versatile the Pattern Party DSP (NOT a “traditional” Christmas paper, right??!) can be as a part of your card-making tool-chest! You can get it for FREE, too – let me tell you how (Hint: my Online Host Club MIGHT be able to help with that! 😉 ). And I love the wintry-pretty sentiments and snowflakes in the Merry Snowflakes set – that front sentiment is perfectly sized and perfectly stated!

I hope you like!
How fun is that Gingham Embossing Folder? Might as well just go ahead and put it on your list so you’ll be ready when the new Jan – Jun 2022 Mini Catalog becomes available to you! 🙂
TTFN
M

Connect with me! https://campsite.bio/stampsnlingers
I’ve created a printable PDF with written instructions and a list of the products used to create this project. You can download, print and/or save it by clicking this image:

HOST CODE FOR 1 NOV – 15 NOV: G26BVVKZ
Use this host code when you order $50 or greater and receive a free gift (AND the Monthly Card Tutorial) from me! If your order is over $150, please do not use this code, but you’ll still get the free gift. The free gift is your choice of any item valued up to $10.00 in any active Catalog! That includes some of the Host Exclusive stamp sets! See my Customer Rewards page for full details.
Note: Make sure that you can see my name on the final checkout page listed as your Demonstrator when you order so that you know that you’re ordering with me and you’ll get my rewards!
You’ll also be getting a link to my ZOOM The Craftroom (an exclusive TWICE-A-WEEK online event for my customers) and the monthly Online Tutorial. The November Tutorial features the Frosted Gingerbread Bundle!


GOING ON NOW!

AND…

Want to see how to make TWO great deals turn into a SUPER-HUGEMUNGOUS great deal?? Check my blog from this morning!
![]()
Will YOU be the next to join my CNCK Team? I sure hope so! 😉
Get the Stampin’ Up! Products Used in this Project:


Price: $18.00

Price: $5.00


Card Cuts Used in This Project:
Thick Basic White Cardstock: 5 1/2″ x 8 1/2″ (card base, scored and folded at 4 1/4″)
Basic White Cardstock: 4 1/4″ x 5 1/2″ (embossed card front); 1/2″ x 3 1/4″ (sentiment); 4″ x 5 1/4″ (mat for inner liner); 3 7/8″ x 5 1/8″ (inner liner)
Gold & Rose Gold Metallic Specialty Paper (in Gold): large Tasteful Labels circle die cut (behind sentiment)
Pattern Party DSP: Scalloped Contours die cut rectangles (panels on front); 3″ x 6″ (envelope flap)
If you need any stamping supplies, I’d be very happy to be your Demonstrator. Just click on the Order Stampin’ Up! Online Now button on the right side of the screen to go directly to my online store or drop me an email if you have any questions. Happy Stamping!
Shop the Clearance Rack here. Earn FREE Stampin’ Up! Products – Join my Punkin Head Peppermint Rewards – My online customer thank you program!
Finn Fan Fix

Just about the time I think I’ve seen his “cutest sleep” position….

…he bumps it up ANOTHER notch!
TTFN
M


 #20 Demonstrator in Sales in the US 2023-2024
 #13 Demonstrator in Leadership in the US 2023-2024
 #21 Demonstrator in Team Building in the US 2023-2024


 KarensCardCorner
 Stamp with Amy K
 Stampin With Shirley G
 Tarabeth Stamps
 TL's Bright Spot
Such a cute card! Love the fun gingham layers. Great colors too. Yeah…that’s a pretty cute shot of the Finn showing you that he can still (mostly) fit on the ottoman. 😉
“Mostly” it is, for sure! He is a big boy! Thanks so much, Amy! 🙂
Love the offset panels Mary, it’s a lovely combination of challenges a fun design! Thanks for sharing at Just Add Ink.
Thanks very much, Nicole – and thanks for coming by! 🙂
who doesn’t love a good check. A good way to incorporate the JAI challenge colours & a fun Christmas card. Thanks for playing along with our challenge.
Di
Thanks so much, Di! I appreciate you coming by! 🙂