Good morning, y’all and happy Friday! Got any fun plans for the weekend? We don’t really – just the normal…stuff! 🤷♀️🤷♀️. But – who knows what might pop up?
My card today is actually…three cards! I finally decided to give Stack Cut and Shuffle cards a go – and I picked the beautiful Delightful Floral DSP as the starting point! The wunnermus Layering Leaves gave me three different sentiments and…I pulled out a few more goodies, too! Take a look-see:

I started with three pieces of the Delightful Floral DSP. Tip: select three patterns of different “scale” – so I have a solid, a small floral and a larger floral/leaf design.
I stacked them tightly and then cut them into three angled pieces. Tip: cut them all at the same time – then set each “stack” aside. It helped me to “re-build” the card front as I set the pieces aside.

I set my three Bubble Bath mats on my work surface and then spread the pieces out – distributing them to the mats, making sure each one had one piece of each of the designs. Then I used Liquid Glue to attach each piece to the mats.
For the first card:

– I stamped a sentiment from Layering Leaves in Pretty Peacock and cut it out with the fourth-from-the-smallest Deckled Circle die.
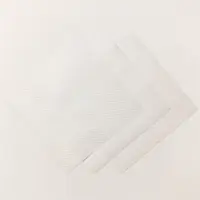
– I used the largest banner die from Nested Essentials to cut out a leaf-strewn piece of Basics Vellum Specialty DSP.
– I cut the banner into two pieces and used Liquid Glue to adhere each piece to the card front – with a gap between them. That let me make my banner longer than it actually was! 🙂
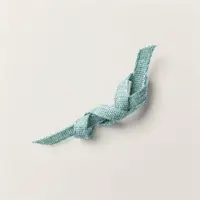
– Using Stampin’ Seal, I adhered a loop of Lost Lagoon 1/4″ Bordered Ribbon into a figure 8.
– I used the Bough Punch to cut out Parakeet Party and Gold Foil leaves.
– I added the sentiment with Stampin’ Dimensionals and then tucked the leaves underneath, adhering them with Liquid Glue.
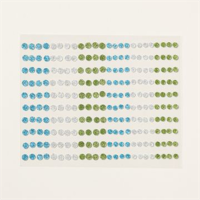
– I added some green Adhesive-backed Glitter Sequins and this card front was done!
For the second card:

– I stamped a sentiment from Layering Leaves in Pretty Peacock and cut it out with the next-to-smallest Nested Essentials rectangle die.
– I used the fourth-from-the-smallest Deckled Circle die to cut out a leaf-strewn piece of Basics Vellum Specialty DSP.
– I used a thin line of Liquid Glue right in the center of the circle to adhere it to the card front.
– Using Stampin’ Seal, I adhered a loop of Bubble Bath 3/8″ Sheer Ribbon into a figure 8.
– I used the Bough Punch to cut out Parakeet Party and Gold Foil leaves.
– I added the sentiment with Stampin’ Dimensionals and then tucked the leaves underneath, adhering them with Liquid Glue.
– I added some of the NEW Adhesive-backed Dragonflies and Birds (available to customers on 7 Nov) and this card front was done!
For the third card:

– I stamped a sentiment from Layering Leaves in Pretty Peacock and cut it out with the smallest Nested Essentials die.
– I used the largest rectangle die from Nested Essentials to cut out a leaf-strewn piece of Basics Vellum Specialty DSP.
– I used a thin line of Liquid Glue right in the center of the rectangle to adhere it to the card front.
– Using Stampin’ Seal, I adhered a loop of Bubble Bath 3/8″ Sheer Ribbon into a figure 8.
– I used the Bough Punch to cut out Parakeet Party and Gold Foil leaves.
– I added the sentiment with Stampin’ Dimensionals and then tucked the leaves underneath, adhering them with Liquid Glue.
– I added some Pretty Peacock sequins from the Adhesive-Backed Sequins Trio pack and the last card front was done!

I made all the insides the same – stamping two leaves from the Layering Leaves set in the corner of a Basic White panel. I did one in Pretty Peacock and the second in Parakeet Party ink.

I used Liquid Glue to adhere each of the panels to their Bubble Bath mats and into the Pretty Peacock card bases, then popped the card fronts on with Stampin’ Dimensionals.
At that point, I added an embellishment to each inner liner – matching the embellishment that was on that card front and then the card was done!

My Basic White Medium Envelopes got the two Layering Leaves leaves on the front…

…and another piece of the Delightful Floral DSP on the envelope flaps.

Et Voila! This is such a fun way to make three card fronts FAST! And it really lets you show off some pretty paper like the Delightful Floral DSP! Once your card front is done – your decorating possibilities are almost endless! These are perfect for some leaves from the Bough Punch, pretty Layering Leaves sentiments (LOVE those fonts!) and a few die cuts from Basics Vellum Specialty DSP!

I hope you like!
If you’d like to recreate this card, all the products and card cuts you’ll need are down below! This is also the card I made on my YouTube Live yesterday. If you’d like to see it – for the first time or again – here ’tis!
I’ve also created a printable PDF with written instructions and a list of the products used to create this project. You can download, print and/or save it by clicking this image:

Missed any tutorials? You can check out my past projects right here!
TTFN
M

Connect with me! https://campsite.bio/stampsnlingers
HOST CODE FOR 1 OCT – 15 OCT: NBKKFBBP
Use this host code when you order $50 or greater and receive a free gift (AND the Monthly Card Tutorial) from me! If your order is over $150, please do not use this code, but you’ll still get the free gift. The free gift is your choice of any item valued up to $10.00 in any active Catalog! That includes some of the Host Exclusive stamp sets! See my Customer Rewards page for full details.
Note: Make sure that you can see my name on the final checkout page listed as your Demonstrator when you order so that you know that you’re ordering with me and you’ll get my rewards!
You’ll also be getting a link to my ZOOM The Craftroom (an exclusive TWICE-A-WEEK online event for my customers) and the monthly Online Tutorial. The October Tutorial features the beautiful Merriest Trees Bundle!


CELEBRATING 35 YEARS!!
Starter Kit Promotion
3 – 31 October 2023

We’re celebrating our 35th Anniversary IN STYLE – with an amazing Starter Kit joining Special!
Here’s the deets!
Thru 31 October, anyone who joins our fun crafting community as a new demonstrator can choose EITHER 35% OFF the cost of their Starter Kit OR get 35% MORE product with their Starter Kit!
Whoo-hoo!
Here’s the deets!
Promotion Period: 3–31 October
Signing Deadline: 31 October 2023; 11:59 PM (MT)
New demonstrators can choose one of the following options for their Starter Kit:
Select Option 1 – save on your Starter Kit Purchase! – Get 35% OFF the normal cost of a Stampin’ Up! Starter Kit. Those who select this option will still receive $125 worth of SU product but will only pay $64.35 plus tax. And – shipping of the kit is FREE!
OR
Select Option 2 – pick MORE fun Stampin’ Up! Product! – Get 35% MORE product with your Starter Kit. Those who select this option will pay the usual $99 plus tax – but will get to select $168.75 worth of product! And – shipping of the kit is FREE!!
BUT WAIT! There’s MORE!!
You’ll ALSO get FREE OnStage@Home Registration!
Those who sign up for a Starter Kit during this offer will also be automatically registered for FREE* to our virtual OnStage event on 11 November – that’s a $77 value! And – you don’t even have to travel – just do it from home. In your jammies, if you like!
- Those who sign up for this offer have the opportunity to watch the event independently, gathered together with other demonstrators, or with their Team Leader.
- Demonstrators who join during this promotion will be automatically added to the OnStage attendees; you won’t even need to register separately.
- Demonstrators who join during this promotion will also receive an email with all the information about this event.
Whether you’d like to start a little side hustle or simply take advantage of the awesome 20-25% discount, I would very much love for you to join my Critters-N-Creatin’ Krew team! We have a great time together – even though we live all over the country!

Check right here to get more info about joining Stampin’ Up! and why being a “Critter” is a great idea! I mean – look at those faces! 😎

And – you can click the flyer below and print it out if you like. You can scan the QR Code to get started! Yes – I AM that hip! 😎

Get the Stampin’ Up! Products Used in this Project: You’re going to want a pack (or twenty!) of the Adhesive-Backed Dragonflies & Birds when they come out!


Card Cuts Used in This Project:
Pretty Peacock Cardstock: 4 1/4″ x 11″ (x3 – card base, scored and folded at 5 1/2″)
Bubble Bath Cardstock: 3 7/8″ x 5 1/8″ (x6 – mats for card front and inner liner)
Parakeet Party Cardstock: Bough Punch leaves (multiple for each card)
Gold Foil: Bough Punch leaves (multiple for each card)
Basics Vellum Specialty DSP: Deckled Circle and Nested Essentials die cuts
Basic White Cardstock: 3 3/4″ x 5″ (x3 – inner liner); Nested Essentials die cuts (x2 – sentiments); Deckled Circle die cut (sentiment)
Delightful Floral DSP: 3 3/4″ x 5″ (x3 – card fronts); 2 1/4″ x 6″ (x3 – envelope flap)
If you need any stamping supplies, I’d be very happy to be your Demonstrator. Just click on the Order Stampin’ Up! Online Now button on the right side of the screen to go directly to my online store or drop me an email if you have any questions. Happy Stamping!
Shop the Clearance Rack here. Earn FREE Stampin’ Up! Products – Join my Punkin Head Peppermint Rewards – My online customer thank you program!
Finn Fan Fix 
Mom’s have a lot of important duties.
Like…holding the bone.

It’s a lot better when someone holds it (someone=Mom – Dad isn’t really good at it…).

Mom just has to sorta keep track of where that gnawing is happening.
TTFN
M


 #20 Demonstrator in Sales in the US 2023-2024
 #13 Demonstrator in Leadership in the US 2023-2024
 #21 Demonstrator in Team Building in the US 2023-2024


 KarensCardCorner
 Stamp with Amy K
 Stampin With Shirley G
 Tarabeth Stamps
 TL's Bright Spot
Such pretty cards! Love the color and mix of designer papers and the vellum layers are the perfect touch! Yeah…mom’s just know how to do things better. 😉
Yes. Yes we do! Thanks so much, Amy! 🙂
These are absolutely beautiful cards. Thank you for sharing them and the video which I am now going to watch. ❤️
Thanks very much, Linda – enjoy the video! 🙂
One other note ***** Thank you for the pdf file. I love these! ❤️
So glad they’re helpful! 🙂
I noticed you cut your dimensionals in half. Did you use the large or small dimensionals to cut in half? Thanks for replying. 💕
I used the large ones – I hardly ever buy mini’s any more! I love the size of the halves – and my fingers are happier with them, too! 🙂
Gorgeous cards, Mary!! This DSP is so pretty! I recently made some cards with this technique for the first time. It was so fun! Thanks for sharing.🙂.
It IS fun – and it’s a great way to get several cards QUICK! Thanks, Pam! 🙂
Pretty cards!
Everybody needs help…😂
Yup! Thanks, Mom! 🙂
I love the stack, cut and shuffle technique….it is just fun and works with so many pretty papers. Loved watching you make your cards!
It’s a Mom’s job to hold the bone, don’tcha know? You’re such a good mom.
I know – I keep reading the Mom Book and…seeing new entries of things I’m supposed to do! Thanks so much, Faith – glad you like the card! 🙂
Thanks so much for the video/instructions (PDF)! I’ve seen so many use this stack and shuffle technique on their cards, and I was “I know I can’t replicate that so evenly on all three pieces”—-yep, now I can. I was thinking I had to cut them all separately and I’m definitely not that coordinated! I definitely will be using this to productively use some of my perhaps less favorite DSP patterns mixed with those more favorite patterns. Have a great weekend!
Yeah! So glad that it helped, Gail. It’s a bit of a spatial…head scratcher…until you see it, right!? Have fun and – use up some of that DSP! 🙂