Good morning and Happy Easter! Hope you’ll have the chance to spend today with family and friends! I appreciate that you’re taking time to read my post today – so, I won’t take up too much of your day! 🙂
I’ve got another sneak peek for you from the 2023-2024 Annual Catalog – available for ordering on 2 May! – and it’s one of my faves! It’s the the Countryside Inn suite – anchored by the Countryside Corners bundle and STUNNING Countryside Inn DSP – plus the Lasting Joy set – which coordinates with the suite and brings the sentiments to the party! Take a look-see:
This one is a CASE of a sample that you’ll see in the catalog! 🙂
I started with a piece of the Countryside Inn DSP that I matted on Misty Moonlight cardstock (I am SO happy Misty is BACK!) for the card front.
Tell me that DSP isn’t just…amazeballs!?!
On a piece of Boho Blue cardstock, I stamped the large single image from the Countryside Corners in Boho Blue ink.
Then, using the largest die in the bundled Countryside Corners Die set – I cut out the entire image.
Then I adhered it to the card front with Liquid Glue.
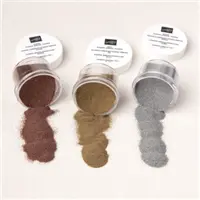
I stamped the big image again – this time in Versamark Ink – on a piece of Basic White cardstock, then I sprinkled it with gold Embossing Powder and heat set it with my Heat Tool.
When the powder was cool, I used two consecutive Countryside Corners dies to cut out the flower “ring” near the center of the image. I set the rest of the embossed image aside for another project – and adhered the die cut into place with Liquid Glue.
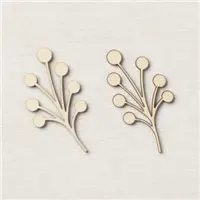
I took a Textural Element and, using my Paper Snips, cut off the bottom of the “branch” – saving it to use on the project later. I adhered the remainder of the Element with Liquid Glue.
I tied a simple bow with a piece of Crumb Cake Baker’s Twine and adhered it with a Glue Dot.
On a piece of Misty Moonlight cardstock, I stamped a pretty sentiment from the Lasting Joy set…
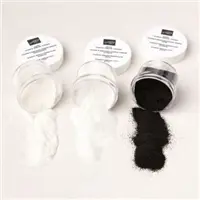
…in Versamark ink, sprinkled it with white Embossing Powder and heat set it.
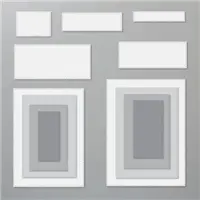
When it was cool, I cut it out with the stand-alone die in the Stitched Rectangles Die set (y’all – you can’t get a lot of these goodies until 2 May – but you CAN – AND SHOULD! – get the Stitched Rectangles Dies right now before they’re gone forever!
Using Stampin’ Dimensionals, I adhered the sentiment over the bow and Textural Element.
Then, using Liquid Glue, I adhered that little piece of stem that I’d cut off earlier – tucking it under the sentiment to make the Element look longer!
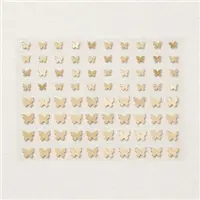
I adhered a Brushed Brass Butterfly and the card front was done!
On the inside, I stamped a second Lasting Joy sentiment in Boho Blue on a Basic White panel. Then I stamped flowers in Boho Blue and little stems and leaves in Crumb Cake.
I used Liquid Glue to adhere the panel to a Misty Moonlight mat and into my Boho Blue card base, popped the card front on with Stampin’ Dimensionals and the card was done!
My Basic White Medium Envelope got more Lasting Joy flowers and stems on the front…
…and more of the Countryside Inn DSP on the envelope flap!
Et Voila! Well? What think you?? The Countryside Inn Suite – with the Countryside Corners bundle and gorgeous Countryside Inn DSP – is truly stunning in Boho Blue, Misty Moonlight, Night of Navy and Balmy Blue! And with sentiments and flowers from Lasting Joy and – yep, this one is going to be a WINNER!
I hope you like!
If you’d like to recreate this card, all the products (at least the ones currently available!) and card cuts you’ll need are down below! And – this was the card I made on my YouTube Live last night! If you’d like to see it – for the first time or AGAIN! – here ’tis!
And…I’ve also created a printable PDF with written instructions and a list of the products used to create this project. You can download, print and/or save it by clicking this image:
Missed any tutorials? You can check out my past projects right here!
TTFN
Connect with me! https://campsite.bio/stampsnlingers
HOST CODE FOR 1 APR – 15 APR: BNME69TM
Use this host code when you order $50 or greater and receive a free gift (AND the Monthly Card Tutorial) from me! If your order is over $150, please do not use this code, but you’ll still get the free gift. The free gift is your choice of any item valued up to $10.00 in any active Catalog! That includes some of the Host Exclusive stamp sets! See my Customer Rewards page for full details.
Note: Make sure that you can see my name on the final checkout page listed as your Demonstrator when you order so that you know that you’re ordering with me and you’ll get my rewards!
You’ll also be getting a link to my ZOOM The Craftroom (an exclusive TWICE-A-WEEK online event for my customers) and the monthly Online Tutorial. The April Tutorial features the beautiful Seaside Bay Bundle!
I am SO excited for you to see the new catalog! Once you do – and after seeing some sneak peeks! – if you decide you just can’t wait until 2 May – then…consider joining the team! If you do that now, then you can add new catalog preorder goodies to your Starter Kit! And then every purchase you make after that is with your 20-25% discount! Yes, please!!
Head over to my joining page here to see the benefits of being a Demonstrator and to sign up now! I would love to have you on my team and help you get all the discounts, and early goodies, and…ALL THE THINGS! 🙂
Get deets right here! And give me a shout if you have any questions! 🙂
Get the Stampin’ Up! Products Used in this Project:
You’ll also want the Countryside Corners Bundle; Lasting Joy stamp set, Countryside Inn DSP; Misty Moonlight and Boho Blue cardstocks, Boho Blue ink when they become available on 2 May!
Card Cuts Used in This Project:
Boho Blue Cardstock: 4 1/4″ x 11″ (card base scored and folded at 5 1/2″); Countryside Corners largest die cut (with stamp)
Misty Moonlight Cardstock: 4 1/8″ x 5 3/8″ (x2 – mat for card front and for inner liner); Stitched Rectangle die cut (sentiment)
Basic White Cardstock: Countryside Corners die cut (with embossed stamp); 4″ x 5 1/4″ (inner liner)
Countryside Inn DSP: 4″ x 5 1/4″ (card front); 2 1/4″ x 6″ envelope flap)
If you need any stamping supplies, I’d be very happy to be your Demonstrator. Just click on the Order Stampin’ Up! Online Now button on the right side of the screen to go directly to my online store or drop me an email if you have any questions. Happy Stamping!
Shop the Clearance Rack here. Earn FREE Stampin’ Up! Products – Join my Punkin Head Peppermint Rewards – My online customer thank you program!
Finn Fan Fix 
On Thursday, we got a mystery box in the mail!
Opening it cleared up much of the mystery!
We saved it for today – Happy Easter!
But on Saturday, Miss Jan came over to drop of the ham for us to smoke for dinner and…a photo shoot ensued!
Enjoy!
And – out of the entire fashion shoot…
The Official Easter Photo! 🙂
Thank you, Aunty Amy and Cousin Ginny for the awesome Easter Basket!!
TTFN
M









 Inky Bee Stampers
 KarensCardCorner
 Stamp with Amy K
 Stamp With Nel
 Stampin With Shirley G
 Tarabeth Stamps
 TL's Bright Spot
Such a pretty card! Love the colors and the layering is perfect! So how many cookies did Finn get to eat during the photo shoot?? Love the bunny ears! 🙂
A few. He truly works for food! Thanks, Amy! 🙂
Love Finn the Easter Bunny!!!
Thanks Gerri! 🙂
So cute!!!!! Happy Easter!
Thanks, Beth – same to you! 🙂
So funny, bunny Finn is being a ham for Easter! Thanks for the morning chuckle!
LOL! Yep – he’s a ham! With bunny ears!! Thanks, Kathy! 🙂
All I can say is…I think I’m going to “need” this suite!
Finn…so cute, so adorable, so pose-able. And such a ham! 😍
Yes – he’s a bit of a “star”! Thanks, Pat – I think you need this set, too! 🙂