Here’s something you don’t know about me. I am an ORGANIZING MAVEN!! I LIVE to clean and organize my household, my barn, my life. My closet is organized by color, garment type and day of the week. My kitchen – well, let’s just say that it could pass for Martha Stewart’s kitchen.
I am possibly the most organized person you will ever know – virtually or in reality.
She said – never!
I’m possibly the polar opposite of everything I wrote above. Oh, I have good intentions. I can straighten and organize an area in the house and it looks quite awesome. And then I USE that area and….well, you know.
Why am I telling you this, you might ask? Well – think back a few posts, when I told you that I’d lost the piece of paper with the recipe for the book Wedding card. Remember me telling you that I would likely FIND said paper where I least expected I would? Guess what? I was right. I DID find it. Tucked away with my embellishments and a couple of ink pads. That’s where you’d have stuck it, right? Certainly you wouldn’t have carefully placed it in your computer roll-on with the other pieces of paper with card recipes. THAT would be crazy. 😉 But, find it I did – so here’s how to make a book card.
Now, this is a different card – I decided to make a new card using the same technique. So the card cuts will be very close to what I used in the wedding card – just different colors. If anyone wants the actual info for the Timeless Love wedding card – just leave me a comment and I’ll post that one as well.
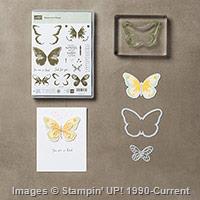
I decided to use the Watercolor Wings set – brand new! – Butterfly Basics, and the Thoughts and Prayers set to create a Get Well card. Take a look see:

In order to keep this post from being longer than the Constitution of the United States, I’ll keep the decription pretty high level here. If you want the full deets, head on over to my Tutorials page!
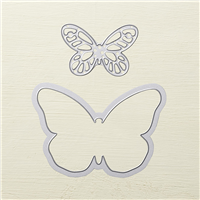
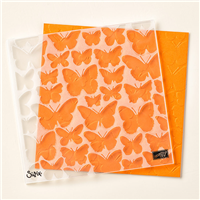
I started with a piece of Whisper White card stock as my card base – I didn’t use the new thicker version – this card has plenty of layers to give it some heft, even with the thinner Whisper White. Then I took a piece of Wisteria Wonder card stock and ran it thru the Big Shot in the brand new Fluttering Textured Impressions Embossing Folder. I SNAILd that to the front of the card base. For the sentiment mat, I used some Shimmery White, and stamped the butterfly from the new Watercolor Wings stamp set. This is an awesome set – with so many possible combinations of colors and potential butterflies! For this one, I did the first stamp in Wisteria Wonder – that I stamped off on a piece of scrap paper before I stamped my art piece. The second stamp (this is a THREE step stamp!), I did in Wisteria Wonder that I did NOT stamp off first. The final color for the third step is Elegant Eggplant. See how you can get a three color butterfly with only two ink pads? Cool, huh? The body and antenna is in Rich Razzleberry. Once the butterfly was stamped, I cut him out with the matching die from the brand new Bold Butterfly thinlets. Which I got for 15% off because I got it as a bundle with the Watercolor Wings stamp set! 🙂

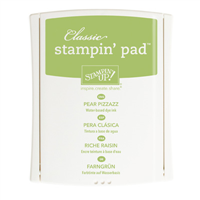
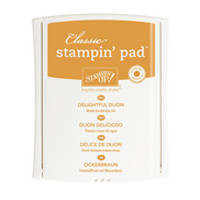
I went into the Butterfly Basics set for the sentiment and the other images on the card front. The sentiment is stamped in Elegant Eggplant. The fronds are Pear Pizzazz – some of them stamped off before putting on the art piece. Finally, the honeycomb is in Delightful Dijon – stamped off on a piece of scrap paper. I set the art piece and the die cut butterfly aside and went to work on the inside of the card.
For the inside, I started with a piece of Shimmery White card stock. The first thing I did was to emboss it with the Fluttering TIEF. I ran it thru twice – the first time I made sure that I put the right edge of the TIEF folder on the centerline of the card stock – where there was going to be a fold (to hide the edge that you get when you emboss….). For the second pass, I put the LEFT edge of the folder on the centerline.
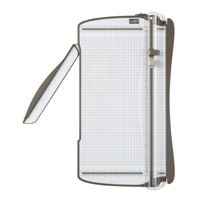
The first cuts are shown in the following picture. Basically, you put the card stock into your trimmer and then cut starting at 1 1/2″ from the edge and the top/bottom and running to 1 1/2″ from the other end. The photo also shows the “joint” between the two TIEF-runs.

Next, I scored the lines that create the “book”. The next photo shows those – please note that I made a boo-boo. The score lines at 3 1/2″ and 7 1/2″ are only supposed to be between the top of the card stock and the top cut and then again between the bottom of the card stock and the bottom cut. When you make your book card, do it the way it SHOULD be done – don’t be like me, okay!?!
Then I folded each of the score lines and used my bone folder to gently burnish each fold. This picture shows how the score lines and hills and valleys work….

The final step of making the book, before I started decorating it, was to glue it to the card base. I used Liquid Multi-Purpose Glue – so I’d have a few minutes to be sure everything was where I wanted it. I only glued the ends of the book insert……as you can see here:

Then I positioned it on the card base – being sure all the ends lined up. And that got the cake baked, as it were – so I started on the frosting. Cake analogy…..hmmm….
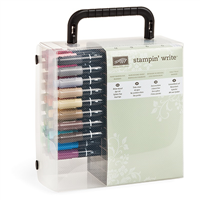
I cut two Wisteria Wonder mats and two pieces of Shimmery White for the inside art pieces. The sentiments are from the Thoughts and Prayers set, stamped in Wisteria Wonder. I used a sticky note on the stamp to let me divide the sentiment between the two pieces. More fronds from the Butterfly Basics, in Pear Pizzaz and stamped off on scrap paper as well as a butterfly from the Papillion Potpourri set in Smoky Slate finished off the art pieces. I used my Pink Pirouette and Daffodil Delight Stampin’ Write Markers to color in a few of the flowers in the butterfly.

And then I did a bunch of little three-dot clusters with my Smoky Slate marker. Guess which one was the “first” one – you know, the one to cover up my ink smudge. Sheesh…. 😉
I SNAILd the mats and art pieces in place – and then added a tiny seed pearl to the center of one of the flowers in the butterfly. And the inside was done.
I went back to the outside of the card, SNAILing the sentiment piece onto the embossed mat. Then I attached the die cut butterfly with glue dots along the body and some Stampin’ Dimensionals under the wings. I gave him some Pearl Basic Jewels for a body – and the card was done.
For the finishing touch, I used the new Whisper White Envelope Paper and my Envelope Punch Board and made a custom envelope. (How many more times could I get the word “envelope” into one sentence!?!) I decorated it with some more of the Butterfly Basic fronds in Pear Pizzaz and a Smoky Slate Papillon Potpourri butterfly.

Hope that you enjoyed the card – and that the directions over in Tutorials make it possible for you to create your own Book Card. I’m definitely going to be making more of them – they’re just fun to make and to give!
If you were interested in getting in on Round Two of the catalog shares, now’s the time – I’ll close the shares out tomorrow at the end of the day.
Also – today’s the last day to get in on this week’s Weekly Deals – I think that 2″ punch is calling my name!
Hope that everyone had a fun and SAFE 4th of July weekend – and remembered to say “Thanks” to the Soldiers, Sailors, Airmen and Marines who make our freedom possible! We’re the Land of the Free – because of the Brave!
TTFN
Mary
WEEKLY DEALS FOR 30 Jun – 6 Jul 15!! Click here to see the Weekly Deals from Stampin’ Up! in my online store. The Weekly Deals are only while supplies last and only available at these great prices through 6 Jul!


Catalog Shares – Round Two

Did you miss out on the Catalog Shares? Are you kind of kicking yourself and doing the Deatherage-Dither (that’s what we call it here when we say “Coulda-woulda-shoulda”!! We say it a LOT!!)? Well, if you are – fear not. I’m going to do it ONE. MORE. TIME! Don’t dither on this one, okay? I’ll leave this round open for a week. Go here to see what’s in a share – and to sign up. This craziness will end on 7 Jul!
Stampin’ Up! Products Used in Today’s Project:


Built for Free Using: My Stampin Blog
Card Cuts Used in Today’s Project:
Whisper White Card Stock: 6″ x 11″ (card base, scored and folded at 5 1/2″)
Shimmery White Card Stock: 6″ x 11″ (inside of card – scored and folded as described above); 4 7/8″ x 5 1/2″ (front are piece); 2 3/4″ x 3″ (two pieces for the inside art pieces
Wisteria Wonder Card Stock: 5 1/8″ x 5 3/4″ (front mat); 3 1/8″ x 2 7/8″ (two pieces for the inside mats)
Whisper White Envelope Paper: 9 3/4″ x 9 3/4″ (for the envelope – says Capt Obvious!)
Shop the Clearance Rack here.
Earn FREE Stampin’ Up! Products – Join my Punkin Head Peppermint Rewards – My online customer thank you program!
BACKORDER LIST AS OF 2 Jul 15
6 July
124267: Basic Black 12″ x 12″ Cardstock
126697: Wetlands Clear Stamp Set
138295: Tree Builder Punch (initial shipment will not cover all backorders; learn more here)
138764: Heartfelt Sympathy Photopolymer Stamp Set
9 July
138424: Mint Macaron 1″ Dotted Lace Trim
138425: Watermelon Wonder 1″ Dotted Lace Trim
138426: Delightful Dijon 1″ Dotted Lace Trim
10 July
129381: Ovals Collection Framelits
138377: Cottage Greetings Card Kit (initial shipment will not cover all backorders; learn more here)
138378: Tin of Cards Project Kit (initial shipment will not cover all backorders; learn more here)
138444: Timeless Elegance Designer Series Paper
13 July
138288: Brick Wall Textured Impressions Embossing Folder
15 July
113475: Big Shot Standard Cutting Pads
31 July
135862: Gift Bag Punch Board
Date to be Determined
138376: All Boxed Up Kit
138395: Expressions Natural Elements
138402: Silver Metallic Thread


 #20 Demonstrator in Sales in the US 2023-2024
 #13 Demonstrator in Leadership in the US 2023-2024
 #21 Demonstrator in Team Building in the US 2023-2024


 KarensCardCorner
 Stamp with Amy K
 Stampin With Shirley G
 Tarabeth Stamps
 TL's Bright Spot
Thank you Mary for sharing the directions on this card!! I love it and can’t wait to try it!!
Thanks, Patty. Hope that my directions lead you down the right path – if not, let me know and I’ll try to help! Appreciate you taking time to leave a comment! 🙂
This is so pretty Mary! Love the fun fold that you’ve used and the butterfly embossing is stunning!
Thanks, Amy! I am loving that TIEF!! 🙂
I absolutely love the card and the great directions. Just one direction question…what is the size of the Whisper White card base and the piece of Wisteria Wonder you embossed. I really want to CASE the card the right way and could really use those measurements. Many thanks, pat
So sorry…I apparently didn’t read to the end of your post.
LOL – I was just cutting and pasting all the card cuts for you! I’m glad that you like the card – hope your CASE goes well. Let me know if there’s any other info I can help with! M 🙂