Good morning on weekend-eve! Yup – we made it thru another week and tomorrow the weekend will dawn bright and clear! At least – supposedly! LOL. It IS Fall here so…one never really knows what it’ll do from one minute to the next. We’re in open-the-windows-close-the-windows-open-the-windows-close….. You know what I’m talking about! But that’s okay – it’s my fave time of the year and I’m loving every second!
Today’s card is a nod to the looming-ness of Christmas! For those of you who give gift cards (me me me!) – a pretty gift card holder is a wonderful thing to have in your kit bag! This one starts as a Hidden Gate Card decorated with Timeless Christmas DSP – and, thanks to some cool die cuts and images from the Home for Christmas bundle – as well as Scalloped Christmas Cheer sentiments – becomes a perfect gift card holder. Take a look-see:

And the color palette was inspired by the color challenge over at The Paper Players this week.

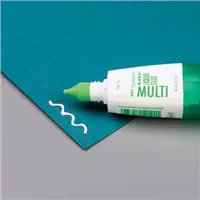
I started by using Liquid Glue to adhere two 7/8″ x 4 1/8″ pieces of gold Timeless Metallic Specialty Paper on the ends of a 4 1/4″ x 5 1/2″ piece of Peaceful Pine cardstock – this is the card base.
Next, using my Paper Trimmer, I scored a 4 1/4″ x 11″ piece of Peaceful Pine cardstock at 2″, 3 3/4″, 7 1/4″ and 9″. Then I folded the two innermost folds “in” and the two outside folds “out” – aka…it’s a gate fold!

On the inside of the gate fold, I adhered pieces of Timeless Christmas DSP – two 1 1/2″ x 4 1/8″ holly patterned pieces, a 3 3/8″ x 4 1/8 plaid piece on the middle section and a 1 7/8″ x 4 1/8″ piece of the plaid DSP on the right-most panel. Note: the remaining panel (on the far left) didn’t get a DSP panel yet. It comes later!

On a piece of Basic White cardstock, I stamped a tree from Home for Christmas in Peaceful Pine ink and cut it out with the corresponding die in the set.
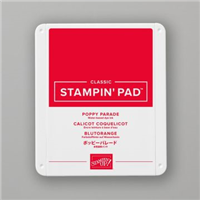
Using a die in the Home for Christmas die set, I cut out the card holder envelope from Basic White cardstock. I set the die cut tree in place and used it as a guide to stamp a Scalloped Christmas Cheer sentiment in Poppy Parade ink. Then I adhered the tree with Liquid Glue.
I cut out three little stars from gold Timeless Metallic Specialty Paper and adhered them to the little tree with Liquid Glue.

I folded the three sides of the little card holder to the back and using Liquid Glue – sparingly! – on the three flaps – adhered it to the middle panel. Note: use an old gift card or credit card as a “sizer” to be sure you place the pocket so the gift card won’t stick out the top of the card!
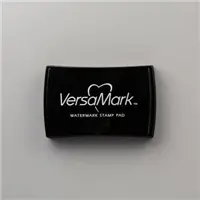
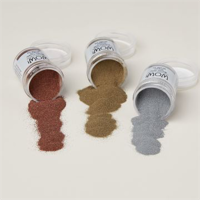
On a piece of Basic White cardstock, I stamped the Home for Christmas bow in Versamark Ink, sprinkled it with Gold Metallics WOW! Embossing Powder and heat set it with the Heat Tool. Then I cut it out with the coordinating die in the set and adhered it to the top of the card holder envelope.

I put Liquid Glue on the back of the center of the gate card and adhered it to the 4 1/4″ x 5 1/2″ card base – centering it left-to-right and aligning the top and bottom edges.
For the front, I adhered a 3 7/8″ x 4 1/8″ piece of plaid Timeless Christmas DSP to a 4″ x 4 1/4″ piece of Peaceful Pine cardstock.
Using the tag die in the Home for Christmas die set, I cut out a tag from green Timeless Christmas DSP and one from Basic White cardstock.

I adhered the green tag to the matted panel with Liquid Glue.
I inked “sending” from the Scalloped Christmas Cheer sentiment in Poppy Parade ink and stamped the white tag. I cleaned the stamp and inked the remaining words to stamp underneath. I adhered the tag to the card with Liquid Glue.

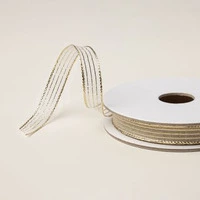
I tied a bow from a piece of Gold Striped 3/8″ Mesh Ribbon (on the Last Chance List so…grab it quick!) and adhered it with a Mini Glue Dot.
I cut out three Home for Christmas holly leaves from Peaceful Pine 2026-2028 In Color Pearlized Paper and five holly berries from red Timeless Metallic Specialty Paper.

I added the die cut holly leaves and berries to the card front with Liquid Glue.
I put Liquid Glue on the left front gate panel and then adhered the card front to it – aligning the left side of the card front and gate panel, as well as the top and bottom. When the card is closed – you can’t tell that there’s a “gate” there! Boom…”Hidden”! 🙂

Finally, I opened the card all the way up and used Liquid Glue to adhere another 1 7/8″ x 4 1/8″ piece of the plaid Timeless Christmas DSP to the BACK of the square card front.

Finally – I added an Adhesive-backed Christmas Berries to the middle of the bow and the card was done!
My Basic White Medium Envelope got the Scalloped Christmas Cheer holly leaf image in Peaceful Pine and the berries in Poppy Parade on the front…

…and more of the plaid Timeless Christmas DSP on the envelope flap.

Et Voila! This is such a fun fun fold – but it gets even better when you can make it into a gift card holder! The Home for Christmas dies and images make it easy and pretty! Timeless Christmas DSP dresses this card in the perfect traditional colors! And the Scalloped Christmas Cheer stamp set is the perfect choice for sentiments!

I hope you like! 🙂
If you’d like to recreate this card, all the products and card cuts you’ll need are down below! And this is the card I made on yesterday’s Thursday After Lunch Bunch Video. If you’d like to see it – for the first time or again! – here ’tis!
I’ve also created a printable PDF with written instructions and a list of the products used to create this project. You can download, print and/or save it by clicking this image:

Missed any tutorials? You can check out my past projects right here!
TTFN
M

Connect with me! https://campsite.bio/stampsnlingers

CUSTOMER REWARDS
Earn 10% of your retail amount on all orders of $20 or greater! And you’ll be earning Punkin’ Head Peppermints – one peppermint for each $25 you spend thru my Online Store! When you gather up 16 Peppermint Points – you’ll be able to select a $40 gift right from me!
You’ll also be getting a link to my ZOOM The Craftroom (an exclusive TWICE-A-WEEK online event for my customers) and the monthly Online Tutorial – featuring the Wrapped in Greenery Bundle for November orders.
See my Customer Rewards page for full details.


DOUBLE STAMPIN’ REWARDS ON PAPER PUMPKIN

Tis the season to earn DOUBLE Stampin’ Rewards on Paper Pumpkin subscriptions! That means 20% instead of the standard 10%! BOOM!
Here’s the deets!
Promotion: 11 Nov – 10 Dec
- Qualifying subscriptions will earn 20% in Stampin’ Rewards once the threshold of $20 is met. Some exclusions apply. View the Stampin’ Rewards page to learn more.
- This offer applies to new and existing pay-as-you-go subscriptions AND new prepaid subscriptions. (So – this does EXCLUDE an existing prepaid subscription.)
- Current pay-as-you-go Paper Pumpkin subscribers don’t need to do anything – your double rewards will be applied automatically on the December 11 billing date.
- New subscribers will receive double rewards upon purchase of their pay-as-you-go or prepaid Paper Pumpkin subscription.
- New subscribers who sign up during this promotion cannot skip the December Timeless Flora Kit. Current pay-as-you-go subscribers must keep their subscriptions active for the December kit to receive double rewards.
- To participate, customers must have a Stampin’ Up! account and be opted in to the Stampin’ Rewards program. Be sure to get that done, if you haven’t already!, before the offer begins!!
- If you purchase a Gift Certificate for someone special (congrats – you’ll be a gift giving hero!!) – you’re ALSO going to earn Double Stampin’ Rewards on that! Here’s printable Certificates that you can print and gift! Note; The Certificate is NOT needed to redeem the Paper Pumpkin subscription – but…they’re cute! Kits will be delivered monthly once the subscription is purchased through the website.


Choose a pay-as-you-go plan with auto shipping – so you never miss a month. Or choose a prepay plan for 3 months, 6 months, or 12 months of Paper Pumpkin kits. Shipping Included. Boom! Get more info here.
Decide which plan you’re going to go for and then get signed up right here!
Holler with any questions or…you can go right here for more details about the Paper Pumpkin Double Stampin’ Rewards offer!
NOVEMBER PRODUCT OF THE MONTH

Every month Stampin’ Up! will release a new item that is only available for purchase once per account. NOTE: These items will be limited quantity and are likely to sell out quickly—once they’re sold out, they’re gone for good
The November Product of the Month is the pretty Branched Out Messages stamp set. Get it for just $5 with your November orders of $75+!!

Give your handmade projects a fresh new look with the Branched Out Messages Stamp Set. Featuring all-occasion sentiments and a beautifully detailed large greenery stamp, this stamp set is perfect for adding elegant botanical touches to your handmade cards. Use just the greenery stamp to fill your card front with leafy details, or incorporate the small flower stamps to enhance your design. No matter your style, you’ll find plenty of ways to let your creativity grow
– 7 photopolymer stamps
– Suggested clear blocks (sold separately): c, d, f
– Also available in French
Get the Stampin’ Up! Products Used in this Project:





Card Cuts Used in This Project:
Peaceful Pine Cardstock: 4 1/4″ x 5 1/2″ (card base); 4 1/4″ x 11″ (gate card, scored and folded at 2″, 3 3/4″, 7 1/4″ and 9″); 4″ x 4 1/4″ (card front)
2026-2028 In Color Pearlized Paper (in Peaceful Pine): Home for Christmas die cut holly leaves (x3)
Timeless Metallic Specialty Paper: 7/8″ x 4 1/8″ (x2 – gold – strips on card base); Home for Christmas die cut holly berries (x5 – red); Home for Christmas die cut stars (x3 – gold)
Basic White Cardstock: Home for Christmas die cut tag (sentiment on front); Home for Christmas stamped & tree; Home for Christmas gold embossed bow; Home for Christmas die cut gift card envelope on inside
Timeless Christmas DSP: 3 7/8″ x 4 1/8″ (holly – card front); 1 1/2″ x 4 1/8″ (x2 – holly – inside strips); 3 3/8″ x 4 1/8″ (plaid – inside center panel); Congrats on an Awesome Quarter!7/8″ x 4 1/8″ (x2 – plaid – on inside panels of card); 2 1/4″ x 6″ (envelope flap)
If you need any stamping supplies, I’d be very happy to be your Demonstrator. Just click on the Order Stampin’ Up! Online Now button on the right side of the screen to go directly to my online store or drop me an email if you have any questions. Happy Stamping!
Shop the Last Chance List here. Earn FREE Stampin’ Up! Products – Join my Punkin Head Peppermint Rewards – My online customer thank you program!
Finn Fan Fix 
It was Grooming Week! Two bootiful pups!!


I’m hoping for a week looking pretty. A girl can dream, right?
TTFN
M


 #17 Demonstrator in Sales in the US 2025-2026
 #13 Demonstrator in Leadership in the US 2023-2024
 #21 Demonstrator in Team Building in the US 2023-2024


 KarensCardCorner
 Stamp with Amy K
 Stampin With Shirley G
 Tarabeth Stamps
 TL's Bright Spot

Such a great fun fold design! Love the little gift card pocket too. Yes, both puppies looks shiny and clean…I’m sure that they won’t roll in anything or run through anything since they’re all spotless now. 😉
No – of course not. They respect Mom’s money and time WAAAY too much to do THAT!! LOL! Thanks so much! 🙂
Love your fancy gift card holder Mary – it allows for a great showcase of those papers and I love the little Christmas tree decoration inside! Thank you for making my colours shine over at The Paper Players this week!
Thanks for the holiday inspiration, Joanne – and I’m glad you liked the gift card holder! 🙂
Such a cute gift card holder, Mary, and I love how you did the fun fold! Great use of our challenge colors, this all comes together wonderfully. Thanks for playing along with us at The Paper Players!
Thank you so much, Christy – I appreciate you stopping by! 🙂