Good morning – I told you it would be Friday again before you know it, didn’t I? And I was right! Whoo-hoo! 😎
So – a couple of my talented team mates – Carole Buckalew and Terry Lynn Bright – made a fun fold card in the past week or so. It’s a Bay Window card and…I’d never made one. So…after seeing their gorgeous cards (you might want to click on their names and check out their blogs! 🤙) – I decided to give it a go!
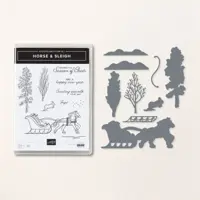
I made mine a Christmas card – decorating it with a beautiful piece of new One Horse Open Sleigh DSP and the Horse & Sleigh bundle – both of which are Online Exclusives. Take a look-see:

There are a lot of Bay Window cards out there, but Debbie Joy, of Delight of My Heart, figured out how to make one that is centered – so…I used her measurements as a starting point! 😉
I started with a 4 1/4″ x 11″ piece of Lemon Lolly cardstock that I scored at 1/4″ and 4 1/2″ along the long side.
Then, I flipped the panel over (the 1/4″ score line is still AT the 1/4″ mark when you do this right!).

I started folding at the 5 1/2″ score line – folding it as a mountain. The next score line is a valley – then mountain – mountain – valley (this is the 1/4″ line).
Using Liquid Glue just between the 4 1/2″ and 5 1/2” score lines, I adhered the front of the card base to the back – just in that 1” area.

I adhered two strips of light woodgrain One Horse Open Sleigh DSP to two pieces of Misty Moonlight – and used Liquid Glue to adhere one of them to the far left panel of the card front (the one I’d just “made”).
I adhered the second matted strip to a 1″ x 4 1/4″ piece of Lemon Lolly cardstock. Using Stampin’ Dimensionals – I adhered it to the other end of the card base – making sure to line up the edges of the strip with the edges of the card base.

To cut the three middle DSP panels – I used my Paper Trimmer and cut a 1″ piece, then a 1 1/2″ piece and then another 1″ piece – all from the same side of the 6″ x 6″ piece of DSP.
I trimmed the three strips down to 4″ lengths – trimming an inch from each end. Note: I didn’t do that on the video but…you should do it that way – it helps to keep the pretty scene centered!
I matted all three pieces on Misty Moonlight and adhered them – in order – to each of the three smaller panels (the “bay”).

On another piece of light woodgrain One Horse Open Sleigh DSP, I stamped a Horse & Sleigh sentiment in Misty Moonlight ink. In the bottom corners, I stamped the tree image a few times in Pebbled Path. I stamped the first tree in stamped-off-once ink and then stamped a few more times without re-inking.

I used Liquid Glue to adhere the panel to a Misty Moonlight mat and into the middle of the card base.
For the front – I cut two Horse & Sleigh trees, using the die in the set – from a piece of dark woodgrain One Horse Open Sleigh DSP. I adhered those to the center panel of the “bay” using Liquid Glue.

On the light woodgrain DSP, I stamped the Horse & Sleigh sentiment in Misty Moonlight and cut it with the largest Stylish Shapes banner die. Then I adhered it to the middle panel – over the trees – with Liquid Glue.
To finish the card, I added a flurry of coppery new Adhesive-backed Snowflakes and the card was done.
This cool card lays flat to go in a Medium Envelope. To make the “bay” – you (and your recipient) slide the 1/4″ tab under the popped up panel on the right side of the card!

And it’ll even stand up on its own!

My Basic White Medium Envelope got the Horse & Sleigh tree on the front…

…and more of the One Horse Open Sleigh 6″ x 6″ DSP on the envelope flap.

Et Voila! Okay – how fun is this Bay Window fun fold?? I love it – and it’s ESPECIALLY perfect with the scenic papers from the One Horse Open Sleigh 6″ x 6″ DSP, isn’t it?! I mean – wow!! I like the pretty images and sentiments in the coordinating Horse & Sleigh stamp set – with the fun bundled dies. Remember – the DSP and the bundle are both Online Exclusives meaning…you know…they’re not in any catalogs!! 🙂

I hope you like!
If you’d like to recreate this card, all the products and card cuts you’ll need are down below! And – this is the card that I made on my YouTube live yesterday! If you’d like to see it – for the first time or again – here ’tis:
I’ve also created a printable PDF with written instructions and a list of the products used to create this project. You can download, print and/or save it by clicking this image:

Missed any tutorials? You can check out my past projects right here!
TTFN
M

Connect with me! https://campsite.bio/stampsnlingers
HOST CODE FOR 1 JUL – 15 JUL: KEBTKUKT
Use this host code when you order $50 or greater and receive a free gift (AND the Monthly Card Tutorial) from me! If your order is over $150, please do not use this code, but you’ll still get the free gift. The free gift is your choice of any item valued up to $10.00 in any active Catalog! That includes some of the Host Exclusive stamp sets! See my Customer Rewards page for full details.
Note: Make sure that you can see my name on the final checkout page listed as your Demonstrator when you order so that you know that you’re ordering with me and you’ll get my rewards!
You’ll also be getting a link to my ZOOM The Craftroom (an exclusive TWICE-A-WEEK online event for my customers) and the monthly Online Tutorial. The July Tutorial features the beautiful Earthen Textures Bundle!


Here’s the Deets!
Earning Period: 6–31 July 2023
Ordering Deadline to Earn: 31 July 2023 at 11:59 p.m. (MT)
- Earn a $5 coupon for every $50 spent (before shipping and tax).
- All coupon codes will be emailed right after a qualifying purchase has been made. Customers can shop, purchase, and earn coupons as a guest if they provide a valid email at checkout. However, customers are encouraged to create an account on our online store.
- If a participant earns multiple codes from a single order, they will receive one email with multiple codes. If they earn multiple codes from multiple orders, they will receive separate emails for each code earned.
- All order types qualify for this promotion. Phone and email orders still require an email address.
- Orders started before the promotion begins will not count toward earning coupon codes. For example, if you add items to your cart before 6 July and wait to purchase until that date or later, then those items will not qualify towards earning coupons. You must add items to your cart and complete your purchase during the earning period.
- There’s no limit to the number of coupon codes you can earn per order or throughout the duration of the earning period.
And – we’ve got some cool spots to look for new goodies and new “deals”! Check these out!


Get the Stampin’ Up! Products Used in this Project:


Card Cuts Used in This Project:
Lemon Lolly Cardstock: 4 1/4″ x 11″ (card base, scored and folded at 1/4″, 1 1/2″, 3 1/4″, 4 1/2″ and 5 1/2″ – see template); 1″ x 4 1/4″ (for pop-up strip on right side of card)
Misty Moonlight Cardstock: 7/8″ x 4 1/8″ (2 – mats for small end panels); 1 1/8″ x 4 1/8″ (x2 – mats for two small panels on “bay”); 1 5/8″ x 4 1/8″ (mat for center “bay” panel); 3 3/8″ x 4 1/8″ (mat for inside panel)
One Horse Open Sleigh 6″ x 6″ DSP: 3/4″ x 4″ (2 – small end panels); 1″ x 4 ” (x2 – two small panels on “bay”); 1 1/2″ x 4″ (center “bay” panel); 3 1/4″ x 4″ (inside panel); Stylish Shapes die cut banner (sentiment); Horse & Sleigh die cut trees (x2); 2 1/4″ x 6″ (envelope flap)
If you need any stamping supplies, I’d be very happy to be your Demonstrator. Just click on the Order Stampin’ Up! Online Now button on the right side of the screen to go directly to my online store or drop me an email if you have any questions. Happy Stamping!
Shop the Clearance Rack here. Earn FREE Stampin’ Up! Products – Join my Punkin Head Peppermint Rewards – My online customer thank you program!
Finn Fan Fix 
Sometimes? When you tip-toe-thru-the-tulips….

Yes – I know that looks like a dimensional cover but…it’s not.
It’s a dried hydrangea petal.
But…”Tip-toe-thru-the-dried-hydrangeas” really just didn’t work…
🤷♀️
TTFN
M


 #20 Demonstrator in Sales in the US 2023-2024
 #13 Demonstrator in Leadership in the US 2023-2024
 #21 Demonstrator in Team Building in the US 2023-2024


 KarensCardCorner
 Stamp with Amy K
 Stampin With Shirley G
 Tarabeth Stamps
 TL's Bright Spot
Such a pretty card design! Love the colors and that paper is perfect for this fancy fold! Poor Finn…he’s just checking to see how things smell and next thing you know, it’s a hydrangea petal to the nose. 😉
They do that – pesky petals!! Thanks so much, Amy! 🙂
This is such a great fun-fold! It was fun watching you create it…..you can make anything seem possible to do!
And Finn…..he is adorable with ‘something’ on his nose!
Thanks, Fait – I do like this fold! And yes – he’s always cute when he’s sporting an embellishment! 🙂