Happy Friday, y’all! Have you had a good week? We’ve done okay – it’s been busy so…looking forward to a quieter weekend. I’d hope for cooler, too – but…I feel like that’s a waste of hoping! I do hope that wherever YOU are you’re not flooding or breathing in a ton of smoke! 🙁
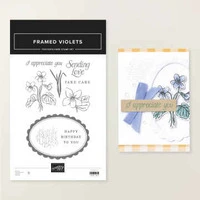
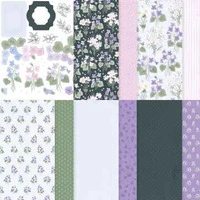
Today’s card is a fun fold – it’s a fun and easy fold called a Tri-Fold Window card. I used Violet Dreams DSP (it was on my desk from the last card I made) and the Framed Violets stamp set to decorate it! Take a look-see:

I saw a few versions of this fun fold online but…I started with dimensions from the card made by Heidi Collins at On Y Go Stamping!
I started with a 4 1/4″ x 11″ piece of Peaceful Pine cardstock that I scored at 5 1/2″. To the front, I adhered a 4 1/8″ x 5 3/8″ piece of Violet Dreams DSP using Liquid Glue. Note: I kept the glue away from the middle of the panel – cuz…I was fixin’ to cut a hole in it!
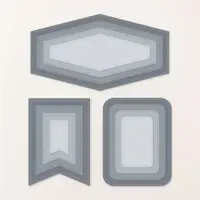
I placed the largest Nested Essentials rectangle die in the middle of the panel and ran it thru the Stampin’ Cut and Emboss Machine. I kept both of the pieces of that I cut out – to use later.

For the inside card, I scored a 4″ x 7 1/2″ piece of Gorgeous Grape cardstock at 5 1/4″. On the smaller panel, I adhered a 2 1/8″ x 3 7/8″ piece of the Violet Dreams DSP using Liquid Glue.
On a 3 7/8″ x 5 1/8″ piece of Basic White cardstock, I stamped a Framed Violets sentiment in Gorgeous Grape ink. In the corner, I stamped the larger floral from the set in Tuxedo Black Memento Ink. I colored the image with the Light Peaceful Pine Stampin’ Blend and the Light & Dark Fresh Freesia Stampin’ Blend.

I used Liquid Glue to adhere the panel to the inside of the Gorgeous Grape card and then used Liquid Glue to adhere the card to the inside of the Peaceful Pine card base – ensuring that it opened in the opposite direction.

I used the next-to-largest Nested Essentials die to cut out a Basic White rectangle. On it, I stamped a Framed Violets sentiment in Gorgeous Grape ink and the stems/leaves image twice-without-reinking in Peaceful Pine. I adhered the white die cut to the Peaceful Pine rectangle that I’d cut out from the front of the card base.

I closed both card bases and – using Liquid Glue on the potion of the inside card base visible thru the window – adhered the matted sentiment back into place.
Then it was time to decorate – and I used die cuts that are included in the Violets Dreams DSP – you get TWO full sheets of beautiful flowers and leaves!

For the inside, I adhered a couple of leaves with Liquid Glue and a few flowers, too – some with Liquid Glue and one with a Stampin’ Dimensional. Note: I made sure that the die cuts didn’t extend past the fold in the Gorgeous Grape card base. I added an Adhesive-backed Blooms and moved to the front!

For the top left corner – I added some leaves with Liquid Glue. Note: it’s REALLY important that you don’t get any adhesive on the sentiment section (in the window)! If you do – the card’s going to have a little trouble opening!
I also used some flowers – adhering them with Liquid Glue. And – there’s another Adhesive-backed Bloom. Aren’t they pretty!?

For the “main” collage – in the bottom right corner – I started again by adhering a couple of the die cut leaves to the card front with Liquid Glue. Then I added a couple of the flowers with Liquid Glue and one with a Stampin’ Dimensional.
I tied a little Linen Thread bow and adhered it with a dab of Liquid Glue,

I added the final flower over the bow with a Stampin’ Dimensional. Then I added an Adhesive-backed Bloom and the card front was done!

My Basic White Medium Envelope got the large Framed Violets image on the front…

…and more of the Violet Dreams DSP on the envelope flap.

Et Voila! Well – this is a fun fun fold, isn’t it?! Easy enough to not make your head hurt – but…cool enough to be a WOW when your recipient opens it up! And it gives lots of options for decorating, too! The Violet Dreams DSP is a great choice – with pretty papers AND those two sheets chock-a-block full of beautiful flowers and leaves to use on your projects! The Framed Violet stamp set comes thru with pretty sentiments and beautiful florals to color as you like!

I hope you like! 🙂
If you’d like to recreate this card, all the products and card cuts you’ll need are down below! And, this is the card I made on yesterday’s Thursday After Lunch Bunch YouTube Video. If you’d like to watch it – for the first time or again – here ’tis!
I’ve also created a printable PDF with written instructions and a list of the products used to create this project. You can download, print and/or save it by clicking this image:

Missed any tutorials? You can check out my past projects right here!
TTFN
M

Connect with me! https://campsite.bio/stampsnlingers
CUSTOMER REWARDS
Earn 10% of your retail amount on all orders of $20 or greater! And you’ll be earning Punkin’ Head Peppermints – one peppermint for each $25 you spend thru my Online Store! When you gather up 16 Peppermint Points – you’ll be able to select a $40 gift right from me!
You’ll also be getting a link to my ZOOM The Craftroom (an exclusive TWICE-A-WEEK online event for my customers) and the monthly Online Tutorial – featuring the Fern & Flora Bundle for July orders.
See my Customer Rewards page for full details.


AVAILABLE NOW!

Introducing one of the hottest items in crafting—the new Stampin’ Hot Foil System. The metallic magic starts with Stampin’ Hot Foil Rolls, specially-made Hot Foil dies, and the Stampin’ Hot Foil System that works with our Stampin’ Cut & Emboss Machine (sold separately). The heat of the platform transfers the foil using hot foil dies designed specifically for this system, allowing you to add dazzling details to paper and more.

I did a full post – with all the deets – on this new system – you can get ALL the deets right here! And then – get to HOT (foiling!) right away!
Paper Pumpkin Subscription Special Thru 10 August!

Have you been thinking of trying Paper Pumpkin? Now’s a perfect time to get started with our all-inclusive crafting kit subscription! Purchase a pay-as-you-go subscription between 11 July and 10 August and you’ll get 25% off the first kit! Whoo-hoo!
Get more deets here or….head over to the Online Store thru 10 August 2026 to subscribe…and if you’re a new subscriber, you’ll get 25% off the August Kit!!
Get the Stampin’ Up! Products Used in this Project:






Card Cuts Used in This Project:
Peaceful Pine Cardstock: 4 1/4″ x 11″ (card base, scored and folded at 5 1/2″)
Gorgeous Grape Cardstock: 4″ x 7 1/2″ (inside card – scored and folded at 5 1/4″)
Basic White Cardstock: Next-to-Largest Nested Essentials die cut (front sentiment); 3 7/8″ x 5 1/8″ (inside liner)
Violet Dreams DSP: 4 1/8″ x 5 3/8″ (card front); 2 1/8″ x 3 7/8″ (small inside panel); Die cut leaves and flowers on card; 2 1/4″ x 6″ (envelope flap)
If you need any stamping supplies, I’d be very happy to be your Demonstrator. Just click on the Order Stampin’ Up! Online Now button on the right side of the screen to go directly to my online store or drop me an email if you have any questions. Happy Stamping!
Shop the Clearance Rack here. Earn FREE Stampin’ Up! Products – Join my Punkin Head Peppermint Rewards – My online customer thank you program!
Finn Fan Fix 
Bootiful after his trip to the hair bender!

Getting the side-eye cuz…it’s PAST dinner time, Mom. Let’s GOOOO!!!
TTFN
M


 #20 Demonstrator in Sales in the US 2023-2024
 #13 Demonstrator in Leadership in the US 2023-2024
 #21 Demonstrator in Team Building in the US 2023-2024


 KarensCardCorner
 Stamp with Amy K
 Stampin With Shirley G
 Tarabeth Stamps
 TL's Bright Spot
Such a pretty card Mary! The fun fold design is perfect, love all of those little violet images too! I do hope that Finn got his dinner speedy fast…silly hair salon appointment getting in the way!! 🙂
Right!? Being beautiful-ER requires great sacrifice!! LOL. Thanks, Amy!
Besides Finn being hungry, his looks says, “yeah, I know I’m pretty”
And, a very pretty card.
Thank you for sharing.
Thanks, Mary Katherine!! 🙂
You’ve done it again, Mary! Another gorgeous card, love everything about it.
Finny…perhaps hungry but handsome as ever! 😍
Yes – he’s a handsome fella – and the camera loves him! ;). Thank you, Pat! 🙂
Beautiful card and fun fold. Great idea!
Thanks so much, Linda! 🙂