Good afternoon, y’all – or, should i say…hello…again!? This is my second post for the day – if you’re looking for our weekly team blog hop – and the card that I posted for it – here’s the link to that post!
I was really excited to be invited to be on the Design Team for the Tic-Tac-Toe challenge – it’s one of my faves (I’m betting you knew that!). I love getting ideas for my cards and trying to get tic-tac-toe on the boards! Today is my first time with the Team!
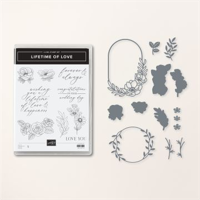
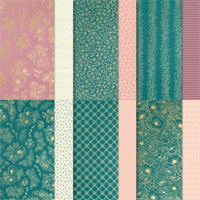
So – for my inaugural card – I pulled out the beautiful Forever Love Specialty DSP and let it take the lead with some help from the coordinating Lifetime of Love bundle. A cool Basic White frame – from the Perennial Postage die set – set the stage for the whole card. Take a look-see:

And – here’s the Tic-Tac-Toe inspiration board for this week – I hope you’ll play along with us! I went down the right column (Word Love – Frame – Heat Embossing) and then across the diagonal (Enamel Dots – Die Cut – Heat Embossing)!

OBTW – I made this project out on Instagram today and you can see it here.
I started by adhering a piece of gorgeous Forever Love Specialty DSP to the front of a Pretty Peacock card base using Liquid Glue.
Then I used the next-to-largest Perennial Postage die to cut out a Basic White rectangle – which I adhered to the card front with Stampin’ Dimensionals.

I matted another design from the Forever Love DSP on a Moody Mauve mat using Liquid Glue – then adhered it over the white panel with more Stampin’ Dimensionals.
I used the pretty leaves die in the Lifetime of Love die set to cut out one Gold Foil leaf and two Lost Lagoon leaves – all of which I adhered to the card front with Liquid Glue.

I used two lengths of white Baker’s Twine to tie a simple bow – which I adhered to the card front with a Glue Dot.
On a piece of Moody Mauve cardstock, I stamped the Lifetime of Love sentiment in Versamark Ink, sprinkled it with white Embossing Powder and heat set it with my Heat Tool.
I adhered the sentiment to a Basic White mat, that I’d cut with the smallest Perennial Postage die, using Liquid Glue.

I adhered the sentiment over the bow with double-stacked Stampin’ Dimensionals.
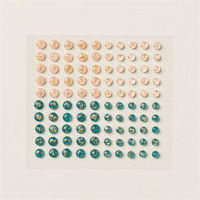
Three Petal Pink gems from the Petal Pink & Pretty Peacock Foiled Gems finished off the card front!

On the inside, I stamped a second Lifetime of Love sentiment in Moody Mauve on a piece of Basic White cardstock. Over the top, in stamped-off-TWICE Pretty Peacock ink, I added the leaf image from the set. I added a single Petal Pink gem, too!

I used Liquid Glue to adhere the panel to a Moody Mauve mat and into the Pretty Peacock card base and the card was done.
My Basic White Medium Envelope got the Lifetime of Love leaf image in stamped-off-ONCE Pretty Peacock ink on the front…

…and more of the Forever Love Specialty DSP on the envelope flap.

Et Voila! I think the Forever Love suite is just perfect for this time of year! Can you think of anything prettier than gold foil with Pretty Peacock?? I’ll wait…
The answer is,…not much! They go together PERFECTLY! And Perennial Postage dies are – yes, my fave of all time! I just love them!

I hope you like!
If you’d like to recreate this project, all the products and card cuts you’ll need are down below! And – as mentioned, I made a short video for Instagram on how to make this card – if you’d like to see it on YouTube, check it out right here!
I’ve also created a printable PDF with written instructions and a list of the products used to create this card. You can download, print and/or save it by clicking this image:

Missed any tutorials? You can check out my past projects right here!
TTFN
M

Connect with me! https://campsite.bio/stampsnlingers
HOST CODE FOR 1 FEB – 15 FEB: 9RSNRGDT
Use this host code when you order $50 or greater and receive a free gift (AND the Monthly Card Tutorial) from me! If your order is over $150, please do not use this code, but you’ll still get the free gift. The free gift is your choice of any item valued up to $10.00 in any active Catalog! That includes some of the Host Exclusive stamp sets! See my Customer Rewards page for full details.
Note: Make sure that you can see my name on the final checkout page listed as your Demonstrator when you order so that you know that you’re ordering with me and you’ll get my rewards!
You’ll also be getting a link to my ZOOM The Craftroom (an exclusive TWICE-A-WEEK online event for my customers) and the monthly Online Tutorial. The February Tutorial features the beautiful Thoughtful Expressions Bundle!


It’s Sale-A-Bration Time!

We ALL look forward to Sale-A-Bration each year and this year is no exception! And – since it coincides with the release of the wonderful new January – April 2024 Mini Catalog, there’s no doubt at all that THIS is the time to SHOP, HOST and JOIN!
Get all the deets at my Stampin’ Up! Promotions page right here!
Get the Stampin’ Up! Products This Project:


Card Cuts Used in the This Project:
Pretty Peacock Cardstock: 4 1/4″ x 5 1/2″(card base, scored and folded at 5 1/2″)
Moody Mauve Cardstock: 2 3/4″ x 4″ (mat for small DSP panel on front); 1/2″ x 1 5/8″ (sentiment); 3 7/8″ x 5 1/8″ (mat for inner liner)
Basic White Cardstock: Next-to-Largest Perennial Postage die cut (frame on front): Smallest narrow Perennial Postage die cut (mat for sentiment); 3 3/4″ x 5″ (inner liner)
Forever Love Specialty DSP: 4 1/4″ x 5 1/2″ (card front panel); 2 5/8″ x 3 7/8″ (small DSP panel on front); 2 1/4″ x 6″ (envelope flap)
If you need any stamping supplies, I’d be very happy to be your Demonstrator. Just click on the Order Stampin’ Up! Online Now button on the right side of the screen to go directly to my online store or drop me an email if you have any questions. Happy Stamping!
Shop the Clearance Rack here. Earn FREE Stampin’ Up! Products – Join my Punkin Head Peppermint Rewards – My online customer thank you program!


 #20 Demonstrator in Sales in the US 2023-2024
 #13 Demonstrator in Leadership in the US 2023-2024
 #21 Demonstrator in Team Building in the US 2023-2024


 KarensCardCorner
 Stamp with Amy K
 Stampin With Shirley G
 Tarabeth Stamps
 TL's Bright Spot
Pretty card Mary! Love the colors and the layering is perfect! Congrats on the new Design Team too! 🙂
Thank you, ma’am! 🙂
Congrats on your new gig! Your card is very pretty. I love all the gold with the Pretty Peacock. I think I’ll give the challenge a go!
Thanks and thanks! And – I hope you will, it’s a lot of fun! 🙂
Congrats on being chosen for the team! I always get a kick out of reading the tik tak toe choices, and then seeing how you used your choices. Pretty card!
Thanks, Maryanne – it’s definitely one of my fave challenges! 🙂
Very elegant! Pretty card!
Thank you so much, Linda! 🙂
Wow…. elegant!
Thank you so much, Bette! 🙂
So lovely and elegant. Congratulations on being a designer on the tictactoe team.
Thanks, Julie! 🙂