Good morning, y’all! I’m working on this post on Saturday afternoon, with sourdough chocolate chip and pecan banana muffins in the oven, listening to the rain (the precursor to the expected rain/snow “event” overnight) and drinking a cup of coffee. Finn is sound asleep on the floor – and Wayne is out doing…Wayne stuff!…in the shop! So – not a half-bad way to spend a rainy Saturday afternoon! 🙂
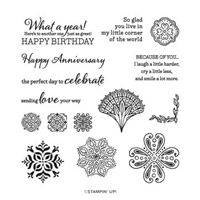
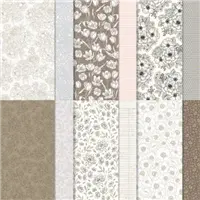
The card I have for you today – that I made last night on my YouTube video (check out the link down below!) is one of my favorite fun folds – the Book Fold – transformed into my SECOND fave fold – the easel. The result is a Book Fold Corner Easel – and this one is festooned with fun Graceful Tiles images and gorgeous Abigail Rose DSP. Take a look-see:

The layout for the front of this one is from the CASE the Designer challenge over at the Global Design Project this week.

And the color palette is from this week’s Color Throwdown challenge!

I started with an Early Espresso cardbase – 4 1/4″ x 11″ – that I scored and folded at 5 1/2″ and 6 3/4″ on the long side. Then I scored the 4 1/4″ x 4 1/4″ portion on the diagonal.

I folded the 5 1/2” score line as a “mountain” and at the 6 3/4” score in the opposite direction. Topographically speaking, that would be a “valley” fold! The diagonal fold is a “mountain”.

Using Liquid Glue between the 5 1/2” and 6 3/4” score lines, I adhered the front of the card base to the back – just in that 1 1/4” area. This made the “book” or “side” fold.
I spent an extra minute or two cutting the two pieces of Abigail Rose DSP – cuz I wanted the stripes (which are running horizontal on the front) to match up between the two pieces. In order to make that happen, I cut a 3 7/8″ x 4 3/4″ piece of Abigail Rose DSP and then cut a 7/8″ piece off one end on the 4 3/4″ side – leaving me with a 7/8″ x 3 7/8″ strip and a 3 7/8″ x 3 7/8″ square.
I matted them both on Sweet Sorbet cardstock using Liquid Glue.

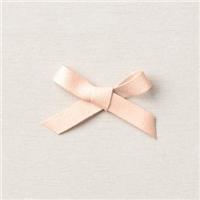
I wrapped a length of Petal Pink 3/8″ Soft Polyester Ribbon around the smaller panel – securing it in the back with Glue Dots. Then I tied a shorter length around the ribbon to create a “faux” bow – and adhered the panel to the small side of the card front with Liquid Glue.
On a piece of Basic White cardstock, I stamped three medallions from the Graceful Tiles stamp set in Versamark Ink and sprinkled them with Gold Embossing Powder. Then I heat set them with my Heat Tool.

When the powder had cooled off, I cut them all out with the next-to-smallest square Stylish Shapes die. While I had the dies out, I cut two from some pretty floral design Abigail Rose DSP.
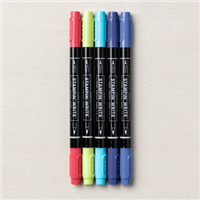
Using my Petal Pink and Sweet Sorbet Stampin’ Write Markers, I colored a few little bits on the one of the medallion designs. I colored the flowers on the DSP squares with my Petal Pink Stampin’ Blends.

Using Liquid Glue, I adhered all the squares to the square matted card front.
I tied a Double Loop Linen Thread Bow and adhered it to the card front with a Glue Dot.

On a piece of Petal Pink cardstock, I stamped the Graceful Tiles sentiment in Early Espresso ink – then I embossed the sentiment panel in the Quatrefoil Tiles Embossing Folder. I matted it on Sweet Sorbet and adhered it over the bow with Double Stacked Dimensionals.
I added some gold Pastel Adhesive-Backed Sequins and a few Champagne Rhinestone Jewels, and the card front was done.
At that point, I put Liquid Glue on the lower triangle of the card front – the easel – and then adhered the card front to it.

For the inside, I used Liquid Glue to adhere another piece of the striped Abigail Rose DSP to a Sweet Sorbet mat and then onto the inside panel. Note that I switched up the direction of the stripes! 😉
On a piece of Petal Pink cardstock, I stamped a sentiment from the Dainty Delight stamp set in Early Espresso and cut it out with the third-from-smallest circle Stylish Shapes die. I embossed it in the Quatrefoil Tiles Embossing Folder and then used Stampin’ Dimensionals to adhere it to the inside of the card – placing it so that my easel stood up how I wanted it to when the card was open!

I added a few more gold Pastel Adhesive-backed Sequins and Champagne Rhinestones to the easel stop and the card was done!
My Basic White Medium Envelope got one of the Graceful Tiles medallions in Early Espresso (with the Petal Pink and Sweet Sorbet colored bits!) on the front…

…and more of the Petal Pink Abigail Rose DSP on the envelope flap.

Et Voila! I love the combination of easel and book folds – and the pretty Abigail Rose DSP is the perfect choice to decorate this anniversary card! While Graceful Tiles might be a bit of a flyover set – it’s definitely worth a second look for the nice sentiments and pretty medallion images! And don’t forget the little details like embossing in the Quatrefoil Tiles folder – it’s a nice addition to the overall card!

I hope you like!
If you’d like to recreate this card, all the products and card cuts are listed below! And – this is the card I made on yesterday’s YouTube live video! If you’d like to see it – for the first time OR again! – here ’tis!
I’ve also created a printable PDF with written instructions and a list of the products used to create this project. You can download, print and/or save it by clicking this image:

Missed any tutorials? You can check out my past projects right here!
TTFN
M

Connect with me! https://campsite.bio/stampsnlingers
HOST CODE FOR 1 FEB – 15 FEB: 7G9ZP33H
Use this host code when you order $50 or greater and receive a free gift (AND the Monthly Card Tutorial) from me! If your order is over $150, please do not use this code, but you’ll still get the free gift. The free gift is your choice of any item valued up to $10.00 in any active Catalog! That includes some of the Host Exclusive stamp sets! See my Customer Rewards page for full details.
Note: Make sure that you can see my name on the final checkout page listed as your Demonstrator when you order so that you know that you’re ordering with me and you’ll get my rewards!
You’ll also be getting a link to my ZOOM The Craftroom (an exclusive TWICE-A-WEEK online event for my customers) and the monthly Online Tutorial. The February Tutorial features the brand new Dainty Delight Bundle!


My Sticky Sweet Ordering Special is….baaaaccckkk!

For all orders of $50 or greater (before shipping and taxes) that has my current host code applied (or for individual orders of $150 or greater) placed through me between now and midnight MT on Tuesday, 14 Feb, you’ll get your choice of a free adhesive!
This can be anything that Stampin’ Up! sells that could be used as an adhesive – that assists you in using adhesive – or decorates adhesive!! And for the adhesives that are $5 or under, two packs will equal one choice (see the items with the (2) on the list below) so if you select those, you’ll get double…and who doesn’t like DOUBLE?!!
The adhesive will be in addition to the normal thank you gift that I order for you!! Plus, since your order will be over $50, you’ll earn Sale-A-Bration item(s) too. A big double whoo-hoo for more free goodies!!
***Please note, if your order is over $150, do not apply a host code. If you apply a host code to your order, it’ll take away your host benefits and nobody thinks that’s a good idea! Never fear, though, you’ll still be eligible for the free gift and free adhesive offer!
Here’s a list of the adhesives you can choose from:
- Stampin’ Dimensionals (2)
- Mini Stampin’ Dimensionals (2)
- Black Stampin’ Dimensionals Combo Pack
- Stampin’ Seal
- Stampin’ Seal Refill
- Stampin’ Seal+
- Stampin’ Seal+ Refill
- Multipurpose Liquid Glue (2)
- Tear & Tape Adhesive
- Adhesive Sheets
- Mini Glue Dots
- Foam Adhesive Strips
- Fine-Tip Glue Pen
- Foam Adhesive Sheets
- Cling Adhesive
- Heat & Stick Powder
- Silicone Craft Sheet – so handy for sticking down sticky stuff without sticking down what you don’t want to stick!
** PLEASE NOTE: if your choice is “Not Orderable” for whatever reason when I place the order for all the goodies on 16 Feb 2022….I’ll order Stampin’ Dimensionals for you instead!
I’ll be asking for your adhesive choice when I send the Thank You email out with your peppermint count! When you let me know what ordering gift you’d like, be sure to give me your adhesive pick, too! Otherwise, I’ll pick something for you and send it with your Thank You gift! 🙂

Be sure to check out my Retired Products Shop page! Lots of new goodies at very sweet savings! Check it out right here!
Sale-a-Bration 2023 Going on Now!

Sale-a-Bration is the coolest time of year at Stampin’ UP! Check out all the goodness – we’ve got reasons to SHOP – reasons to HOST – and…HUGE reasons to JOIN!!

We’ve also got new items to pick from at the $50 level and $100 level during Sale-a-bration (which ends on 28 Feb)! They’re all items from the current catalog and they’re all available IN ADDITION to the Sale-a-bration exclusives from the Sale-a-bration 2023 Brochure!
Click on this flyer to open a PDF with the list of new Sale-a-bration items available now:

Get all the deets on my Stampin’ Up! Promotions page – or…find out why NOW is the BEST time to join the team!
Here’s a hint…

Get the Stampin’ Up! Products Used in this Project:


Card Cuts Used in This Project:
Early Espresso Cardstock: 4 1/4″ x 11″ (card base, scored and folded at 5 1/2″ and 6 3/4″)
Sweet Sorbet Cardstock: 4″ x 4″ (x2 – mats for square card front and for inner liner ); 1″ x 4″ (mat for small side panel); 3/4″ x 3 1/8″ (mat for front sentiment)
Petal Pink Cardstock: 5/8″ x 3″ (front sentiment); Third-from-Smallest Circle Stylish Shapes die cut (easel stop/inside sentiment)
Basic White Cardstock: Next-to-Smallest Square Stylish Shapes die cuts (x3 – embossed Graceful Tiles squares)
Abigail Rose DSP: 3 7/8″ x 3 7/8″ (x2 – square card front and inner liner); 7/8″ x 3 7/8″ (small side panel); Next-to-largest square Stylish Shapes die cuts (x2); 2 1/4″ x 6″ (envelope flap)
If you need any stamping supplies, I’d be very happy to be your Demonstrator. Just click on the Order Stampin’ Up! Online Now button on the right side of the screen to go directly to my online store or drop me an email if you have any questions. Happy Stamping!
Shop the Clearance Rack here. Earn FREE Stampin’ Up! Products – Join my Punkin Head Peppermint Rewards – My online customer thank you program!
Finn Fan Fix 
I asked him how – and more importantly…WHY – he managed to shoe-horn himself into the space between the sofa and the coffee table.

Not sure if he’s trying to come up with an answer that makes any sorta sense or…if he’s thinking….maybe if I just hold real still she’ll go away…. 🤷♀️🤷♀️
TTFN
M


 #20 Demonstrator in Sales in the US 2023-2024
 #13 Demonstrator in Leadership in the US 2023-2024
 #21 Demonstrator in Team Building in the US 2023-2024


 KarensCardCorner
 Stamp with Amy K
 Stampin With Shirley G
 Tarabeth Stamps
 TL's Bright Spot
I LOVE everything about your card. Winner, winner, card challenge dinner. AND, of course, I love EVERYTHING about Finn 🙂
Thanks so much, Karen!! 🙂
Such a pretty card! Love the layering and the fun fold design! Sorry that I missed your live…again! I’ll check out the replay. 🙂 My theory on stuffing oneself into a tiny space is that all big dogs think that they’re the size that they are when they are born…of course they can still fit on your lap and under the bed and in all of these small places!! 😉
Yes! That’s probably it! They still think they weigh 10 pounds!! Thanks, Amy! 🙂
Beautiful card and I enjoyed your video on it as well! Love a book fold card!
Thank you, Carol! 🙂
Dogs (and cats) manage to shoehorn into small spaces..no idea why.
Love this card. Maybe one for our projects, since Anniversary is our theme.
Thanks for sharing.
That they do – and no, we don’t know why at all!! Maybe it feels safe! 🤷♀️🤷♀️ Have fun with it, Julie – thank you! 🙂
You know I love the card!
And snow events…and muffins…and the Finn, shoe-horned or no.
And YOU!
Thanks, Mom! 🙂
I love your card designs, they are so pretty and make me want to make them all!
Thanks for your inspiration!
Thanks very much, Candy – hope you WILL make some of them!! 🙂
What a cool fold! Thanks for joining us for this week’s Color Throwdown!
Thanks much, Lori – appreciate you stopping by!! 🙂