Happy Happy Hawwwmp Day, y’all! How goes your week?! Can you believe that we’re almost all the way thru July? Where the heck is the year going, anyway!? Yikes!!
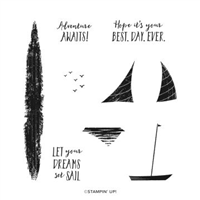
So – even though it feels like Christmas is GALLOPING towards us – I did NOT do another Christmas card today. Instead – I went back to my fave place – the islands! I pulled out the Sunkissed set and got a little tiny bit of help from the Let’s Set Sail stamp set, too. Take a look-see:

The idea for an island sunset came to mind thanks to the As You See It challenge this week.

I started by stamping the palms image from Sunkissed in Tuxedo Black on a Basic White panel. I used the Stamparatus to get a nice dark image.
Once it was VERY dry – I helped it along with my Heat Tool – I used the biggest circle in the Stylish Shapes die set to cut right out of the middle of the panel.

Then I used my Blending Brushes, on just the die cut circle portion of the card front, to make my sunset scene. I started at the bottom with Petal Pink. Next was Polished Pink, then Orchid Oasis and finally Starry Sky at the top.
Once I had the sunset as vibrant as I wanted, I added the birds image, from Let’s Set Sail, a couple of times in Starry Sky.

To ensure I had the circle in the right spot, I set the entire panel in place on my Polished Pink mat and then carefully picked up the circle from the middle. I adhered the circle back in place with Liquid Glue, making sure to keep the whole thing where it belonged – and getting the image lined up.
Then I popped the remainder of the card front back in place with Stampin’ Dimensionals.

I stamped the sentiment from Sunkissed in Orchid Oasis on a piece of Basic White and cut it with the Stylish Shapes banner die.
I adhered the sentiment with a Dimensional on the left and a little Liquid Glue on the right.

I added a few 2021-2023 In Color Opal Rounds in Polished Pink and the card front was done!
On the inside, I used the Stamparatus again to stamp the Sunkissed palms in Tuxedo Black on a piece of Basic White cardstock. I used the Blending Brushes again to add sunset color to the panel. I didn’t use ANY more ink – just used the Brushes with whatever ink remained on them after doing the card front. I added a second Sunkissed sentiment in Orchid Oasis and some Starry Night birds from Let’s Set Sail.

I used Liquid Glue to adhere the panel to a Polished Pink mat and into my Petal Pink card base, popped the card front on with Stampin’ Dimensionals and the card was done!
My Basic White Medium Envelope got part of the Sunkissed palms in Tuxedo Black (again I used the Stamparatus) and some Starry Sky birds from Let’s Set Sail on the front…

…and more of the Let’s Set Sail birds on the envelope flap.

Et Voila! I love this card! The Sunkissed set is PERFECT for silhouette cards – and using the Blending Brushes really let me create a Hawaiian sunset, don’t you think??! I love that we have ALL the tools we need in our arsenal!! And those little sea birds -one of my fave images ever – thanks to the Let’s Set Sail stamp set!

I hope you like!
If you’d like to recreate this card, all the products and card cuts you’ll need are down below! And – I did a quick little video on how to put this card together – if you’d like to see it – click here! 🙂
And…I’ve also created a printable PDF with written instructions and a list of the products used to create this project. You can download, print and/or save it by clicking this image:

Missed any tutorials? You can check out my past projects right here!
TTFN
M

Connect with me! https://campsite.bio/stampsnlingers
HOST CODE FOR 16 JUL – 31 JUL: 2UQW7WND
Use this host code when you order $50 or greater and receive a free gift (AND the Monthly Card Tutorial) from me! If your order is over $150, please do not use this code, but you’ll still get the free gift. The free gift is your choice of any item valued up to $10.00 in any active Catalog! That includes some of the Host Exclusive stamp sets! See my Customer Rewards page for full details.
Note: Make sure that you can see my name on the final checkout page listed as your Demonstrator when you order so that you know that you’re ordering with me and you’ll get my rewards!
You’ll also be getting a link to my ZOOM The Craftroom (an exclusive TWICE-A-WEEK online event for my customers) and the monthly Online Tutorial. The July Tutorial features the Hello Harvest Bundle!


HEY FLORIDA – YOU’RE UP!

For those of you living in Alabama, Arkansas, Florida, Illinois, Massachusetts, Missouri, New Mexico, Ohio, Puerto Rico, South Carolina, Tennessee, Texas, Virginia and West Virginia…GOOD NEWS!! You’ve got sales tax holidays coming up in the next few weeks! HINT: Floridians – take a quick look – YOU’RE up NOW – 25 Jul – 5 August!!
And – even better – it turns out that SOME items in our Stampin’ Up! Catalogs qualify for the sales tax holidays! The list of sales tax holidays by state and items in that state that qualify are listed below (click on the image to open up a full-size printable document):

Just a caveat: you must place your order with Stampin’ Up! DURING the tax holiday period in order to receive these items tax-free (which is midnight on the first day to midnight on the last day of the tax holiday). Also, keep in mind this is a STATE sales tax holiday; the state statute may not apply to county, city, and special jurisdiction taxes.
If you live in one of those states, whoo-hoo for you! Have fun shopping tax free during your holiday!

Sale-A-Bration means you’ll be earning free fun things when you place orders over $50 (before shipping & tax) from 1 Jul – 31 Aug!!
As is the case with ALL our Stampin’ Up! Sale-a-Brations, the July – August Sale-a-bration event has a SHOP, HOST and JOIN promotion! You can get all the deets right here on my Stampin’ Up! promotions page!
Get the Stampin’ Up! Products Used in this Project:


Used in This Project:
Petal Pink Cardstock: 4 1/4″ x 11″ (card base, scored and folded at 5 1/2″)
Polished Pink Cardstock: 4″ x 5 1/4″ (x2 – mats for card front and for inner liner)
Basic White Cardstock: 3 7/8″ x 5 1/8″ (x2 – card front and inner liner)
If you need any stamping supplies, I’d be very happy to be your Demonstrator. Just click on the Order Stampin’ Up! Online Now button on the right side of the screen to go directly to my online store or drop me an email if you have any questions. Happy Stamping!
Shop the Clearance Rack here. Earn FREE Stampin’ Up! Products – Join my Punkin Head Peppermint Rewards – My online customer thank you program!
Finn Fan Fix

This has become a nightly thing! Even when I do NOT have a dinner plate! 🤷♀️

It’s pretty nice.
But – I DO have to take a picture or two when one becomes available!
Case in point…

This one is maybe not his best angle but….it’s a danged cute schnoozle!

You’re welcome!
TTFN
M


 #20 Demonstrator in Sales in the US 2023-2024
 #13 Demonstrator in Leadership in the US 2023-2024
 #21 Demonstrator in Team Building in the US 2023-2024


 KarensCardCorner
 Stamp with Amy K
 Stampin With Shirley G
 Tarabeth Stamps
 TL's Bright Spot
Oh, my, goodness…just when I think you’ve reached the end of making my heart go pitter patter, you show up with a sunset and a schnoozle! LOVE this card and Finn’s new routine. He loves him momma!
Thank you so much, Karen. And yes – he does love his mamma. And his mamma loves HIM!! 🙂
Beautiful both inside and out Mary! A clever way to stamp your beach scene the cut and colour the inset circle – I love the finished effect. What a relaxing scene! Thanks for sharing with us over at As You See It this week!
Thanks very much – it was fun to make! Appreciate you stopping by, Joanne! 🙂
Love this card so much! Perfect colors, love the clean design! Poor Finn…snapping pictures while he’s out cold. 😉 Those are some cute pictures!
I know! The paparazzi are CRAY CRAY!! Thanks so much, Amy! 🙂
This is gorgeous, Mary! You have captured that little scene perfectly using our colors! Just beautiful! Thanks for playing with our AYSI challenge this week!
Thank you, LeAnne! I loved this color palette!! 🙂
Hi Mary….I love, love, love your card today!! Perfect during our hot summer days….the sunset is so beautiful…..sigh……makes one yearn for an island somewhere…..
SWEET pictures with Finn….nothing better than evening cuddles…(smile)
True – I love those minutes with him!! He really is the sweetest thing! Thanks very much, Faith! 🙂
Loveable dog!
What a perfectly gorgeous sunset, I mean, CARD! I am impressed with this one. Love the scene overlapping onto the panel, and your sunset is beautiful. Inside is great too, as is the envelope.
Thank you so much, Julie! They looked like that most every night in Hawaii!! 🙂
This card is so pretty, Mary. I will be attempting this one, your download will be a big help!
Oh that Finny, too cute for words! 🥰
Yeah – have fun with it, Pat! 🙂 Thanks so much! And yes – I think he’s pretty adorable, too!! 🙂
This is so lovely, Mary – perfect blending work for that tropical sky! Love the little “window” layout, too – such a perfect design! Thanks so much for playing at As You See It!
Thanks so much, Heather! Appreciate the kind words. 🙂
You did what I thought those colours were made to go together for, Mary – a gorgeous sunset! Your ink blending is impeccable! I like how you extended your stamps to the outside of the circle too! Thanks for getting colourful with us at As You See It!
Thanks so much – it just HAD to be an island sunset! Appreciate you stopping by!!
Now that’s just fabulous! Love the design – all that delicious white space and a focal point of tropical sunset. It reminds me of our trip to Tahiti. I’ve just bought that set and now you’ve given me the desire to get it out and play. Thanks so much for sharing this with us at As You See It.
Yeah – have fun with it, Jan! And thank you so much for the kind words! 🙂
Congratulations, Mary! You were our Featured Artist for As You See It Challenge #279 which means you are invited to be our guest designer for Challenge #281. I’ve sent you an email with all the information.
Thank you so much, Heather! I replied – I’d be honored! 🙂