Happy Friday – I hope your week has gone well and that you have something fun planned for the weekend. We have no plans that I know of – so…we’re winging it!
If you were able to join me yesterday for my YouTube live video, I appreciate you spending part of your week with me! If not, but you’d like to see how I made this card, here ’tis!
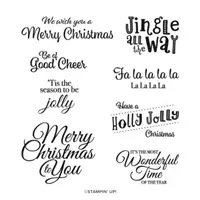
This card has a ton of my favorite things in it – pine cones – pine boughs – pine green! See a trend!? The cool Painted Christmas DSP is the base for a Holly Jolly Wishes sentiment and some Christmas Season and Christmas Pinecone piney embellishments and images! Take a look-see:

This interesting layout is from the CAS Colours & Sketches challenge this week.

I started by adhering a piece of the Painted Christmas DSP to an Evening Evergreen mat for the card front.
I took a 4″ wide x 3″ tall piece of Evening Evergreen cardstock and, using my Stampin’ Trimmer, cut it according to the template to make the pointed panel.

Then I embossed the panel in the pine bough design folder in the Wintry 3D Embossing Folders. Then I trimmed it down by cutting the width to 3 7/8″ (from the original 4″ width).
Bonus: in the video I showed how you can “punch” up the embossing by swiping your Whisper White stampin’ pad on the inside of the embossing folder before adding the cardstock and running it thru the Stampin’ Cut and Emboss Machine. How your panel looks depends on which side of the folder you ink. We all got a great tip – ink BOTH sides of the folder and then emboss the panel. That way you can pick which side you like better! 🙂


I used Liquid Glue to adhere the embossed panel to the top of the card front.

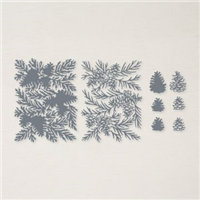
Using the large and small detailed pinecone dies in the Christmas Pinecone die set, I cut one each from Gold Shimmer Vellum. Then I used the matching solid dies to cut one each in Early Espresso. Using Liquid Glue, I adhered the detailed Gold Shimmer Vellum pinecones to the Early Espresso solid pinecones.
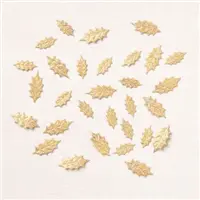
I used Liquid Glue to adhere the pine cones to the card front and a Glue Dot to adhere a large Gold Holly Leaf.

I tied a simple bow from the gold trim in the Simply Elegant Trim pack and adhered it with a Glue Dot.
I stamped the Holly Jolly Wishes sentiment in Evening Evergreen on Basic White and cut it with a Stitched Rectangle Die. Then I popped it over the bow with double-stacked Stampin’ Dimensionals.

I added a large Soft Succulent gem from the 2021-2023 In Color Jewels and the card front was done.
For the inside, I stamped a large sentiment from the Holly Jolly Wishes stamp set in Evening Evergreen on a Basic White panel. Over the top, I stamped the large – single – pine bough from Christmas Season twice in stamped-off-once Soft Succulent. Then I added the small detailed pine cone in stamped-off-TWICE Early Espresso. Finally, I added another Soft Succulent gem from the 2021-2023 In Color Jewels.

I used Stampin’ Seal to adhere the panel to an Evening Evergreen mat and then into a Soft Succulent card base, popped the card front on with Stampin’ Dimensionals and the card was done.
My Basic White Medium Envelope got two of the Christmas Season pine boughs in full-strength Soft Succulent. Then I added the small detailed pinecone in Early Espresso and the “fill” pine cone image in stamped-off-once Early Espresso…

…and more of the Painted Christmas DSP on the envelope flap.

Et Voila! Okay – I sort of love this card! The angled and Wintry 3D Embossed panel is perfect atop gorgeous Painted Christmas DSP, don’t you think? And the Holly Jolly Wishes sentiments – on the front and again inside – are wonderful focal points, enhanced with the Christmas Season and Christmas Pinecone images and die cuts. It pretty much has all the things!

I hope you like!
If you’d like to recreate this card, all the products and card cuts are listed below!
TTFN
M

Connect with me! https://campsite.bio/stampsnlingers
I’ve created a printable PDF with written instructions and a list of the products used to create this project. You can download, print and/or save it by clicking this image:

HOST CODE FOR 1 OCT – 15 OCT: UMS9DENS
HOST CODE FOR 16 OCT – 31 OCT: F3UQFV9T
Use this host code when you order $50 or greater and receive a free gift (AND the Monthly Card Tutorial) from me! If your order is over $150, please do not use this code, but you’ll still get the free gift. The free gift is your choice of any item valued up to $10.00 in any active Catalog! That includes some of the Host Exclusive stamp sets! See my Customer Rewards page for full details.
Note: Make sure that you can see my name on the final checkout page listed as your Demonstrator when you order so that you know that you’re ordering with me and you’ll get my rewards!
You’ll also be getting a link to my ZOOM The Craftroom (an exclusive TWICE-A-WEEK online event for my customers) and the monthly Online Tutorial. The October Tutorial features the Sparkle of the Season Bundle!


New Love, Santa Tags Kit
Santa’s back in a fun and easy tag kit to spruce up your Christmas gifting! The Love, Santa Tag Kit has everything you need to create 12 whimsically designed tags.

That means you’ll find printed die-cut tags and labels, sequin embellishments, pink and white baker’s twine, an exclusive stamp set, a Night of Navy Classic Stampin’ Spot, and more in this all-inclusive kit! You can sleigh ride right in without the prep work.

This is the kit- exclusive photopolymer stamp set called Love, Santa!

Love, Santa Tag Kit Details:
- Kit contains enough supplies to create 12 tags—3 each of 4 designs.
- Includes printed die-cut tags, decorative die cuts, adhesive, embellishments, and pink baker’s twine.
- Features an exclusive stamp set and a Night of Navy Classic Stampin’ Spot.
- Finished tag size: approximately 2-1/2″ x 4-3/4″
- Coordinating colors: Bumblebee, Just Jade, Night of Navy, Polished Pink, Poppy Parade
- Item number 158375, $19.00
Love, Santa Treat Bags

That’s right—figuring out how to dress up your gifts this year is no longer a “Claus” for concern! But don’t relax too soon as these products are based on availability!

Love, Santa Treat Bag Details:
- 12 treat bags
- 3 each of 4 designs
- 4″ x 9-1/2″
- Food safe
- Item number 158381, $7.00
And – you can even get them all together in one awesome project collection!
Stop by my online store here to see all of the great kits in the Kits Collection by Stampin’ Up!.
![]()
On Saturday, 16 Oct – we’re going to be celebrating the FIFTH anniversary of Finn’s arrival into our hearts and home! Yep – FIVE years ago, Saturday, we drove to TN and met the Man.
To celebrate his Fifth Gotcha-Day, I’m giving away a Love, Santa Tag Kit AND a pack of coordinating Love, Santa Treat Bags! You’ll be all ready to fill the bags and add a fun tag for Christmas!
How to get entered? All you need to do is leave a comment on THE ORIGINAL BLOG POST by 5pm Eastern Time on Saturday, 16 Oct 2021. In your comment – give me your best CAPTION for this picture:

Just a note – I have comment moderation turned on so it may take me a few minutes to see and approve your comment. Don’t worry if it doesn’t show up right away, it’ll be there just as soon as I see it. 🙂
The winner will be chosen by the random number generator from all of the comments received and I’ll announce the winners on my blog on Sunday, 17 Oct 2021!!
Please note, anyone is welcome to leave me a comment but per the Demonstrator rules from Stampin’ Up!, I can only ship Stampin’ Up! merchandise to addresses within the United States. Thanks for your understanding. Good luck!!
Get the Stampin’ Up! Products Used in this Project:


Price: $11.50


Card Cuts Used in This Project:
Soft Succulent Cardstock: 4 1/4″ x 11″ (card bases, scored and folded at 5 1/2″)
Evening Evergreen Cardstock: 4″ x 5 1/4″ (mats for card front and for inner liner); 4″ x 3″ (embossed and angled panel – then cut down to 3 7/8″ wide)
Early Espresso Cardstock: Christmas Pinecone die cut solid pinecones
Gold Shimmer Vellum: Christmas Pinecone die cut detailed pinecones
Basic White Cardstock: 4 1/8″ x 5 3/8″ (inner liner); Stitched Rectangle die cut (sentiment)
Painted Christmas DSP: 3 7/8″ x 5 1/8″ (card front); envelope flap
If you need any stamping supplies, I’d be very happy to be your Demonstrator. Just click on the Order Stampin’ Up! Online Now button on the right side of the screen to go directly to my online store or drop me an email if you have any questions. Happy Stamping!
Shop the Clearance Rack here. Earn FREE Stampin’ Up! Products – Join my Punkin Head Peppermint Rewards – My online customer thank you program!
Finn Fan Fix

Hum the theme music from Jaws….


We’re gonna need a higher sofa arm…

TTFN
M


 #20 Demonstrator in Sales in the US 2023-2024
 #13 Demonstrator in Leadership in the US 2023-2024
 #21 Demonstrator in Team Building in the US 2023-2024


 KarensCardCorner
 Stamp with Amy K
 Stampin With Shirley G
 Tarabeth Stamps
 TL's Bright Spot
Pine cone-y perfect! 🎶
Thanks, Mom! 🙂
Thank you for the template. I’ll give it a try. I have such a difficult time with angles but no trouble with an angel like Finn! See you tomorrow night!
Thanks, Karen! Have fun with the card! 🙂
I love this holiday card! The paper, the embossing and the wonderful bits! Beautifully done. Thanks so much for playing along with us at the CC&S challenge blog this week!
Thank you, Julie! Appreciate you stopping by! 🙂
It’s my toy! Just try to take it and see what happens!
Yep – he got too tall for the sofa arm! 😳😳😳 Thanks, Amy! 🙂
Sweet sweet Finn, such a cutie! My Smokey has very similar ideas – she is just the right height to rest her chin on the table while we eat. Watching us longingly with her beautiful big brown sweet eyes – however, you said it – the Jaws theme is definitely in the background. I digress! Beautiful card. I love those embossing folders, anything pinecone is a winner in my book. Thanks so much for joining us this week at CC&S
ROFL! The Jaws theme for sure! They use those eyes to good effect, don’t they!? Thank you so much! Appreciate you stopping by! 🙂
Just love the pine cones too Mary! Lovely to see the photos of your adorable pup 🙂 Thanks for joining in with us at CAS Colours & Sketches! Vicky x
Thank you, Vicky! Appreciate you coming by! 🙂