Good morning, y’all! It’s Wednesday and I’m once again away from home for business. I’ll be back on Thursday, so it’s a short trip. In anticipation of being away from my card-making goodies, I made two cards over the weekend and on Monday to be “ahead” of the game! Before I share today’s card – a little story….
I have a Master’s Degree in Adult Education. Yes, it’s true. I’m all edu-ma-cated and stuff! One thing I learned in my course of study, was how to teach by example. You can show students a “true” example. “See? If you do these things, in the order I’ve shown you, you’ll get the ‘right’ answer”. You can also, however, teach by showing “close, non-examples”. The end product is really….almost…right…. It’s also a method for tripping students up on multiple choice tests. Two answers that look almost the same…but only one is correct. The other is close. A non-example. That’s a simplified explanation.
But, why do I tell you this completely non-cardmaking, unrelated story? Well, cause I sort of messed up one of my cards that I so industriously made ahead of time – and I didn’t have time to go back and re-do it. So, I decided, having the heart of an educator, to use this as a teachable moment.
Stick with me, guys – you’ll know of what I speak soon.
My card design was based on the very pretty sketch from Mojo Monday. #416, so be exact. This is a great sketch, so please take a minute to go see what the other talented folks have come up with!

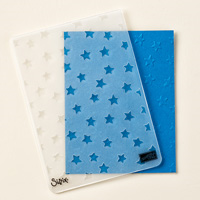
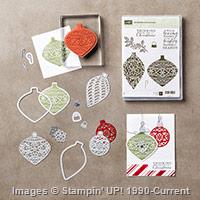
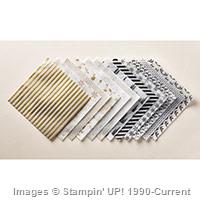
When I saw the sketch, my brain said “Embellished Ornaments!” So that’s what I pulled out – the bundled set, with clear mount stamps and matching Delicate Ornament Thinlits. I grabbed my Dazzling Diamonds and Red Glimmer Papers. I inventoried my gold and silver foil. I found a piece of Winter Wonderland Designer Vellum. And this is what I came up with. Take a look-see:

And, when I got it all made and done and looked at it closely…..well. You see the problem, right? It’s GLUE!! You can see the freakin’ glue! ;(
I’m sorry I cursed on the internet.
Measure twice, cut once. Failure to plan is planning to fail. Yada Yada. Obviously, my plan was to hide the glue behind the ornaments and the ribbon and the sentiment. I knew I’d need a little sumpin’ sumpin’ in the top corners, but that was easy. But, I didn’t do a good job laying out my whole design, so my glue (which was one of the first things to go down) is not in the places it needs to be.
Okay. So – don’t be like me. DO make this card! DO add this great bundle to your stash. Do NOT put the glue in the wrong spots! Measure. Layout. Re-Measure.
So – that’s that. This particular card will never see the light of day – I’ll probably pull the ornaments off and re-make the whole thing. In the meantime, let me tell you how to make it, so YOU can make it RIGHT! 🙂
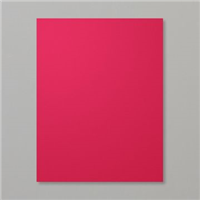
Start by using the Multi-Purpose Liquid Glue to adhere a piece of the gold embossed Winter Wonderland Designer Vellum to a Real Red card stock panel. (try to hide it! 😉 )
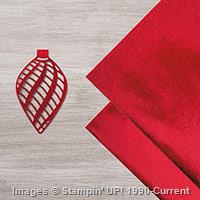
The ornaments are built using the Delicate Ornaments Thinlit dies. I cut the large ornament out of Dazzling Diamonds Glimmer Paper and laid it over the matching solid die cut from new Holiday Catalog Red Foil. I used little dabs of the Liquid Glue to adhere it. Now, this is a beautiful die cut – but it’s very detailed and, as such, a bit persnickety. I used my waxed paper. The paper comes out of the die very nicely. But the Glimmer Paper has a tough waxy backing on it, and it’s hard to cut thru. So send the die and paper thru the Big Shot multiple times. And then settle in with your craft pick and take your time getting all the little pieces out. The end result is very much worth the effort!

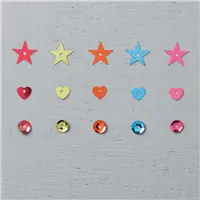
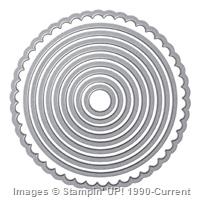
The two smaller ornaments are cut from Red Glimmer Paper and laid over a circle of Gold Foil. These little guys take about a 1 1/2″ circle of foil behind them, so you can use a 1 1/2″ punch or, if you don’t have one, cut a “close” circle with your Circles Collection dies and then fussy cut the excess. That’s what I did!
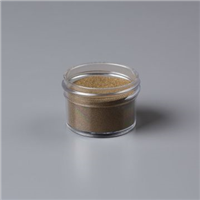
The sentiment is from Embellished Ornaments, and I heat embossed it with Gold Stampin’ Emboss powder on a rectangular piece of Whisper White card stock. Then I used the outer corner punch on my Envelope Punch board to round the corners. I did the same on a piece of Gold Foil and then adhered the sentiment to the foil for a golden mat!

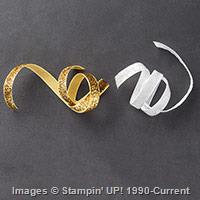
The horizontal element starts with a strip of Gold Foil, adhered with SNAIL to the card front. Then I wrapped some of the new White 3/8″ Glitter Ribbon around, securing it with a line of Liquid Glue under it on the front, and some scotch tape on the back of the card front.
Then I added the ornaments to the card front – the two small ornaments are secured with Multi-Purpose Liquid Glue, and the large center ornament is popped up with Stampin’ Dimensionals.
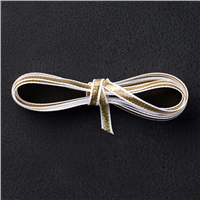
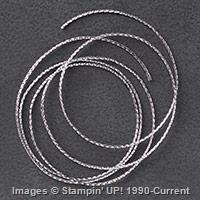
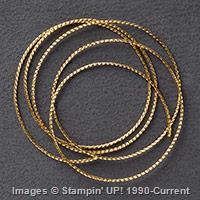
I added some Silver and Gold Cording Trim bows with Liquid Glue, and a couple of Rhinestone Basic Jewels in the top corners – to hide the glue! I popped the whole shootin’ match onto my Whisper White card base with Stampin’ Dimensionals, and the front was done!

The inside is quite simple and clean. I just added the Embellished Ornaments sentiment, heat embossed in Gold, to a piece of Whisper White Card Stock, and layered it over a mat of Gold Foil.

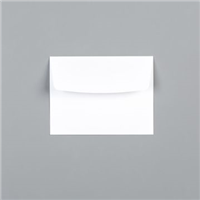
As a final touch, I used my Envelope Liner Framelits to add a short piece of Winter Wonderland Designer Vellum as a liner to my Whisper White Medium Envelope.

Et Voila! A close, non-example of a well-made card! I love the design and the paper and the texture. I love love love the ornaments – in the glimmer paper with the foil behind them, they’re just spectacular. I very much hope that you’ll give this card and stamp/die set a try!
But – don’t be like me. Hide. Your. Glue.
This concludes the embarrassing teachable moment! ;(
I’ll be back tomorrow – the second card is a “true” example – I promise!

A little update that we got from Stampin’ Up! about the Witching Decor Project Kit (item 140969). Stampin’ Up! is experiencing a very high demand for this fun kit and anticipate that it will run out soon. Because additional kits can’t be manufactured and sent to their warehouse in time for Halloween, they will not be ordering more. If you’d like one of these kits, please place your order for this item as soon as possible. Click here to go right to my online store to purchase it.
TTFN….
Mary
WEEKLY DEALS FOR 22 Sep – 28 Sep 15!! Click here to see the Weekly Deals from Stampin’ Up! in my online store. The Weekly Deals are only while supplies last and only available at these great prices through 28 Sep!
Built for Free Using: My Stampin Blog

To show our support for Breast Cancer Awareness Month, we’re going PINK . . . or at least our October boxes are! And because we know our subscribers want to share the love too, we will be making a donation on their behalf to the Breast Cancer Research Foundation (BCRF).
Stampin’ Up! will donate
- $1 for every active Paper Pumpkin subscriber.
- Plus, an additional $1 for every new subscriber.
- Together, we will make a difference!
Here’s how you can help:
Subscribe! If you’re new to Paper Pumpkin, click here to get started. Your first kit will arrive in a limited-edition pink box that you’ll want to hold onto forever-and we’ll donate $2 because you’re new!
Stay active! If you’re a subscriber, keep your subscription active so we can donate $1 for you. Only those who receive the October shipment will be counted for the donation.
Spread the word! Help us get as many new subscribers as possible. Every current subscriber adds $1 and for new subscribers it’s doubled, so let’s get the word out and raise as much as possible.
Additional Details:
- New subscribers are those who signed up between September 11 and October 10, 2015 and have not been a Paper Pumpkin subscriber at any time in the past.
- All funds will be donated in US dollars.
- Mini spoiler alert! The October project inside the pink box is just as awesome as always, but we should probably let you know that it is not a pink project. That’s all we’re saying. 😉
- Funds will be donated based on number of subscribers instead of boxes shipped. But, if you want more than one pink box, you can always increase your subscription quantity by logging into your account at PaperPumpkin.com before October 10.
STAMPIN’ UP PRODUCTS USED IN TODAY’S PROJECT:


Built for Free Using: My Stampin Blog
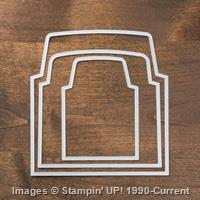
Card Cuts Used in Today’s Project
Shop the Clearance Rack here.
Earn FREE Stampin’ Up! Products – Join my Punkin Head Peppermint Rewards – My online customer thank you program!
BACKORDER LIST AS OF 22 Sep 15
23 September
139672: Softly Falling Textured Impressions Embossing Folder (933 backordered; 9,648 expected)
139673: Woodland Textured Impressions Embossing Folder (2,815 backordered; 3,024 expected)
25 September
139670: Sleigh Ride Edgelits Dies (1,834 backordered; 1,920 expected)
28 September
138402: Silver Metallic Thread (41 backordered; 2,816 expected)
7 October
139622: Spider Web Paper Doilies (more details)
13 October
139647: To You and Yours Shaker Cards Project Kit (201 backordered; 2,500 expected)
15 October
139666: Hearth & Home Thinlits Dies (2,970 backordered; 3,120 expected)
Date to be Determined
140969: Witching Décor Project Kit (179 kits on backorder; 1,100 expected – once inventory is depleted, kit will no longer be available)


 #20 Demonstrator in Sales in the US 2023-2024
 #13 Demonstrator in Leadership in the US 2023-2024
 #21 Demonstrator in Team Building in the US 2023-2024


 KarensCardCorner
 Stamp with Amy K
 Stampin With Shirley G
 Tarabeth Stamps
 TL's Bright Spot
And life is fraught with teachable moments, no? Love the card, glue or not.
Indeed. Thanks, Mom!
Hee hee, yep…been there, done that. 😉 Your card is beautiful as it is, love the design with the three ornaments! 🙂
I figure there’s them that has and them that will! Now I’m “has”! Thanks, Amy! I’m going to submit it to Mojo Monday regardless. They can have a chuckle over my debacle-card! 🙂
Mary, I wish I had read this post this morniing! You truly make my day with your wit, and of course your beautiful cards. This one is great even with the pesky glue. 🙂
Thanks so much, Jari! Glad I can bring you a smile! 😊
Beautiful Christmas card! Love your elegant ornaments!
Thank you, Lisa! Glad that you liked it. 🙂