Good morning and…happy Friday!! Whooo-hoo! Hope you’ve got some fun plans for the weekend!
Today’s card is a fun fold – called a Tower Fun Fold – that I’ve decorated with the pretty new Mosaic Garden DSP – such gorgeous paper! – and some images and sentiments from the new Round About Messages stamp set. They’re both in our new Sept-Dec 2026 Catalog. Take a look-see:

You’ll see this card – along with the other Design Team members’ cards – at this month’s Creative Creases Challenge! 😎 We’re ALWAYS wanting to see pretty fun folds so…I hope hope hope you’ll make one (or three!) and come share them with us! 🙂

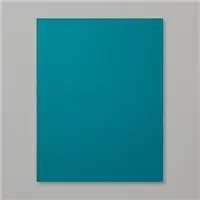
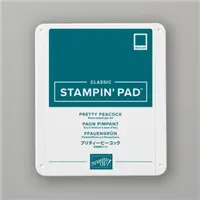
I started with a 5 1/2″ x 8 1/4″ piece of Pretty Peacock cardstock that I scored at 1″, 2″, 3″ and 4″ on the long side. I folded all the score lines in the same direction (“in”).
 I used Liquid Glue to adhere three 7/8″ x 5 3/8″ strips of Mosaic Garden DSP on the three narrow panels closest to the 4″ score line. I adhered a 4 1/8″ x 5 3/8″ piece of the DSP to the large panel – that would become the BACK of the main card base.
Then, I placed Tear and Tape on the outside small panel.

I removed the covers from the Tear & Tape and then folded the card base at the 2″ score line…

I closed the card base – back over the Tear & Tape – and that created the tower. Note: as we all know – a video is worth a gazillion words so…check the video!

Using Liquid Glue, I adhered a 3 1/8″ x 5 3/8″ piece of the Mosaic Garden DSP (in a different design) to the remaining panel.
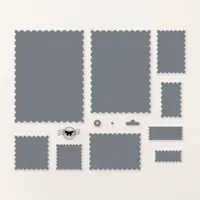
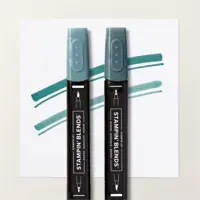
For the back – I used the next-to-largest Perennial Postage die to cut a Basic White panel. On it, I stamped a Round About Messages sentiment in Pretty Peacock ink. I stamped the little sun over the top in Crisp Cantaloupe. In the corner, I stamped the small flower in Pretty Peacock and colored it with the Light Golden Glow and Light Pretty Peacock Stampin’ Blends.

I adhered a Hydrangea Hue 2026-2028 In Color Butterfly and adhered it to the back of the card base with Liquid Glue.
For the side panel – I scored a 4″ x 4 1/2″ piece of Pretty Peacock cardstock at 1/2″ and 1 1/2″ on the long side. Again – I folded both score lines in the same direction.

I used Liquid Glue to adhere a 2 7/8″ x 3 7/8″ piece of Mosaic Garden DSP to the front of the side panel. I added a 7/8″ x 3 7/8″ piece to the middle panel.

I cut out a third-from-largest Perennial Postage die from Basic White cardstock and adhered it to the front of the panel with Liquid Glue.
On a piece of Basic White cardstock, I stamped the “so kind of you” Round About Messages sentiment in Pretty Peacock ink. In the center, I stamped the little sun in Crisp Cantaloupe.

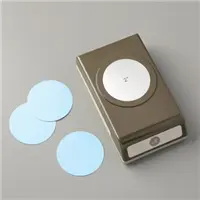
Using the 2″ Circle Punch, I cut out the sentiment.
I used Stampin’ Seal on the back to adhere a loop-d-loop of Crisp Cantaloupe 3/8″ Bordered Ribbon.

Then I adhered it to the panel with Stampin’ Dimensionals and added a few Hydrangea Hue 2026-2028 In Color Butterflies.
I put Tear & Tape on the 1/2″ panel.

I folded the panel at the 1 1/2″ mark and lined that edge up with the edge of the card base and used the Tear & Tape to adhere the panel to the card base.

I put Liquid Glue on the far edge of the panel…

Then closed the tower and used the Liquid Glue to adhere it to the front of the tower portion…

…and the card was done!

Confused? Check the video – it’ll help! 🙂
My Basic White Medium Envelope got the Round About Messages sun in Crisp Cantaloupe on the front…

…and more Mosaic Garden DSP on the envelope flap.

Et Voila! I really like this Tower Fun Fold – it’s easier to make than it looks and it’s a great palette for showing off pretty papers – like the crisp and gorgeous Mosaic Garden DSP! I am really loving this paper – the colors are gorgeous and it feels bright and clean to me! I’ve always liked round – or vertical – sentiments so the Round About Messages set is very fun – and it’s so cool that it works with one of our punches, don’t you think!?

I hope you like!
If you’d like to recreate this card, all the products and card cuts you’ll need are down below! And – this is the card I made on yesterday’s Thursday After Lunch Bunch YouTube video! If you’d like to see it – for the first time or again! – here ’tis!
I’ve also created a printable PDF with written instructions and a list of the products used to create this project. You can download, print and/or save it by clicking this image:

Missed any tutorials? You can check out my past projects right here!
TTFN
M

Connect with me! https://campsite.bio/stampsnlingers
CUSTOMER REWARDS
Earn 10% of your retail amount on all orders of $20 or greater! And you’ll be earning Punkin’ Head Peppermints – one peppermint for each $25 you spend thru my Online Store! When you gather up 16 Peppermint Points – you’ll be able to select a $40 gift right from me!
You’ll also be getting a link to my ZOOM The Craftroom (an exclusive TWICE-A-WEEK online event for my customers) and the monthly Online Tutorial – featuring the Painted Pumpkins Bundle for September orders.
See my Customer Rewards page for full details.


DOUBLE PEPPERMINTS ORDERING SPECIAL THRU 7 Sept 2026!

Here’s the deets!
1. All orders of $50 or greater (before shipping and taxes) placed through my online store between today (1 Sept 2026) and the end of the day on 7 Sept (that’s next MONDAY!) 2026 will earn DOUBLE PEPPERMINT REWARD POINTS!!
2. Your orders will also get you my Monthly Online Tutorial (this month features the NEW Painted Pumpkins Bundle – so be sure to pick that one up when you place your order today!). For more information about my Punkin Head Peppermint Reward points (my buyer reward program), click here.
WHAT’S NEW THIS WEEK?!
A LOT! Click a picture to explore!


Get the Stampin’ Up! Products Used in this Project:










Card Cuts Used in This Project:
Pretty Peacock Cardstock: 5 1/2″ x 8 1/4″ (large card base – scored and folded at 1″, 2″, 3″ and 4″ on the long side); 4″ x 4-1/2″ (Side panel, scored and folded at 1/2,” and 1-1/2″ on the long side)
Basic White Cardstock: Third-from-Largest Perennial Postage die cut (on card front); 2″ Circle Punch (sentiment); Next-to-Largest Perennial Postage die cut (back panel)
Mosaic Garden DSP : 5/8″ x 5 3/8″ (x3 – on tower panels); 3 1/8″ x 5 3/8″ (front of back panel on large card base); 2 7/8″ x 3 7/8″ (front of small side panel); 7/8″ x 3 7/8″ (edge of side panel); 4 1/8″ x 5 3/8″ (back of large card base); 2 1/4″ x 6″ (envelope flap)
If you need any stamping supplies, I’d be very happy to be your Demonstrator. Just click on the Order Stampin’ Up! Online Now button on the right side of the screen to go directly to my online store or drop me an email if you have any questions. Happy Stamping!
Shop the Clearance Rack here. Earn FREE Stampin’ Up! Products – Join my Punkin Head Peppermint Rewards – My online customer thank you program!
Finn Fan Fix 


They’re both peeking at me.
Too early, Mom!
TTFN
M


 #20 Demonstrator in Sales in the US 2023-2024
 #13 Demonstrator in Leadership in the US 2023-2024
 #21 Demonstrator in Team Building in the US 2023-2024


 KarensCardCorner
 Stamp with Amy K
 Stampin With Shirley G
 Tarabeth Stamps
 TL's Bright Spot
Such a fun design! Love the mix of designer papers. And I’m with the puppies…it’s too early, go back to bed! 🙂
If only I could! Which is not to say there might not be a little…snoozing in the recliner!! LOL! Thanks, Amy! 🙂
Mary, what a beautiful Tower Fold card with that lovely DSP! Such pretty ribbon on the front, too! Hope you have a wonderful holiday weekend with plenty of craft time!
Thanks, Carrie – and a wonderful weekend to you, too! 🙂
Congratulations on your BIG achievement with SU!! Yep, I will be looking forward to your stamp set…….I can’t imagine what it will be!!!!!!! I enjoy the card ideas that you present on your blog!! Oh by the way……that paper cutter is looking a little spiffy!!!! It’s lost it’s wrinkles!!
LOL – yes. I FINALLY got tired of the ratty plastic and just went crazy and pulled it offa there!! :). Thanks very much, Karen – I appreciate the kind words! 🙂
Very pretty tower card, Mary! I love this fold and need to make another one soon. Your papers are lovely! I don’t have this one for some odd reason. Have a great weekend!
Thanks, Debbie – appreciate the kind words! And getcha some of that paper!! 🙂