Good morning, y’all! Happy Friday! Hope your weekend is looking good! 🙂
My card today is a happy little number that would be great to send to…anyone who needs a hug! AND – if that person is also a fan of the islands…so much the better! It showcases the fun Snowman Hugs stamp set with a melty snowman and his trusty parrot! Take a look-see:

The layout for this one is from The Paper Players challenge this week.

I started by adhering a panel of A Little Bit Festive Mix & Match Specialty DSP to a Calypso Coral mat using Liquid Glue.
Then I adhered the panel to the front of a Daffodil Delight card base with more Liquid Glue.

On a piece of Basic White cardstock, I stamped the Snowman Hugs image in Tuxedo Black Memento Ink.
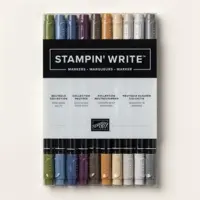
When the ink was dry, I used a combination of Stampin’ Blends and Stampin’ Write Markers to color the image:
– Hat – Dark Azure Afternoon Stampin’ Blend
– Shirt – Dark Daffodil Delight Stampin’ Blend
– Flowers on shirt – Light Calypso Coral Stampin’ Blend
– Middles of flowers – Dark Daffodil Delight Stampin’ Blend
– Collar of shirt – Dark Calypso Coral Stampin’ Blend
– Snow – Light Pool Party Stampin’ Blend
– Carrot – Light Pumpkin Pie Stampin’ Blend
– Lei – Dark Azure Afternoon Stampin’ Blend and Azure Afternoon Stampin’ Write Marker
– Parrot – Light Daffodil Delight Stampin’ Blend, Light & Dark Calypso Coral Stampin’ Blends, Dark Pool Party Stampin’ Blend
– Snowman Arms – Pecan Pie Stampin’ Write Marker

Once I had it colored – I cut it out with the large Stylish Shapes square die – turned up as a diamond.
The diamond didn’t fit on the card front (at least not where I wanted it to set) so, I held the square in place on the card front, turned it over and used a pencil to lightly mark where to cut off the excess. Then I sliced that little point off with my Stampin’ Trimmer.

I adhered the diamond to the card front with Stampin’ Dimensionals.
On a piece of Daffodil Delight cardstock, I stamped the Snowman Hugs sentiment in Calypso Coral ink and cut it out with the large Stylish Shapes banner die.

I tied a simple Linen Thread bow and adhered it with a dab of Liquid Glue, then adhered the sentiment over the top with Stampin’ Dimensionals.
Then I added three Garden Green Adhesive-backed Dots for Days and the card front was done!

For the inside, I inked the snowman in Tuxedo Black Memento Ink, covered part of it with a sticky note and stamped it in the corner of a Basic White panel. Then I colored it using the same colors as for the melty-man on the front.

I used Liquid Glue to adhere the panel to the inside of the card base and the card was done.
My Basic White Medium Envelope got the Snowman Hugs snowman on the front…

…and more of the A Little Bit Festive Mix & Match Specialty DSP on the envelope flap.

Et Voila! Well – this little guy has a bit of an…expiration date, I fear. But – he’s here to give Snowman Hugs for as long as he can before he melts away! And the green from the A Little Bit Festive Mix & Match Specialty DSP gives an unexpected little tropical touch, don’t you think?

I hope you like! 🙂
If you’d like to recreate this card, all the products and card cuts you’ll need are down below! And – this is the card I made on yesterday’s Thursday After Lunch Bunch video. If you’d like to see it – for the first time or again – here ’tis!
I also created a printable PDF with written instructions and a list of the products used to create this project. You can download, print and/or save it by clicking this image:

Missed any tutorials? You can check out my past projects right here!
TTFN
M

Connect with me! https://campsite.bio/stampsnlingers

HOST CODE FOR 1 NOV – 15 NOV: 6KYVPF24
Use this host code when you order $50 or greater and receive a free gift (AND the Monthly Card Tutorial) from me! If your order is over $150, please do not use this code, but you’ll still get the free gift. The free gift is your choice of any item valued up to $10.00 in any active Catalog! That includes some of the Host Exclusive stamp sets! See my Customer Rewards page for full details.
Note: Make sure that you can see my name on the final checkout page listed as your Demonstrator when you order so that you know that you’re ordering with me and you’ll get my rewards!
You’ll also be getting a link to my ZOOM The Craftroom (an exclusive TWICE-A-WEEK online event for my customers) and the monthly Online Tutorial – featuring the Peaceful Season Bundle for November orders.


Get the Stampin’ Up! Products Used in this Project:


Card Cuts Used in This Project:
Daffodil Delight Cardstock: 4 1/4″ x 11″ (card base, scored and folded at 5 1/2″); Stylish Shapes banner (sentiment)
Calypso Coral Cardstock: 3″ x 5 3/8″ (mat for DSP panel on front)
Basic White Cardstock: Largest Stylish Shapes die cut square (art); 4″ x 5 1/4″ (inner liner)
A Little Bit Festive Specialty DSP: 2 7/8″ x 5 1/4″ (front DSP panel); 2 1/4″ x 6″ (envelope flap)
PIf you need any stamping supplies, I’d be very happy to be your Demonstrator. Just click on the Order Stampin’ Up! Online Now button on the right side of the screen to go directly to my online store or drop me an email if you have any questions. Happy Stamping!
Shop the Clearance Rack here. Earn FREE Stampin’ Up! Products – Join my Punkin Head Peppermint Rewards – My online customer thank you program!
Finn Fan Fix 
In case you don’t recognize this body language….

…it means… “I’m considering what you’ve requested. I’ll get back to you!” 🤷♀️
TTFN
M


 #20 Demonstrator in Sales in the US 2023-2024
 #13 Demonstrator in Leadership in the US 2023-2024
 #21 Demonstrator in Team Building in the US 2023-2024


 KarensCardCorner
 Stamp with Amy K
 Stampin With Shirley G
 Tarabeth Stamps
 TL's Bright Spot
Such a cute card! Love the fun, sunny snowman. And yep, I’ve seen that look on the face before…should I come in, as requested, or bolt. I’m sure that he made the right decision. 😉
He did – just took him a moment or three to get to it! Thanks, Amy! 🙂
Mary… loving your tropical snowman! Thanks so much for sharing with The Paper Players this week.
Thanks much, Elizabeth – appreciate you stopping by!!
What a lot of fun this is! The bright colours get me smiling before I even look further. I love the pointed square, echoing the points of the trees. You sandy snowman is fun too. Thanks for joining in with us at The Paper Players.
Thanks Jan! Appreciate the kinds words! 🙂
Adorable, Mary! This is such a fun snowman image. I love how you stamped him on the inside so that he looks like he is waving hello. What cheery colors! Thank you for playing in my sketch challenge at The Paper Players this week!
Thanks so much, Ann – he’s a pretty adorable little melty-man! Appreciate you stopping by! 🙂