Good morning and happy Friday! Hope you’ve got a great weekend planned!
Maybe you live somewhere where you’ll be headed to the beach? Maybe hitting some waves?
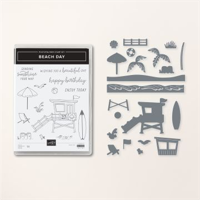
No? Okay – well…let’s go to the beach ANYWAY! With a fun fold card – a Double Easel, to be exact – decorated using the AMAZEBALLS Beach Day Bundle. Take a look-see:

This was my card for this week’s Creative Creases Challenge – all fun folds all the time! I hope you’ll come and join us!

And I played along with The Paper Players this week, too, for the layout!

I started with the basics of a Double Easel.
The main cardbase is made with Early Espresso cardstock – 5 1/2″ x 8 1/2″, scored and folded at 4 1/4 (to make a landscape tent-fold card).

The easel mechanism is in Crumb Cake – 5 1/4″ x 8″ – scored at 4″ and 6″ on the long side. Then I folded the 4″ line as a “valley” and the 6″ line as a “mountain”.

For the “ocean” on the back panel – I used the wave die in the Beach Day die set to cut out 5 or 6 – 5 1/4″ long strips of Basic White cardstock. Tip: you need ONE that has a straight edge – the remainder don’t matter so much!


I cut the rest of the strips – they’re all 5 1/4″ long – but how wide they are isn’t too important.


I removed all the little strips from the dies and then used the Dark Pool Party and the Light Lost Lagoon Stampin’ Blend to color each of the strips – using random (horizontal) strokes with both Markers. I wanted the strips to be streaky and not completely colored in.

Starting at the bottom of a Basic White panel, and using the one strip with the straight edge first, I started to adhere the strips using Liquid Glue. I let them overlap just a little. I adhered 5 strips and then checked that – when I closed the easel – I’d still be able to see the top of the “ocean”.

With the “ocean” done, I stamped the sentiment from the Beach Day stamp set in Early Espresso ink. Then I stamped the seagull three times in Smoky Slate ink.
Using Liquid Glue, I adhered the panel to the back panel of the Crumb Cake easel.

I used Whisper White ink to stamp the little shells image from Beach Day all over the small front panel of the easel and on a second Crumb Cake strip. When it was dry – it DOES take a little longer than other inks – I stamped the same image in Crumb Cake ink.
I used the same waves die from the set to cut one edge off the smaller Crumb Cake strip. I stamped Happy Birthday – from the Beach Day set – in Early Espresso ink. Then I brushed some Crumb Cake ink on the top (curvy) edge using a Blending Brush.

Using Stampin’ Dimensionals – I adhered the strip to the bottom of the front easel panel.
Note: on the video (down below) – I forgot to stamp the sentiment before adhering the panel to the easel with Dimensionals. I was afraid to try to stamp it at that point, so….
Using Liquid Glue, I adhered the entire easel panel to the front of the Early Espresso card base.
Then it was time to decorate – the fun part!
– On a piece of Basic White, I stamped the surfboard image in Azure Afternoon, Lemon Lolly, Bubble Bath, Granny Apple Green and Calypso Coral.
– Using the LIGHT Stampin’ Blend for each color – I colored the surf boards and then cut them out with their coordinating Beach Day die.
– I adhered the surf boards in place – using a little Liquid Glue – tucking them behind the “sand dune”.
– Using the dies in the set, I cut out an Early Espresso tree trunk and one of each of the palm frond dies in Shaded Spruce.
– I adhered the trunk and fronds with Liquid Glue – just making sure that it didn’t extend past the edge of the card base.
– On a piece of Basic White, I stamped the beach chair and the umbrella in Early Espresso and cut them out with their coordinating Beach Day dies.
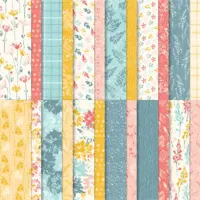
– I stamped those images again – in Early Espresso – on some Lost Lagoon Inked Botanicals 6″ x 6″ DSP.
– Using Paper Snips, I cut out the “fabric” of the chair stamped on the DSP – and adhered it to the die cut chair using Liquid Glue.
– I did the same with the “fabric” portion of the umbrella.

– I adhered the umbrella and chair to the easel with Liquid Glue.
– Using the grass die from the Beach Day set, I cut out a Crumb Cake and a Shaded Spruce “grass” – and adhered them with Liquid Glue.
I finished off with a few champagne Adhesive-backed Sparkle Gems and the card front was done!

For the inside, I used the Blending Brush to add some Crumb Cake ink on the bottom of a Basic White panel. Then I stamped the Beach Day umbrella in Early Espresso and colored it with the Light Lost Lagoon Stampin’ Blend. I added Crumb Cake shells and Smoky Slate seagulls.

For the card in the video – I added the birthday sentiment to the inside in Early Espresso – and also added another of the champagne Adhesive-backed Sparkle Gems.

I used Liquid Glue to adhere the panel to a Crumb Cake mat and into the card base and the card was done!
My Basic White Medium Envelope got the Beach Day “scene” on the front…

…and more Inked Botanicals 6″ x 6″ DSP on the envelope flap.

Et Voila! Oh. My. Goodness! I love this Beach Day bundle SO SO much! Between the amazing images in the stamp set – and all the dies and variety of the die set – you can make beach scenes like crazy! It’s actually hard to STOP decorating! I had WAY too much fun making this card. Now – there’s no rhyme or reason to surf boards – they can be whatever color you like – just pick a color that you have a Light Stampin’ Blend for and you’re golden!! 😎 And – I had forgotten how fun Paper Piecing is (like on the umbrella and beach chair) – and the Inked Botanicals DSP is a perfect choice!

I hope you like!
If you’d like to recreate this project, all the products and card cuts you’ll need are down below! And – this is the card I made on my Thursday After Lunch Bunch YouTube Video yesterday! If you’d like to see it – for the first time or again! – here ’tis!
I’ve also created a printable PDF with written instructions and a list of the products used to create this card. You can download, print and/or save it by clicking this image:

Missed any tutorials? You can check out my past projects right here!
TTFN
M

Connect with me! https://campsite.bio/stampsnlingers
HOST CODE FOR 1 FEB – 15 FEB: 9RSNRGDT
Use this host code when you order $50 or greater and receive a free gift (AND the Monthly Card Tutorial) from me! If your order is over $150, please do not use this code, but you’ll still get the free gift. The free gift is your choice of any item valued up to $10.00 in any active Catalog! That includes some of the Host Exclusive stamp sets! See my Customer Rewards page for full details.
Note: Make sure that you can see my name on the final checkout page listed as your Demonstrator when you order so that you know that you’re ordering with me and you’ll get my rewards!
You’ll also be getting a link to my ZOOM The Craftroom (an exclusive TWICE-A-WEEK online event for my customers) and the monthly Online Tutorial. The February Tutorial features the beautiful Thoughtful Expressions Bundle!


It’s Sale-A-Bration Time!

We ALL look forward to Sale-A-Bration each year and this year is no exception! And – since it coincides with the release of the wonderful new January – April 2024 Mini Catalog, there’s no doubt at all that THIS is the time to SHOP, HOST and JOIN!
Get all the deets at my Stampin’ Up! Promotions page right here!
NOW!
GET NEW SALE-A-BRATION CHOICES!!

SURPRISE! Stampin’ Up! is giving use a WHOLE NEW SET of goodies to choose from during Sale-A-Bration! Yup – they’ve just released even more products you can earn for FREE! Click the flyer below to take a look-see at the products just added to this promotion and then get busy! Sale-A-Bration ends 29 February!

WE’VE GOT TWO NEW KITS!
Kits Collection by Stampin’ Up! is all about making crafting fun, accessible, and inclusive! We’re always working hard to design a collection full of different product options to allow you and your customers oodles of options when it comes to finding that perfect project or gift. And – we’ve got two NEW kits for you to choose from!
Check out the Birthday Sparkle Kit!

Create glittering birthday cards and gift tags with the Birthday Sparkle Kit! It’s easy to create each project for your recipient or get ahead on your crafting for the year by making quick multiples. Either way, you’ve got a special paper craft that your recipients will love!
What’s in the box:

– Makes six cards and six gift tags.
– Die-cut paper pieces and twine.
– Glitter stickers, pressed wood picks, coordinating envelopes, and gold foil paper pieces!
– Fun stamp set!

Want to see how to make it? Click right here!
Or – maybe you’d like the new Happy Houseplants Kit!

Calling all plant lovers! The Happy Houseplants Kit is an adorable home decor crafting kit! Create four coordinated houseplant decor pieces. They can stand by themselves, or you can hang them on your wall. Either way, your houseguests will be amazed that you created it yourself!
What’s in the box:

– Four 6″ x 6″ white frames
– Precut paper pieces for you to curl and assemble inside the frames.
You don’t even have to stamp on this one – no inky fingers – just super cute projects to make! Want to see how to make it? Click right here!
Get the Stampin’ Up! Products This Project:


Card Cuts Used in the This Project:
Early Espresso Cardstock: 5 1/2″ x 8 1/2″(card base, scored and folded at 4 1/4″); Beach Day die cut tree trunk
Crumb Cake Cardstock: 5 1/4″ x 8″ (easel – scored and folded at 4″ and 6″); 1 3/4″ x 5 1/4″ (“sand dune” on front of easel); 4″ x 5 1/4″ (mat for inner liner); Beach Day die cut grass
Shaded Spruce Cardstock: Beach Day die cut palm fronds (x2); Beach Day die cut grass
Basic White Cardstock: 4″ x 5 1/4″ (back panel on easel); Stamped and die cut Beach Day surf boards (x5), umbrella and chair; 5 1/4″ long pieces (5 or 6 – to create ocean using Beach Days die); 3 7/8″ x 5 1/8″ (inner liner)
Inked Botanicals DSP: Fussy cut Paper Piecing for chair and umbrella; 2 1/4″ x 6″ (envelope flap)
If you need any stamping supplies, I’d be very happy to be your Demonstrator. Just click on the Order Stampin’ Up! Online Now button on the right side of the screen to go directly to my online store or drop me an email if you have any questions. Happy Stamping!
Shop the Clearance Rack here. Earn FREE Stampin’ Up! Products – Join my Punkin Head Peppermint Rewards – My online customer thank you program!
Finn Fan Fix 
Have you ever been to the spa – for a nice massage – maybe an exfoliation?
And – while you were there, they offered you a light snack?


Spa Maria….
TTFN
M


 #20 Demonstrator in Sales in the US 2023-2024
 #13 Demonstrator in Leadership in the US 2023-2024
 #21 Demonstrator in Team Building in the US 2023-2024


 KarensCardCorner
 Stamp with Amy K
 Stampin With Shirley G
 Tarabeth Stamps
 TL's Bright Spot
Such a cute card! Love the fun beach colors and the layout is perfect! 🙂 The pony does have a rough life… 😉
She does, indeed! Thanks, Amy! 🙂
Mary, genius idea to use the surfboards – I love the creative take on the challenge. Thank you for reminding me that summer will arrive sometime! So glad you joined us at the Paper Players this week
Jaydee
Thanks so much, Jaydee – and yes – it’s very summery! 🙂
Pampered pony…as is meet and right! 💖
She is – and it is! Thanks, Mom! 🙂
What a wonderful double easel card, Mary! I really like this bundle and may end up with it after seeing your card. I like this fun fold but am happy to see your measurements for making it landscape vs portrait style. Your waves are fantastic – like the Lost Lagoon/Pool Party combo. Have a great weekend!
Thanks so much, Debbie – and happy that the measurements helped. I LOVE how the ocean turned out, too! 🙂
What a great beach-themed fun fold Mary – love those colourful boards, surf’s up! Thanks for sharing with us over at The Paper Players this week!
Thanks much, Joanne – appreciate you stopping by!! 🙂
So fun Mary! All of the detail, inside, outside and even the envelope…. perfectly done. This is one fun “fun-fold”!
Rae in Reno
Creative Creases DT
Thanks very much, Rae! 🙂