Good morning, y’all! Hope the weekend is shaping up to be a good one for you! We’re having friends over this evening – including the totes adorbs Juliette – who I suspect is growing like a weed! We’re having pizza – which I also suspect SHE won’t want to eat much of… or…you know…any! 🙂
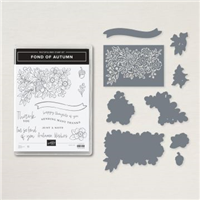
My card today has all the things I love. Flowers. Fall. Vintage-izing. Layers layers and layers!! It uses the Fond of Autumn stamp set and bundled Autumn Bouquet Dies. The vintag-i-fication comes from the cool Stripes 3D Embossing Folder – and a sponge dauber. Tale a look-see:

I saw a card by Robin Broome at the Creative Birdhouse blog where she showed how to use the embossing folder to create the gorgeous background! 🙂
This card came together thanks to the inspiration photo from the Global Design Project CASE The Designer challenge!

I started by stamping the big and gorgeous Fall floral image from the Fond of Autumn stamp set in Soft Suede on a piece of Very Vanilla cardstock. Then I embossed it in the Stripes 3D Embossing Folder. Note: you’ll need to run the panel twice to get all the way across it – cuz these are MINI embossing folders!
Using a VERY dry Sponge Dauber with Cajun Craze ink (did I say NOT MUCH INK!!?) I lightly colored the embossed ridges and the edges of the panel.
Then I matted the panel on Soft Suede for the card front using Liquid Glue.

On another piece of Very Vanilla cardstock, I stamped the image three more times – once in Soft Suede and twice in Early Espresso.
Using the die in the Autumn Bundle die set, I cut out one of the Early Espresso images – it’s the die that cuts the image into five pieces!
I embossed both of the other two stamped images again with the Stripes 3D Embossing Folder. And then – say it with me! – I cut both of them with the Autumn Bundle die to create all the little pieces!

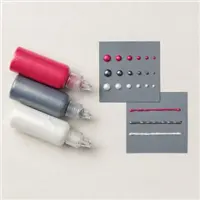
Using Stampin’ Blends – I colored the large embossed Early Espresso image – and two berries die cuts from the NON-embossed Early Espresso image.
– Oak leaves – Light & Dark Old Olive and Dark Daffodil Delight Blends
– Small leaves – Dark Daffodil and Light Old Olive Blends
– Acorns – Light and Dark Soft Suede Blends.
– Berries – Light Pumpkin Pie and Dark Daffodil Delight
I used the barely-inked Sponge Dauber again to brush across the embossed die cuts (so…the colored Early Espresso image and the NON-colored Soft Suede image).

Are you completely confused about what’s embossed – what’s colored – what’s Dauber’d?? Sorry! Be sure to check out the video below – you’ll see how it was done! 🙂
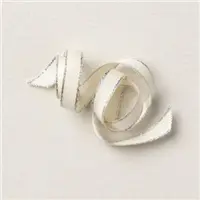
Using Stampin’ Seal + – I adhered a length of Natural Finish 7/8″ Ribbon (that I’d frayed the ends of) to the card front.
I added the UN-colored – and embossed – and dauber’d Soft Suede image with Liquid Glue – making sure to NOT line it up with the stamped image on the card front.
Then I popped the colored – and embossed – and dauber’d – Early Espresso image on with Dimensionals – lining it up with the original stamped image.

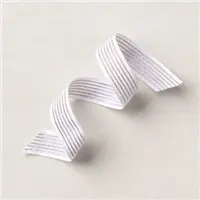
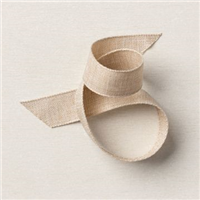
I tied a Double Loop Linen Thread bow and attached it with a Glue Dot.
The sentiment, from Fond of Autumn, is stamped in Old Olive ink on a piece of Very Vanilla and cut with a Stylish Shapes die. I adhered it with DOUBLE stacked Dimensionals. Note: there’s a TRIPLE stack of dimensionals under the right side of the sentiment.
I added a bunch of Rustic Metallic Adhesive-backed Dots and the card front was done.

On the inside, I stamped the acorn from Fond of Autumn in Early Espresso on a Very Vanilla panel and colored it with the Light and Dark Early Espresso Stampin’ Blends.

I used Liquid Glue to adhere the panel to a Soft Suede mat and into my Thick Very Vanilla card base, popped the card front on with Stampin’ Dimensionals and the card was done.
My Very Vanilla Medium Envelope got the Fond of Autumn acorn in Early Espresso on the front – colored with the Soft Suede Blends…

…and the envelope flap got another acorn – this one not colored!

Et Voila! This card is ALL about texture – and the Fond of Autumn bundle made it come together perfectly! And – isn’t it cool how the Stripes 3D Embossing Folder looks like a weathered wooden panel with just a SMIDGE of Cajun Craze sponge daubering!? I love it!

I hope you like!
If you’d like to recreate this card, all the products and card cuts you’ll need are down below!
This is also the card that I made yesterday on my YouTube live video so…if you’d like to see how to make it, here ’tis ! 🙂
And…I’ve also created a printable PDF with written instructions and a list of the products used to create this project. You can download, print and/or save it by clicking this image:

Missed any tutorials? You can check out my past projects right here!
TTFN
M

Connect with me! https://campsite.bio/stampsnlingers
HOST CODE FOR 16 SEP – 30 SEP: CHZU7CTX
Use this host code when you order $50 or greater and receive a free gift (AND the Monthly Card Tutorial) from me! If your order is over $150, please do not use this code, but you’ll still get the free gift. The free gift is your choice of any item valued up to $10.00 in any active Catalog! That includes some of the Host Exclusive stamp sets! See my Customer Rewards page for full details.
Note: Make sure that you can see my name on the final checkout page listed as your Demonstrator when you order so that you know that you’re ordering with me and you’ll get my rewards!
You’ll also be getting a link to my ZOOM The Craftroom (an exclusive TWICE-A-WEEK online event for my customers) and the monthly Online Tutorial. The September Tutorial features the Perched in a Tree Bundle!


In response to changing policies at Stampin’ Up – I’m adjusting my Ordering Gift policy as well. 😔 I’m having to get a little more hard-over on the adding of Host codes when you place your order thru my Online Store.
Not to worry – you’re still going to get that $10 ordering gift for orders of $50 (before shipping & tax) or greater (I’m not a monster!! 😎). And the gift is still any SU! product up to that $10 value – which includes some of our fun Host Sets!
But – if you DO NOT use the code for your orders of less than $150 (this is the RETAIL total before Shipping & Handling), then you’ll have two options:
- You’ll need to call Stampin’ Up! (1-800-Stamp-Up) and ask them to add it for you.
- If your order was over the $50 threshold but under $150, then…you’ll forfeit that $10 ordering gift – this is the Bummer Option – and I REALLY don’t want to do it, so….
You’ll still get the monthly tutorial and link to my monthly Zoom The Craftroom (YEAH!!) but….not that free goody! And no one wants that to happen so….try to remember, okay!?
Step One – Be sure you’re shopping with me!
Make sure that you can see my name on the final checkout page listed as your Demonstrator when you order so that you know that you’re ordering with me and you’ll get my rewards! Hopefully it won’t be this blurry…🤔

Step Two – Add the current Host Code.
When you check out, if your order is less than $150 (in retail – before shipping & tax), then please be sure to add my Host Code during the Checkout Process!
Here’s how….
Above the giant CHECKOUT button you’ll see “Demonstrator/Host Code (Optional)”. Click the “+” ….
NOTE: For orders under $150 you need to click this and add the Host Code – EVEN THOUGH YOU CAN SEE MY FACE IN THE TOP OF THE SCREEN!

…and a text entry box will open.

Type the current host code (or you can copy and paste it from my Blog post each day – be sure you’re in the CURRENT time frame for the code!) and then….
be sure to click “Apply”. If you don’t do that last piece – it won’t be applied to the order!
Once you do that this is what you’ll see!
Click CHECKOUT and continue on your merry way!! 🙂
Remember – If your order is over $150, please do not use my Host Code – instead – be sure to pick your OWN Stampin’ Rewards goodies!! Not to worry, you’ll still get the free ordering gift.

Click here to see this in Printable PDF Form so that you’ll have it handy! 🙂
If you have any questions – please get in touch with me! I’ll be happy to help!

Here’s this week’s Deals! Good thru 21 Sept 22!
Sale: $9.60
Price: $12.00


Get the Stampin’ Up! Products Used in this Project:


Card Cuts Used in This Project:
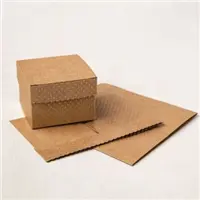
Thick Very Vanilla Cardstock: 4 1/4″ x 11″ (card base, scored and folded at 5 1/2″)
Soft Suede Cardstock: 4″ x 5 1/4″ (x2 – mats for card front and for inner liner)
Very Vanilla Cardstock: 3 7/8″ x 5 1/8″ (card front); Stylish Shapes Die cut banner (sentiment); Fond of Autumn Die Cut flowers and leaves
If you need any stamping supplies, I’d be very happy to be your Demonstrator. Just click on the Order Stampin’ Up! Online Now button on the right side of the screen to go directly to my online store or drop me an email if you have any questions. Happy Stamping!
Shop the Clearance Rack here. Earn FREE Stampin’ Up! Products – Join my Punkin Head Peppermint Rewards – My online customer thank you program!
Finn Fan Fix

Who the heck left this here?!?!
Mom – are you seeing this?!?

TTFN
M


 #20 Demonstrator in Sales in the US 2023-2024
 #13 Demonstrator in Leadership in the US 2023-2024
 #21 Demonstrator in Team Building in the US 2023-2024


 KarensCardCorner
 Stamp with Amy K
 Stampin With Shirley G
 Tarabeth Stamps
 TL's Bright Spot
Your card is absolutely stunning Mary 🙂 I LOVE everything about it. Sorry I missed your live, I’m going back to watch the replay.
Thank you very much, Karen! 🙂
Such a pretty fall card! Love the colors and the embossed background is perfect! 🙂
Thanks! I love all the layers on this one! 🙂
Such a beautiful card and I love all of the layers!
Thanks, Carol! 🙂
Beautiful card! I missed the ‘live’ because I’d been invited to dinner…..BBQ ribs!! I’ll watch it now….
Well – dinner sounds yummy and I hope you had a great time! Thanks so much, Faith! 🙂