Happy Happy Hawwwmp DAY!! The week is marching on – and I’ll be marking mid-week with a trip to the dentist for a crown prep!
Yes. I know. You’re envious, right? Hard not to be, really! Not everyone can be lucky like that, though – sorry! 😉
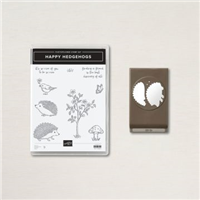
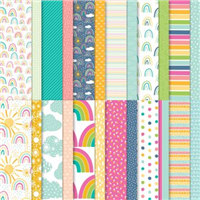
My card today is so bright and cheery and features a hedgehog. Yes. It’s a Happy Hedgehog. And he’s happy cuz he has a bundled PUNCH! 😉 I figured I’d use another happy-inducing product – and added some Sunshine & Rainbows DSP. Know why THAT is “happy-inducing”? Cuz…you can get it for FREE right now during Sale-A-Bration with a $50 purchase (before shipping & tax). Free stuff ALWAYS makes me happy. Take a look-see:

The layout for this one is based on the sketch at the Global Design Project this week.

I started by adhering a piece of Granny Apple Green paper from the FREE Sunshine & Rainbows DSP to a So Saffron mat using Liquid Glue for the card front.
I cut a circle from a piece of Basic White cardstock using a Layering Circles Die – diameter of the circle is 2 5/8″. Then I placed a square of So Saffron Sunshine & Rainbows DSP in my Stamparatus and stuck the circle on top of it – using a little repositionable tape runner to hold the die cut in place temporarily (a little tiny bit of Stampin’ Seal would also work if you don’t have repositionable tape handy).

I stamped the flower from Happy Hedgehogs in Granny Apple Green ink. Then I picked up the circle and stamped the square again. This took care of the weird little “gap” in the image between the die cut and the DSP. I matted the square on So Saffron using Liquid Glue.
I used my Light Daffodil Delight and Granny Apple Green Stampin’ Blends to color the flowers and leaves.
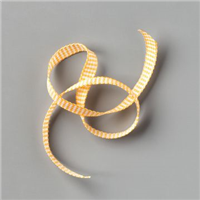
Using Glue Dots to secure it in the back, I ran a length of Bumblebee 1/4″ Gingham Ribbon around the matted panel.

I popped the circle back into place – lining up the stamped image – using Stampin’ Dimensionals.
The sentiment, from Happy Hedgehogs, was stamped in Polished Pink on a strip of Basic White. I snipped a banner end and adhered the strip to the die cut circle with Liquid Glue.
I cut out a hedgehog “body” from Crumb Cake cardstock using the bundled Hedgehog Builder Punch. I also cut out the second shape – which is the “back” of the hedgehog.

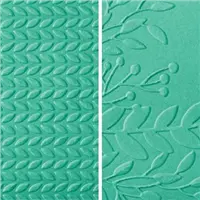
I embossed the “back” shape in the leafy Greenery Embossing Folder – then brushed Crumb Cake ink over the raised portions using a Sponge Dauber. I also lightly sponged the second piece that I had punched (the body). Note: don’t be all impressed – I totally CASEd this idea from the sample in the Jan – Jun 2022 Mini Catalog – thanks SU! 🙂
I adhered the embossed back piece to the little body with Liquid Glue. Then I added his face with an Early Espresso Stampin’ Write Marker – with cheeks from a Calypso Coral Watercolor Pencil. Then I adhered him to the card front with Liquid Glue.
I tied a little bow from the ribbon and adhered it with a Glue Dot.

On a piece of Basic White, I stamped the little butterfly from Happy Hedgehogs in Crumb Cake ink. I colored him with my Light So Saffron and Daffodil Delight Stampin’ Blends – with a little help from the Calypso Coral Watercolor Pencil. Then I fussy cut him and popped him onto the card front with a Stampin’ Dimensional.
I colored a Rhinestone Basic Jewel with the Dark Granny Apple Green Stampin’ Blend and adhered it to the sentiment – and the card front was done. 🙂
On the inside, I stamped a second Happy Hedgehogs sentiment in Polished Pink on a Basic White panel. I added the little butterfly and flower in Crumb Cake and Granny Apple Green – coloring everything as I’d done on the front. I added a single Granny Apple Green Stampin’ Blend-colored Rhinestone Basic Jewel.

I used Liquid Glue to adhere the panel to a So Saffron mat and into my Polished Pink card base, popped the card front on with Stampin’ Dimensionals and the card was done.
My Basic White Medium Envelope got the Happy Hedgehogs flowers and butterfly on the front…

…and more of the Sunshine & Rainbows DSP on the envelope flap.

Et Voila! I dare you not to smile when you see these adorable little Happy Hedgehogs – and their butterfly and bird friends in the set! I know you guys like punches, too – and this one is really fun! I loved being able to make him a two-parter! And – there’s no denying that Sunshine & Rainbows DSP is so cheerful and bright and pretty – you have to love it! Oh. And it’s… FREE!!

If you’d like to recreate this card, all the products and card cuts are listed below!
And…I’ve also created a printable PDF with written instructions and a list of the products used to create this project. You can download, print and/or save it by clicking this image:

Missed any tutorials? You can check out my past projects right here!
TTFN
M

Connect with me! https://campsite.bio/stampsnlingers
HOST CODE FOR 16 JAN – 31 JAN: ABK32SQ6
Use this host code when you order $50 or greater and receive a free gift (AND the Monthly Card Tutorial) from me! If your order is over $150, please do not use this code, but you’ll still get the free gift. The free gift is your choice of any item valued up to $10.00 in any active Catalog! That includes some of the Host Exclusive stamp sets! See my Customer Rewards page for full details.
Note: Make sure that you can see my name on the final checkout page listed as your Demonstrator when you order so that you know that you’re ordering with me and you’ll get my rewards!
You’ll also be getting a link to my ZOOM The Craftroom (an exclusive TWICE-A-WEEK online event for my customers) and the monthly Online Tutorial. The January Tutorial features the Honeybee Home Bundle!


As is the case with ALL our Stampin’ Up! Sale-a-Brations, the January – February Sale-a-bration event has a SHOP, HOST and JOIN promotion! Check it out!
SHOP!

- There are 7 new products (4 stamp sets and 3 paper packs) that are available as free items to choose from with a Level 1 order (free with an order of $50+)
- There are 2 new items (1 stamp set and paper BUNDLE and and an amazing Sentiment set!) that are available as free choices with a Level 2 order (free with an order of $100+).

HOST!

- There’s also a great new host exclusive stamp set called Calming Camelia that you can pick up for FREE with either a personal order of $300+ or a party with sales totaling $300+!
- Drop me an email at stamps-n-lingers@comcast.net if you’re interested in setting up a personal host code for you and your friends to use – when you collect orders to reach the $300 retail point then you’ll get this cool sentiment-only stamp set for FREE! And that’s on TOP of the free Sale-A-Bration picks you’ll have!
JOIN – HERE’S THE BEST PART OF ALL!

- There is an AWESOME joining promotion happening! If you purchase the Starter Kit between January 4 and February 28, you’ll get to pick a TWO FREE stamp sets with your Starter Kit!! All stamp sets except for host exclusive and Sale-a-bration stamp sets are can be picked as your free sets!!
- When you purchase the Starter Kit for $99 + taxes (if applicable) before the end of Sale-a-bration, the kit ships for FREE and you get to pick $125 in Stampin’ Up! merchandise and you’ll get TWO additional FREE stamp sets with your kit! Yay!! Two free stamp sets in addition to $125 in merchandise for $99, yes please!!
If you have any questions about joining, please drop me a note at stamps-n-lingers@comcast.net, I’d love to chat with you!
You can also see additional information on my blog here: https://stampsnlingers.com/join-my-team/ and on my Stampin’ Up! site here: https://stampsnlingers.stampinup.net/join_now

Get the Stampin’ Up! Products Used in this Project:

Price: $0.00


Card Cuts Used in This Project:
Polished Pink Cardstock: 4 1/4″ x 11″ (card base, scored and folded at 5 1/2″)
So Saffron Cardstock: 4″ x 5 1/4″ (x2 – mat for card front and for inner liner); 3 1/4″ x 3 1/4″ (mat for middle panel)
Basic White Cardstock: 2 5/8″ Layering Circle Die cut (middle art); 5/8″ x 3″ (sentiment); 3 7/8″ x 5 1/8″ (inner liner); Fussy Cut Happy Hedgehog butterfly
Crumb Cake Cardstock: punched Happy Hedgehog and hedgehog “hedge”
Sunshine & Rainbows DSP: 3 7/8″ x 5 1/8″ (card front); 3 1/8″ x 3 1/8″ (middle panel); 3″ x 6″ (envelope flap)
If you need any stamping supplies, I’d be very happy to be your Demonstrator. Just click on the Order Stampin’ Up! Online Now button on the right side of the screen to go directly to my online store or drop me an email if you have any questions. Happy Stamping!
Shop the Clearance Rack here. Earn FREE Stampin’ Up! Products – Join my Punkin Head Peppermint Rewards – My online customer thank you program!
Finn Fan Fix

Had a cool cool “sighting” last night!
Often, in the evening when we’re making that last walk around with Finn, we can hear our owls discussing…owl stuff…in our woods. It’s nearl impossible to find them in the trees.
Last night, though – we could tell he was close and in the back pasture. It was twilight and we didn’t hold much hope of seeing him.
But…


He was being really cooperative so…I decided to try a video.
I apologize for the sideways start – I turned my phone part way thru and…that didn’t work out. So….it will turn to “right” shortly. And do turn your sound on – you MIGHT be able to hear him.
Totally. Cool.
TTFN
M


 #20 Demonstrator in Sales in the US 2023-2024
 #13 Demonstrator in Leadership in the US 2023-2024
 #21 Demonstrator in Team Building in the US 2023-2024


 KarensCardCorner
 Stamp with Amy K
 Stampin With Shirley G
 Tarabeth Stamps
 TL's Bright Spot
Such a sweet card! Love the little hedgehog with the butterfly! Very cool shots of the owl too! 🙂
Thanks, Amy! 🙂
Love your card and I must say, your owl find was the coolest thing I’ve seen this morning.
TFS
Right?! Thank you so much – we got REALLY lucky!! 🙂
Hi Mary, oh yes….seeing the owl was very cool. when I was a child, we had a palm tree where an owl roosted most of the time. I could see him sleeping there in the day time. I’ve always loved owls……thanks for sharing yours with us. The evening sky was very beautiful too with the trees in silhouette. Looks like card inspiration to me…..
We love owls in our family, too! Seeing them IRL is an amazing treat! Thank you so much, Faith! 🙂
Cute card, Mary. Love the bright colors, and that hedgehog is just too cute!
Your owl video was so awesome, they’re such beautiful birds. Absolutely love to hear them as much as see them.
Yes – we HEAR them a LOT LOT LOT more than we ever see them. So it’s a real treat – and a blessing, really! – when we get to actually SEE them. Thank you so much! 🙂
Thanks for sharing, not only your wonderful card but also the spectacular owl sighting.
Thanks, Debra – glad you liked it! 🙂
this card is a smile-maker for sure! I love the way you stamped the flower branch to hang off the circle and, of course, that cute hedgehog. I’m impressed with your video of the owl…I hear one often but never seen him. Maybe i need to look higher! TFS
We got really lucky – if he’d been lower we’d have never caught a glimpse! Thank you, Susan! 🙂
My husband and I love to go birding and have seen a fair number of owls. Once, we even saw a papa, mama and baby. The papa flew off to lure us away. Was soooo cool! To find more of your owls, look for their white poo running down trees – I believe I saw “your” owl poop in the video. They kind of lean forward for a second or two, when pooping. When owl-hunting, we first look at trees on the edge of a forest or grove of trees – think wood lots. Then, on the edges, where the trees meet a field or pasture, you will oftentimes find the tell-tale trails of white poo running down a tree. If the trees come to a point, they especially like that area, because there is more open field space to find a meal. Also, look at the base of those trees for the bones and feathers of the owl’s scooby snacks! Thank you for the video!
We DID find some scooby snacks – by our new barn. Or…rather…FINNY found the pile! 🙁 He didn’t think it was icky AT ALL! Thanks for the advice, Angie – we’ll give it a go! 🙂