Good morning and happy Sunday! Got a little scare last night – I was afraid THIS was Fall-Back-Weekend!! 😳😳😳 I am NOT ready to go back to the Dark Time Schedule (DST). Are you?!? 🤔 Fortunately, we’ve still got a few weeks yet! Whew!
If you were able to join me last night for my Facebook Live Tutorial, I appreciate you spending part of your weekend with me. If not, but you’d like to see the replay on YouTube, here ’tis!
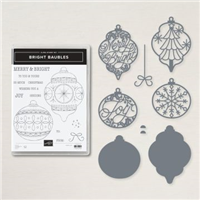
I hadn’t used the Bright Baubles bundle yet, so when I saw the Freshly Made Sketches challenge, I thought it fit the bill nicely. And the Merry Melody 3D Embossing Folder is ALWAYS a good idea! Take a look-see:

And here’s that Freshly Made Sketches challenge that inspired the card layout.

And the color palette is from the Global Design Project color challenge.

I started with a piece of Sahara Sand cardstock and the Merry Melody 3D Embossing Folder. Using my Sahara Sand Ink Pad, I scraped it across the EMbossing side of the folder (the side with the Stampin’ Up! logo printed on it). Then I carefully placed the panel inside the folder and ran it thru the Stampin’ Cut and Emboss Machine. The ink added some really nice dimension to the embossed panel!

I matted the embossed panel on Basic Black to make the card front.
I used the Delicate Baubles die set – bundled with the Bright Baubles stamp set – to cut two detailed ornaments from Sahara Sand cardstock and the matching solid ornaments from Basic Black.
Using Liquid Glue, I adhered the die cuts together.

I cut two Real Red ribbon ornament hangers using the uber-cute die in the Delicate Baubles set. I snipped off the “string” from one and adhered it to the top of the larger ornament with Liquid Glue. I left the string on the second one and adhered it to the smaller ornament.
With Liquid Glue, I adhered the larger ornament at the top of the card front – letting it hang off the top and side just a little. Tip: lay the card front on your card base so that you can judge how far the ornaments can hang off the card front but NOT off the edge of the card base! 🙂

I adhered the second ornament – with its attached “string” – with Liquid Glue.
I stamped the Bright Baubles sentiment in Real Red on a Basic White strip and snipped some banner ends. Then I edged the banner with my Basic Black Stampin’ Write Marker and popped it onto the card front with Black Stampin’ Dimensionals.

I added some Red Rhinestone Jewels here and there and the card front was done!
On the inside, I simply stamped the large ornament from Bright Baubles in stamped off TWICE Sahara Sand (tip: that is also called “third generation” stamping!) in the middle of a Basic White panel.

I used Liquid Glue to adhere the panel to a Basic Black mat and into my Real Red card base, popped the card front on with Black Stampin’ Dimensionals and the card was done.
My Basic White Medium Envelope got the Bright Baubles ornament on the front with full-strength Sahara Sand and added the sweet little bow in Real Red…

,,,and then I added some Heartwarming Hugs DSP on the envelope flap!

Et Voila! I like how this color palette looks with the Bright Baubles ornaments – the Sahara Sand Delicate Baubles die cuts really pop against their black, solid backgrounds! And the Merry Melody 3D Embossing Folder is simply gorgeous – especially when you can accentuate the pretty melody with some added inking!

I hope you like!
If you’d like to recreate this card, all the products and card cuts are listed below!
Y’all want to check out the Finn Fan Fix today – he’s announcing our Blog Candy Winner! 🙂
TTFN
M

Connect with me! https://campsite.bio/stampsnlingers
I’ve created a printable PDF with written instructions and a list of the products used to create this project. You can download, print and/or save it by clicking this image:

HOST CODE FOR 16 OCT – 31 OCT: F3UQFV9T
Use this host code when you order $50 or greater and receive a free gift (AND the Monthly Card Tutorial) from me! If your order is over $150, please do not use this code, but you’ll still get the free gift. The free gift is your choice of any item valued up to $10.00 in any active Catalog! That includes some of the Host Exclusive stamp sets! See my Customer Rewards page for full details.
Note: Make sure that you can see my name on the final checkout page listed as your Demonstrator when you order so that you know that you’re ordering with me and you’ll get my rewards!
You’ll also be getting a link to my ZOOM The Craftroom (an exclusive TWICE-A-WEEK online event for my customers) and the monthly Online Tutorial. The October Tutorial features the Sparkle of the Season Bundle!


New Love, Santa Tags Kit
Santa’s back in a fun and easy tag kit to spruce up your Christmas gifting! The Love, Santa Tag Kit has everything you need to create 12 whimsically designed tags.

That means you’ll find printed die-cut tags and labels, sequin embellishments, pink and white baker’s twine, an exclusive stamp set, a Night of Navy Classic Stampin’ Spot, and more in this all-inclusive kit! You can sleigh ride right in without the prep work.

This is the kit- exclusive photopolymer stamp set called Love, Santa!

Love, Santa Tag Kit Details:
- Kit contains enough supplies to create 12 tags—3 each of 4 designs.
- Includes printed die-cut tags, decorative die cuts, adhesive, embellishments, and pink baker’s twine.
- Features an exclusive stamp set and a Night of Navy Classic Stampin’ Spot.
- Finished tag size: approximately 2-1/2″ x 4-3/4″
- Coordinating colors: Bumblebee, Just Jade, Night of Navy, Polished Pink, Poppy Parade
- Item number 158375, $19.00
Love, Santa Treat Bags

That’s right—figuring out how to dress up your gifts this year is no longer a “Claus” for concern! But don’t relax too soon as these products are based on availability!

Love, Santa Treat Bag Details:
- 12 treat bags
- 3 each of 4 designs
- 4″ x 9-1/2″
- Food safe
- Item number 158381, $7.00
And – you can even get them all together in one awesome project collection!
Stop by my online store here to see all of the great kits in the Kits Collection by Stampin’ Up!.
Get the Stampin’ Up! Products Used in this Project:


Card Cuts Used in This Project:
Real Red Cardstock: 4 1/4″ x 11″ (card bases, scored and folded at 5 1/2″)
Basic Black Cardstock: 4″ x 5 1/4″ (mats for card front and for inner liner); Delicate Baubles die cut solid ornaments
Sahara Sand Cardstock: 3 7/8″ x 5 1/8″ (card front); Delicate Baubles detailed die cut ornaments
Basic White Cardstock: 1/2″ x 2 3/4″ (sentiment); 3 7/8″ x 5 1/8″ (inner liner)
Heartwarming Hugs DSP: 3″ x 6″ (envelope flap)
If you need any stamping supplies, I’d be very happy to be your Demonstrator. Just click on the Order Stampin’ Up! Online Now button on the right side of the screen to go directly to my online store or drop me an email if you have any questions. Happy Stamping!
Shop the Clearance Rack here. Earn FREE Stampin’ Up! Products – Join my Punkin Head Peppermint Rewards – My online customer thank you program!
Finn Fan Fix

Finn here!
Y’all had some AMAZING and funny captions for my awesome photo! I loved reading them all. 🙂

But – we can only have ONE winner….and I had my Mom put the numbers into something she calls a Random number generator. It doesn’t sound like a lot of fun for me – but…it DID select a winner!
And that was….comment #52! Darla S – who wrote “You knows you wanna pet me?.. right?…yis, I’m super cute anddd I’s knows it…” Finn. Happy Gotcha Day!”

Congrats, Darla! Send your address to my mom (stamps-n-lingers@comcast.net) and she’ll get your fun kit and treat bags in the mail!
There were some really fun caption ideas – I highly recommend you check them out right here!! Scroll all the way to the bottom! 🙂
TTFN
M


 #20 Demonstrator in Sales in the US 2023-2024
 #13 Demonstrator in Leadership in the US 2023-2024
 #21 Demonstrator in Team Building in the US 2023-2024


 KarensCardCorner
 Stamp with Amy K
 Stampin With Shirley G
 Tarabeth Stamps
 TL's Bright Spot
So pretty Mary! Love the embossed background, great colors too! 🙂
Thanks so much, Amy! 🙂
What a beautiful card! I love those ornaments! Love the embossed background as well! So pretty! Thanks for joining us this week at Freshly Made Sketches!
Thanks Jen – appreciate you! 🙂
These baubles were perfect for the sketch! Lovely holiday card! Glad you shared it at FMS!
Thanks so much, Linda – appreciate you stopping by! 🙂
The ornaments are perfect for the sketch and I love the sheet music background! Thanks for playing along with us at FMS this week.
Thanks, Jacquie! Appreciate you stopping by! 🙂