Good morning! Hope you’re having a great weekend – we’re having a good one, if a wet one. It just won’t stop raining! 🙁 It’s hurrying all the leaves off the trees – as you go along our driveway, it looks like it’s raining leaves! I’m always sorry to see the trees naked – I love them in their Fall finery. So – STOP raining already!! 🙂
Today’s card is inspired by a beautiful card I saw on Pinterest, created by Kittie Carraciolo.

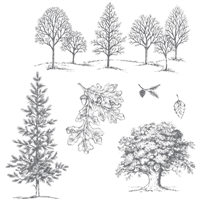
I changed it up a little, but keep the basic elements – the Lovely as a Tree image and the window from the Hearth and Home Thinlits. Take a look-see:

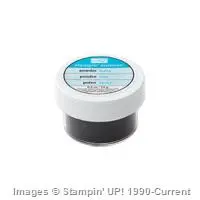
I started with a panel of Whisper White card stock, that I ran thru the Woodland TIEF and then SNAILd to a Real Red mat. The Hearth & Home window is cut from a piece of Basic Black card stock. For the image, I stamped the Lovely as a Tree image in Versamark ink and then sprinkled it with Black Stampin’ Emboss Powder and heated it up. Then I adhered it behind the window with some Multi-Purpose Liquid Glue.

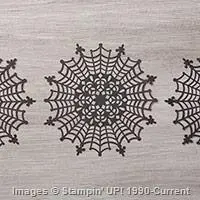
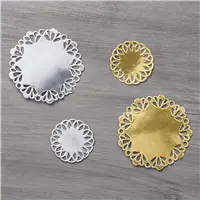
I built my wreath with one of the smaller Gold Metallic Foil Doilies – and….part of a Spider Web Doily! I cut my Spider Web….

…first cutting the outer portion off, then cutting the middle section – yielding the size I needed. No – I didn’t take a picture of that. That would have been too good-blogger-like. Sorry! 🙁
Anywho – when you turn the Spider Web over, it’s white. So I sponged it with Garden Green, and then adhered it to my Gold Metallic Doily with Liquid Glue.
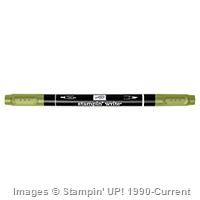
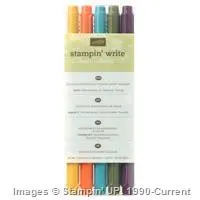
The holly leaves are from the Peaceful Wreath set. I had one of the “sprigs” leftover from a previous card – it’s heat embossed in Gold and colored with Pear Pizzazz and Mossy Meadow Stampin’ Write Markers. I fussy cut the Holly leaves – not too hard, just a little time comsuming. Then I stuck them around the edge of my “wreath” with Liquid Glue.
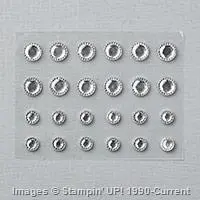
I made holly berries using a Red Sharpie to color some Pearl Basic Jewels. Finally, I stuck an Iced Rhinestone Embellishment in the middle of the wreath. I could have punched the center out, but I kind of like being able to see the two doilies – and the Iced Rhinestone suggests the idea of a hole, so….

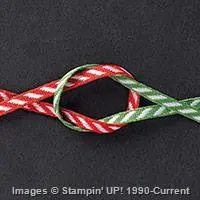
My bow is a two-piecer. First I stuck down a bow made of Gold Metallic Thread and then I stuck a 1/8″ Real Red Ribbon bow over the top of that with a Glue Dot. Then I used a few more Glue Dots to adhere the wreath to the window frame. I also used a Glue Dot under each of the tails of the Red/White bow. My picture shows that one tail all catty-wampus. It’s not quite so Jamie-Lee-Curtis-in-the True-Lies-Fake-Seduction-Scene in real life. Do you know the movie scene to which I refer? If you haven’t seen the movie – it’s an oldie-but-a-goodie! If you have – you know what I’m talking about….. 😉
I popped the embellished window frame onto the card front with Stampin’ Dimensionals – and then I set the card front aside to make the inside. I’ve almost learned my lesson good enough to NOT put the card front onto my card base until I’ve made my inside and successfully gotten it “installed”. Finally.

On the inside, I SNAILd a piece of Whisper White to another Real Red mat. Then I pulled out my Sassy Salutations stamp set. I heat embossed the sentiment in Real Red.
Wait. What? Stampin’ Up! doesn’t have Real Red Stampin’ Emboss Poweder.
Do they?
Nope. They don’t. But, I saw a technique – Pinterest rocks! – where you can emboss in any color SU! has. Here’s how. Note: if you already know this little trick, just go ahead and roll your eyes at my naivete – and scroll on down!
Here’s how you do it. Pull out your Clear Stampin’ Emboss Powder, your Versamark ink, and the ink of the color you want your embossed image to be. In my case, I pulled out my Real Red ink pad.
Ink your image/sentiment in the Versamark and then ink it with your desired color. Don’t stamp in between – you want to double ink the image. First with Versamark and then with your color. Stamp the image, sprinkle with the Clear Stampin’ Emboss Powder – and heat it up!

Cool, huh?
With that, I went ahead and popped my card front onto my Basic Black card base with Stampin’ Dimensionals!
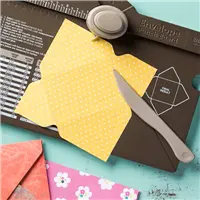
I decided it would be fun to use (finally!) a piece of my Real Red Envelope Paper to make an envelope for my card. I cut an 8 1/8″ square (the Envelope punch board calls for 8″ x 8″, but, if you’ve read my Tutorial, you know we add 1/8″ to compensate for all the goodies on our cards!) and then prepared the envelope. Before I stuck it all together, I stamped the front with the Lovely as a Tree image in Tuxedo Black Memento Ink….

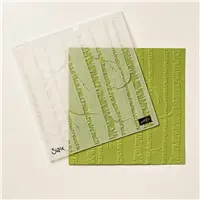
…and then I made a liner using Whisper White card stock that I embossed with the Woodland TIEF. Cut the liner first (see how here), and then put it in the TIEF so that you can be sure you’re getting the embossed image the way you want it (trees standing up – not sideways or upside down!).

Et Voila! A Christmas card with neither a tea light nor a Poinsettia!
The moral here is to remember your old standby stamp sets! In the excitement of new Holiday products, it’s easy to forget that the Annual Catalog has great sets that can be easily made into Christmas beauties. Lovely as a Tree – about as “oldie-but-goodie” as you can get, and Sassy Salutations are two such sets. Of course, a few fun things from the Holiday Catalog doesn’t hurt either!
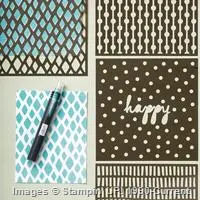
Design note – if you don’t have the Woodland TIEF, try Softly Falling (Holiday) or Decorative Dots (Annual) or even Woodgrain. Any of those would be beautiful substitutes!
Enjoy the rest of your weekend and I’ll be back in your inbox bright and early Monday morning. 🙂
TTFN
Mary
P.S. Today’s my Mom’s Birthday!! Happy Happy Birthday, Mom! 🙂
Today and Tomorrow Only!!
DON’T MISS OUT ON EXTRA STAMPIN’ REWARDS!!

If you place an order of $300 or greater or host a stamping event October 9 – November 9 with at least $300 in sales, you’ll receive an extra 3% in Stampin’ Rewards!! For more details, head over to my Promotions page and check them out.
WEEKLY DEALS FOR 3 Nov – 9 Nov 15!! Click here to see the Weekly Deals from Stampin’ Up! in my online store. The Weekly Deals are only while supplies last and only available at these great prices through 9 Nov!

Built for Free Using: My Stampin Blog
STAMPIN’ UP PRODUCTS USED IN TODAY’S PROJECT:


Built for Free Using: My Stampin Blog
Card Cuts Used in Today’s Project
Basic Black Card Stock: 4 1/4″ x 11″ (card base; scored and folded at 5 1/2″); Hearth and Home die cut
Whisper White Card Stock: 4″ x 5 1/4″ (card front and inner liner); ~2 3/8″ x 3 1/8″ (tree image inside window); envelope liner
Real Red Card Stock: 4 1/8″ x 5 3/8″ (card front and inner liner mats)
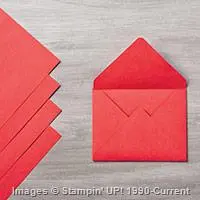
Real Red Envelope Paper: 8 1/8″ x 8 1/8″ (envelope)
If you need any stamping supplies, I’d be very happy to be your Demonstrator. Just click on the Order Stampin’ Up! Online Now button on the right side of the screen to go directly to my online store or drop me an email if you have any questions. Happy Stamping!
Shop the Clearance Rack here. Earn FREE Stampin’ Up! Products – Join my Punkin Head Peppermint Rewards – My online customer thank you program!
BACKORDER LIST AS OF 5 Nov 15
6 November
126889: Stampin’ Trimmer (88 backordered; 996 expected)
9 November
139647: To You and Yours Shaker Cards Project Kit (1,188 backordered; 4,000 expected)
139622: Spider Web Paper Doilies (3,054 backordered; 6,930 expected)
15 November
139673: Woodland Textured Impressions Embossing Folder (9,135 backordered; 6,048 expected. 2,376 more expected 1 December; 12,096 more expected 7 December)
17 November
139643: Reindeer Paper Clips (1,152 backordered; 10,368 expected)
19 November
139639: Home for Christmas Designer Buttons (1,327 backordered; 2,016 expected)
20 November
138317: Corrugated Paper (335 backordered; 2,800 expected)
23 November
138401: Gold Metallic Thread (495 backordered; 2,560 expected)
138309: Fine-Tip Glue Pen (2,123 backordered; 2,550 expected)
25 November
139638: Snowflake Elements (4,571 backordered; 15,120 expected)
1 December
138283: Leaflets Framelits Dies (2,184 backordered; 5,040 expected)


 #20 Demonstrator in Sales in the US 2023-2024
 #13 Demonstrator in Leadership in the US 2023-2024
 #21 Demonstrator in Team Building in the US 2023-2024


 KarensCardCorner
 Stamp with Amy K
 Stampin With Shirley G
 Tarabeth Stamps
 TL's Bright Spot
Beautiful card Mary! Love your little wreath and the embossed sentiment inside is awesome. I agree…stop raining already!! It’s worse than Portland. 😉
Thanks, Amy! I’m glad I found the technique to emboss in any color!! 🙂
Charming scene! Love the trees and on the envelope too.
Thanks, Mom!