Happy Thursday, y’all! Business is satisfactorily concluded and I’m getting back on the road to head home! In the meantime, please enjoy this card I have to share with you today.
I am really really pleased with this one (especially after the “teachable moment card” of yesterday!). But, let me warn you up front – it wasn’t particularly easy OR peasy to put together. It took a lot of adjusting and Stamp-A-Ma-Jigging and wiggling. But I finally got it and I’m proud as punch at how it turned out! And, let’s be honest here – if I can do it, so can you! Promise! 🙂
I’d seen a card with a Happy Scene on a Vintage Leaf (Miss Amy Koenders did one a few days back!) and I loved it. So, I wanted to do a similar thing, but….I didn’t want a direct CASE. So, I played in my head with an idea….and this is what I came up with. Take a look-see:

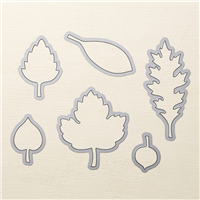
Once I’d decided to try to put a Happy Scene scene onto more than one leaf, I made the choice to use the long oak leaves in the Leaflets Thinlits die set. The first thing I did was to stamp the scene three times in Soft Suede onto a piece of Very Vanilla Card Stock. Then I cut out the first leaf, capturing the left-most side of the image. Second, I cut the right-most side of the image with another oak leaf. Here’s a tip: you need to keep the general orientation of the leaves the same – if one is angled too much, then the horizon line of the image won’t line up for your third (middle) leaf. Oh, a missing piece of info: I’d already decided I wanted the stems of the leaves to come together so I could “wrap” a bow around them – so having one leaf stick out to the side all cock-a-mamie wasn’t going to work! Hence the need to keep them all in the same rough orientation whilst stamping the image. Did that make sense??
When it was time to cut the final leaf, I used my Stamp-A-Ma-Jig to get the best line-up possible. Obviously it’s not only okay for there to be overlap between the three cut-outs, but it’s desirable!

Once I had the three leaves cut out, I colored the image with my Pumpkin Pie, Tangelo Twist, Always Artichoke, Cherry Cobbler and Crushed Curry Stampin’ Write Markers. Then I did some sponging on the edges of the leaves with Soft Suede and a Sponge Dauber. I set the leaves aside and moved on to the next element of the card.
The maple leaf behind the oak leaves was cut from Dazzling Diamonds Glimmer Paper and the edges sponged first with Crushed Curry and then with Pumpkin Pie ink. This part was easy peasy! 🙂
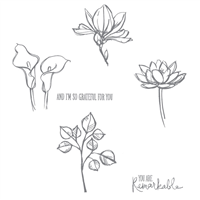
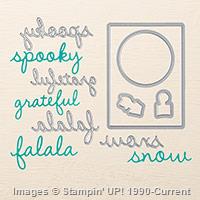
Finally, I made the sentiment. I cut Grateful from the Seasonal Frame Thinlit die set, first in Crushed Curry and then twice more with Cajun Craze Card Stock. Then I layered them up, using Multi-Purpose Liquid Glue to adhere the layers together.

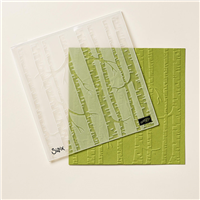
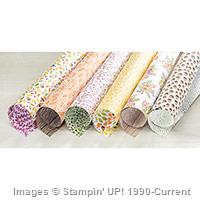
I decided that the shape of the leaves and how they needed to be assembled lent themselves very nicely to a tall-and-skinny card, so that’s what I did! I started by running a piece of Cajun Craze Card Stock thru my Big Shot in the Woodgrain TIEF and then adhering it to a piece of Crushed Curry Card Stock with SNAIL. Finally, I adhered that to a piece of Into the Woods DSP and then popped the whole thing onto my tall-and-skinny Very Vanilla card base with Stampin’ Dimensionals.
I stuck the sponged Dazzling Diamonds maple leaf to the card front, adhering it with the Liquid Glue. Then, I laid the three oak leaves down, lining up the scene until I got it as close to perfect as I could get. I took the top (middle) leaf back off and, one at a time, adhered the two bottom (left and right) leaves to the card front on top of the maple leaf.

Then I carefully returned the final piece of the puzzle to the card, popping it up with Stampin’ Dimensionals.
And then I just looked at it for a while, cause I couldn’t believe I’d made that!! 🙂
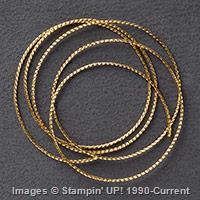
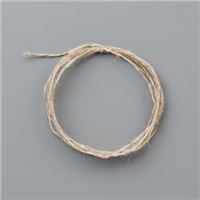
Once I got over myself, I tied a double bow out of Linen Thread and the new Gold Cording Trim and adhered it to the confluence of the stems with Multi-Purpose Liquid Glue.

I added my stacked sentiment to the bottom of the card with Liquid Glue….
…and moved inside.
For the inside, I repeated the Happy Scenes image, but I only did half the scene on each side. And I reversed it from how it was laid out on the outside of the card. No particular reason – just seemed like a cool design feature. I stamped it in Soft Suede on a piece of Very Vanilla Card Stock and colored it again with my Stampin’ Write Markers. Then I layered that onto a Cajun Craze mat and that was that!

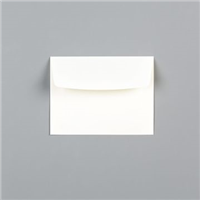
For the envelope, I repeated the Happy Scenes image on the front of a Very Vanilla Medium Envelope (which is a little big for this size card, but it gives you plenty of room for the additional embellishments!)….

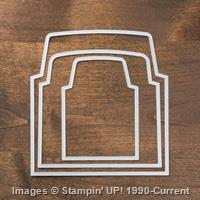
….and added some more of the wood-y Into the Woods DSP as a liner with my Envelope Liner Thinlits (you didn’t think I’d skip that on this card, did you?! 😉 )

Et Voila! Probably my favorite card I’ve ever made! It took a lot of my brain power and most of my patience, but….I’m ever-so-happy with it!
Thanks for joining me today – I hope you’ve enjoyed this card. Please excuse my self-back-patting, okay? 😉

Update on the Witching Decor Project Kit: As reported yesterday, inventory of the Witching Décor Project Kit was very low—and customers responded! This kit is now sold out and is no longer available. For those who had ordered the kit and received notice that it was on backorder, you’ll receive your kit once the shipment already in transit arrives at the SU! warehouse; that delivery is tentatively scheduled for September 30. If you didn’t get in on time and you’re looking for a Halloween decoration project, might I suggest the Season to Season Wreath Project Kit?


This project kit will give you everything to make a wreath that spans Halloween, Thanksgiving and Christmas! Three wreaths from one kit. Interested? Click here to go right to that spot and get yours on its way!
See you tomorrow!
TTFN….
Mary
WEEKLY DEALS FOR 22 Sep – 28 Sep 15!! Click here to see the Weekly Deals from Stampin’ Up! in my online store. The Weekly Deals are only while supplies last and only available at these great prices through 28 Sep!
Built for Free Using: My Stampin Blog

To show our support for Breast Cancer Awareness Month, we’re going PINK . . . or at least our October boxes are! And because we know our subscribers want to share the love too, we will be making a donation on their behalf to the Breast Cancer Research Foundation (BCRF).
Stampin’ Up! will donate
- $1 for every active Paper Pumpkin subscriber.
- Plus, an additional $1 for every new subscriber.
- Together, we will make a difference!
Here’s how you can help:
Subscribe! If you’re new to Paper Pumpkin, click here to get started. Your first kit will arrive in a limited-edition pink box that you’ll want to hold onto forever-and we’ll donate $2 because you’re new!
Stay active! If you’re a subscriber, keep your subscription active so we can donate $1 for you. Only those who receive the October shipment will be counted for the donation.
Spread the word! Help us get as many new subscribers as possible. Every current subscriber adds $1 and for new subscribers it’s doubled, so let’s get the word out and raise as much as possible.
Additional Details:
- New subscribers are those who signed up between September 11 and October 10, 2015 and have not been a Paper Pumpkin subscriber at any time in the past.
- All funds will be donated in US dollars.
- Mini spoiler alert! The October project inside the pink box is just as awesome as always, but we should probably let you know that it is not a pink project. That’s all we’re saying. 😉
- Funds will be donated based on number of subscribers instead of boxes shipped. But, if you want more than one pink box, you can always increase your subscription quantity by logging into your account at PaperPumpkin.com before October 10.
STAMPIN’ UP PRODUCTS USED IN TODAY’S PROJECT:


Built for Free Using: My Stampin Blog
Card Cuts Used in Today’s Project
Shop the Clearance Rack here.
Earn FREE Stampin’ Up! Products – Join my Punkin Head Peppermint Rewards – My online customer thank you program!
BACKORDER LIST AS OF 23 Sep 15
23 September
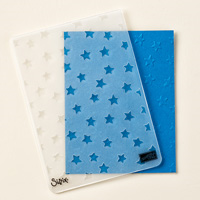
139672: Softly Falling Textured Impressions Embossing Folder (1,252 backordered; 9,648 expected)
139673: Woodland Textured Impressions Embossing Folder (3,536 backordered; 3,024 expected)
25 September
139670: Sleigh Ride Edgelits Dies (2,179 backordered; 1,920 expected)
28 September
138402: Silver Metallic Thread (87 backordered; 2,816 expected)
30 September
139592: Home for Christmas Designer Series Paper
140969: Witching Décor Project Kit (inventory of the Witching Décor Project Kit was very low—and customers responded! This kit is now sold out and is no longer available. For those who had ordered the kit and received notice that it was on backorder, you’ll receive your kit once the shipment already in transit arrives at the SU! warehouse; that delivery is tentatively scheduled for September 30.)
5 October
139752: Wonderland Wood Stamp Set
13 October
139647: To You and Yours Shaker Cards Project Kit (347 backordered; 2,500 expected)
15 October
139666: Hearth & Home Thinlits Dies (2,970 backordered; 3,120 expected)
20 October
139622: Spider Web Paper Doilies (3,451 backordered; 6,930 expected)


 #20 Demonstrator in Sales in the US 2023-2024
 #13 Demonstrator in Leadership in the US 2023-2024
 #21 Demonstrator in Team Building in the US 2023-2024


 KarensCardCorner
 Stamp with Amy K
 Stampin With Shirley G
 Tarabeth Stamps
 TL's Bright Spot
That is a striking card, Mary! I never would have thought to stamp onto a leaf… Very nicely done!
Thanks so much, Patricia! 🙂
Oh, that’s awesome Mary!! Your stamping and layering is just perfect and I love the embossing and designer paper background. Stunning!!
Thanks, Amy! 🙂
Really great wiggling. Gorgeous card, Mary…don’t you love it when a plan comes together? Yours most surely did.
I do. Cause it doesn’t always! Thanks, Mom. 🙂
Your card is phenomenal! I love it, is is truly one of a kind beautiful!
Thank you, Jari! 🙂
This card is spectacular. I love everything about it. Thank you for sharing all the details of how you did it. I would never have thought to stamp on leaves like this.
What a nice thing to say! Thanks so much! 🙂
Beautiful. Lots of lining up there. Very nice job.
Thanks, Pat! 🙂
Wow, wow, WOW! This card is absolutely GORGEOUS and I love how you stamped on all 3 leaves! I also love the sponging on the Dazzling Diamonds Glimmer Paper.
Thanks so much, Connie – that’s a kind thing to say and I’m really glad that you liked it!! 🙂
I saw Amy K’s card on her blog and thought about CASE’ing it, too. I stumbled across yours from Splitcoast. Your card is just perfectly lovely. Now I know I must make one using this idea. Beautiful!
Thanks so much, Melanie! Have fun! 🙂