Happy Happy Hawwmp Day, y’all – hope you’re having a great week. We’ve just been doing the usual things – Wayne’s working equipment outside – I hear a tree fall every now and again and then the chainsaw fire up. You know – FALL stuff! 🙂
Today’s card is another one that depends on my fave Mosaic Garden DSP – it does the work, for sure! My friend Judy shared this Reverse Joy Fold card – that relies heavily on DSP – and I loved it enough to make my own! In addition to the DSP – I used the coordinating Tile Garden bundle and the ever-handy-and-perfect Banner Sayings bundle. Take a look-see:

The layout I ended up with on the front was inspired by Vicki’s card at the Just Us Girls CASE the DT challenge this week!

I started with a 5 3/8″ x 6″ piece of the Mosaic Garden DSP and scored it at 4 1/8″ on the long side. Note: this DSP has an up and a down – so…I made sure to keep the orientation correct (aka – the 5 3/8″ side parallels the vertical pattern. Does that make sense?).
I folded the scored line in and then adhered the panel to my 4 1/4″ x 5 1/2″ piece of Pretty Peacock cardstock with the folded panel on the right side.

For the little card on the front, I scored a 4″ x 5 1/2″ piece of Barely Blush cardstock at 2 3/4″ and folded it. Note – being a Joy Fold – the fold wants to be on the LEFT side (so…opposite “normal”).
For the inside, I stamped a sentiment from Tile Garden in Hydrangea Hue ink on a 2 5/8″ x 3 7/8″ piece of Basic White cardstock. Across the bottom I adhered a 5/8″ wide strip of the Mosaic Garden DSP with Liquid Glue.
Using Liquid Glue on the back of the little card – I adhered it to the middle of the card front – remembering to keep the fold on the LEFT!

I used Liquid Glue to adhere a 2 5/8″ x 3 7/8″ piece of Mosaic Garden DSP to the front of the little card base.
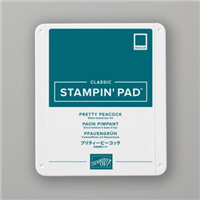
On a piece of Basic White cardstock, I stamped a Tile Garden stem/leaf image in Pretty Peacock. I stamped my fave flower from the set in Crisp Cantaloupe. Then I used the next-to-smallest crimped-edge Tile Garden die to cut out the flower – tipping the die up as a diamond.

Using Liquid Glue, I adhered the diamond to the front of the little card – lining the top and bottom corners up with the folded edge of the DSP panel underneath.
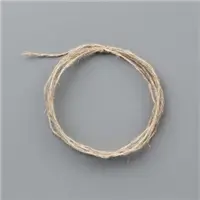
I tied a little bow from Linen Thread and adhered it with a Mini Glue Dot.
On a piece of Basic White cardstock, I stamped a Banner Sayings sentiment in Hydrangea Hue. I cut it out with the Three Banner Punch and adhered it over the bow with Stampin’ Dimensionals.

I added three Barely Blush 2026-2028 In Color Butterflies to the white diamond and…the card was done!
Tip: If you need more room to write – put a 4 1/8″ x 5 3/8″ piece of Basic White cardstock on the back of the card base. I’d stamp the Tile Garden flower in the corner. But…that’s just me! 😉
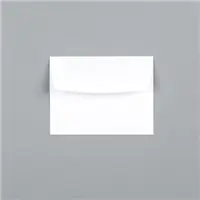
My Basic White Medium Envelope got the Tile Garden flower on the front…

…and more Mosaic Garden DSP on the envelope flap.

Et Voila! Well – I mean. Who doesn’t love a Joy Fold? Reverse it for even more fun AND – use DSP for the main fold. It’ll make your card thinner and lighter and…so keeps the postage TOLL down! 🙂 And it’s a super way to showcase the gorgeous and amazing Mosaic Garden DSP! I love the flowers and sentiments in the Tile Garden bundle and…the square dies don’t even need discussed – they’re just amazing! And Banner Sayings – the whole bundle – just get it, okay?! And plan to keep it cuz it’s amazing!

I hope you like! 🙂
If you’d like to recreate this card, all the products and card cuts you’ll need are down below!
I’ve also created a printable PDF with written instructions and a list of the products used to create this project. You can download, print and/or save it by clicking this image:

Missed any tutorials? You can check out my past projects right here!
TTFN
M

Connect with me! https://campsite.bio/stampsnlingers

CUSTOMER REWARDS
Earn 10% of your retail amount on all orders of $20 or greater! And you’ll be earning Punkin’ Head Peppermints – one peppermint for each $25 you spend thru my Online Store! When you gather up 16 Peppermint Points – you’ll be able to select a $40 gift right from me!
You’ll also be getting a link to my ZOOM The Craftroom (an exclusive TWICE-A-WEEK online event for my customers) and the monthly Online Tutorial – featuring the Wrapped in Greenery Bundle for November orders.
See my Customer Rewards page for full details.


Get the Stampin’ Up! Products Used in this Project:








Card Cuts Used in This Project:
Pretty Peacock Cardstock: 4 1/4″ x 5 1/2″ (card base
Barely Blush Cardstock: 4″ x 5 1/2″ (small card base, scored and folded at 2 3/4 on the long side)
Basic White Cardstock: Next-to-Smallest Crimped Edge Tile Garden die cut (front diamond); Three Banner Punch (sentiment); 2 5/8″ x 3 7/8″ (small card inner liner)
Mosaic Garden DSP: 5 3/8″ x 6″ (fun fold – scored at 4 1/8″ on the long side); 2 5/8″ x 3 7/8″ (front of small card base); 2 1/4″ x 6″ (envelope flap)
If you need any stamping supplies, I’d be very happy to be your Demonstrator. Just click on the Order Stampin’ Up! Online Now button on the right side of the screen to go directly to my online store or drop me an email if you have any questions. Happy Stamping!
Shop the Last Chance List here. Earn FREE Stampin’ Up! Products – Join my Punkin Head Peppermint Rewards – My online customer thank you program!
Finn Fan Fix 
Finn just watches when the vacuum is going.
Like…oh. The staff is just doing their work to keep me comfy.
Addy – on the other paw – has a WHOLE different response.

She goes for the throat. Of the vacuum.
That little lunge is accompanied by a VERY fierce GROWWWWWL!
She follows it all over – jumping on it and back off – with a growl every time.
I have a similar feeling about vacuuming!! 🙂
TTFN
M


 #20 Demonstrator in Sales in the US 2023-2024
 #13 Demonstrator in Leadership in the US 2023-2024
 #21 Demonstrator in Team Building in the US 2023-2024


 KarensCardCorner
 Stamp with Amy K
 Stampin With Shirley G
 Tarabeth Stamps
 TL's Bright Spot
