Happy Sunday, y’all! Hope your weekend is going well! We’ve spent some time in the garden – AND some time at the garden SHOP buying more things FOR the garden! It’s just that time of year! 🙂
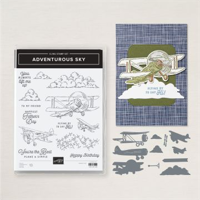
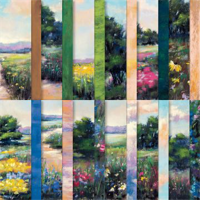
My card today uses some Meandering Meadows DSP to create a landscape for my Adventurous Sky die cut airplane and birthday sentiments to soar above. And – I put it all in a Shadow Box fun fold card. Take a look-see:

Note – I am not going to try to explain in writing how to make the actual card. This is a card that TOTALLY needs to be SEEN to understand how to build it. Once you SEE it – then it’s not nearly as confusing as it appears! To that end – it’s the card I made for last night’s Saturday video – so…you can watch it as many times as you like. In the video, I made a template card base – with no decoration – so that you’d be able to follow along with me. Check the link to the video below – the template is the first part of the video!
This shadow box card consists of two pieces of Balmy Blue cardstock – one 4 1/4″ x 10 1/2″ (scored and folded at 5 1/2″) and the second is 4 1/4″ x 11″ (scored and folded at 1/2″, 5 1/2″ and 6″).
On the front, I matted a cloudy piece of Meandering Meadows DSP on Petal Pink and then adhered it to the card front.

Using the dies in the Adventurous Sky set, I cut out three large and a medium cloud from Basic White cardstock. On one of the large clouds, I stamped the Adventurous Sky sentiment in Fresh Freesia ink.

Using the dies again, I cut out a smoky slate fuselage from Take to the Sky DSP, wings from Petal Pink cardstock, and a Fresh Freesia propeller. I assembled the plane with Liquid Glue.

I adhered two large clouds – one with the sentiment – to the card front with Liquid Glue. Then I adhered the plane with Stampin’ Dimensionals. I slid the remaining clouds under the airplane – adhering them with Liquid Glue.
For the inside, I used two identical panels of Meandering Meadows DSP – one for the inside of the shadow box and one for the top portion.

I adhered the DSP panels to the shadow box mechanism (this is the 4 1/4″ x 11″ piece) with Liquid Glue. I used the largest Stylish Shapes circle to cut out a window.
At this point, I assembled the card – see the video, y’all – I couldn’t describe this in a 1000 words!.

I decorated the inside of the shadow box with the back bit of a second assembled Adventurous Sky airplane – adhered with Dimensionals – and a “towed” banner with a second sentiment stamped in Fresh Freesia.

I stamped three Adventurous Sky clouds in Petal Pink ink on Basic White and cut them with the dies in the set. I adhered two of them to the outer part of the shadow box mechanism with Liquid Glue. I slid the final cloud up under the popped up departing airplane!
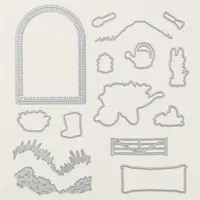
I felt like it needed another little sumpin’ sumpin’ – so…I cut out a Basic White gate with a Garden Meadow die. I used a little Liquid Glue to adhere it at the bottom of the die cut circle window.
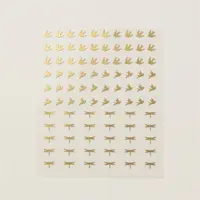
I added some Adhesive-backed Dragonflies and Birds to finish it off.

This card needed a spot for someone to write a message – and the back was wide open… so I stamped a third sentiment from Adventurous Sky in Fresh Freesia ink on a Basic White panel. In the corner I stamped the smallest aircraft in Smoky Slate – and colored it with my Light Smoky Slate and Dark Petal Pink Stampin’ Blends. I added another Adhesive-backed Bird, cuz I like them!

I used Liquid Glue to adhere the panel to a Petal Pink mat and then to the back of the card and the card was done!
My Basic White Medium Envelope got the Adventurous Sky airplane on the front…

…and more Meandering Meadow DSP on the envelope flap.

Et Voila! Okay – this is NOT the world’s easiest fun fold – but it’s also NOT the hardest, so…don’t be scared to give it a try. I’d highly recommend that you watch the video – maybe a time or two! – then make yourself a practice/template version – using two different colors of cardstock (like I did) for the two panels. That’ll help you get a feel for it.
THEN – make your “real” card – and be sure to decorate at least ONE like this one – with the fun Adventurous Sky bundle and some pretty Meandering Meadows DSP! I think ANYone would love to get this fun card, don’t you!? 🙂

I hope you like!
If you’d like to recreate this project, all the products and card cuts you’ll need are down below! And – here’s that video from yesterday’s Saturday Nite Live You Tube so that you can see how to make the Shadow Box fold.
I’ve also created a printable PDF with written instructions and a list of the products used to create this project. You can download, print and/or save it by clicking this image:

Missed any tutorials? You can check out my past projects right here!
TTFN
M

HOST CODE FOR 1 JUNE – 15 JUNE: HQQMNSS3
Use this host code when you order $50 or greater and receive a free gift (AND the Monthly Card Tutorial) from me! If your order is over $150, please do not use this code, but you’ll still get the free gift. The free gift is your choice of any item valued up to $10.00 in any active Catalog! That includes some of the Host Exclusive stamp sets! See my Customer Rewards page for full details.
Note: Make sure that you can see my name on the final checkout page listed as your Demonstrator when you order so that you know that you’re ordering with me and you’ll get my rewards!
You’ll also be getting a link to my ZOOM The Craftroom (an exclusive TWICE-A-WEEK online event for my customers) and the monthly Online Tutorial. The June Tutorial features the cool Thoughtful Wishes Bundle!


SHOP MY RETIRED PRODUCTS STORE!

I’ve updated my Retired Products shop with items from the 2023-2024 Annual Catalog and the Jan-Apr 2024 Mini Catalog – and there’s still things left for you to save on!
Check them out right here!
Scroll down a bit and – among other things! – you’ll find a clickable logo for both those catalogs!
And – be sure the check the other categories as well – I’ve cut prices IN HALF for older products that are still on my shelf!
HUGE BUNDLE SALE STARTING ON 5 JUNE 2024!

Starting on 5 June – and running thru the end of the month – you’ll save an ADDITIONAL 10% off Stamp and Die bundles!!
Oh – and did you notice the little scripty words on the picture?? With the little arrow? In white??
That’s right – you’ll ALSO be able to get a 10% savings on the Full Size Stampin’ Cut and Emboss Machine and the Mini Stampin’ Cut and Emboss Machine! Get one – get both!
So…you’ll be able to get that new die cutting machine you’ve been eyeballing AND some brand spanking new die bundles to go along with.
Here’s the deets:
Sales Period: 5–30 June 2024
– Sale Ends: 30 June 2024 at 11:59 p.m. (MT)
– Get an additional 10% discount on stamp and die bundles only (that’s a total of 20% discount on stamp and die bundles!). Note: suite collections, stamp and punch bundles, and any other bundles (Like… Close to My Heart products) aren’t included.
– Save 10% on the Stampin’ Cut & Emboss Machine and the Mini Stampin’ Cut & Emboss Machine (in white or Boho Blue).
– The 10% discount applies automatically to stamp and die bundles in all orders including Starter Kit orders.
And – did you know that Stampin’ Up! Demonstrators get the SAME discounts and sales that CUSTOMERS do? On TOP of their demonstrator discount?

It’s true! Which, when combined with the 2024-2026 In Color Starter Kit promotion that ends on TODAY – makes NOW a super excellent time to join the team!
Get the Stampin’ Up! Products Used in this Project:


Card Cuts Used in This Project:
Balmy Blue Cardstock: 4 1/4″ x 10 1/2″ (card base, scored and folded at 5 1/2″); 4 1/4″ x 11″ (shadow box mechanism, scored and folded at 1/2″, 5 1/2″ and 6″)
Petal Pink Cardstock: 4″ x 5 1/4″ (mat for card front); 4″ x 4 3/4″ (mat for rear panel); Adventurous Sky die cut wings (x2)
Fresh Freesia Cardstock: Adventurous Sky die cut propeller and tow bar
Basic White Cardstock: 3 7/8″ x 4 5/8″ (rear panel)
Take to the Sky DSP: Adventurous Sky die cut fuselage (x2)
Meandering Meadows DSP: 37/8″ x 5 1/8″ (card front); 4″ x 4 3/4″ (x2 – inside panel and shadow box panel); 2 1/4″ x 6″ (envelope flap)
If you need any stamping supplies, I’d be very happy to be your Demonstrator. Just click on the Order Stampin’ Up! Online Now button on the right side of the screen to go directly to my online store or drop me an email if you have any questions. Happy Stamping!
Shop the Clearance Rack here. Earn FREE Stampin’ Up! Products – Join my Punkin Head Peppermint Rewards – My online customer thank you program!
Finn Fan Fix 
Fortunately – whatever THAT is on his nose…

Does NOT interfere with licking the pumpkin spatula!

TTFN
M


 #20 Demonstrator in Sales in the US 2023-2024
 #13 Demonstrator in Leadership in the US 2023-2024
 #21 Demonstrator in Team Building in the US 2023-2024


 KarensCardCorner
 Stamp with Amy K
 Stampin With Shirley G
 Tarabeth Stamps
 TL's Bright Spot
I think this is my favorite of all time! With your video, I know I can git ‘er done! Stay tuned. Chester loves pumpkin too but too much of it does not settle well if you know what I mean! Have a wonderful Sunday.
I do, indeed, know JUST what you mean! It’s a fine line, right?! Thanks, Karen – have fun making it! 🙂
Such a cool card! Love the inside as much as the outside! Yeah, a little something on the nose never got in the way of licking the good stuff off a spatula. 😉
One must overcome, right!? Thanks so much, Amy! 🙂
Love this card!! Yes, it looks difficult, but, who among us paper crafters doesnt’ like a challenge? I did watch the video and I think I can make this one.
Yummy pumpkin! Finn looks like he is thoroughly enjoying it!
He does love his punkin’! Which is good cuz it’s good for him – and helps him get his meds! Thanks so much, Julie – I hope you WILL give it a go! 🙂
What a fantastic fun fold and your card is beautiful! Thanks for sharing this on your video last night! Is that a Dimensional cover on Finn’s nose? 🙂
Nooo…I don’t know exactly what it IS – but…it’s not a dimensional cover!🤷♀️. Thanks so much, Carol! 🙂
Can I just say Fresh Fresia Propeller? Every little piece and part of this card screams AWESOME! You really out-did yourself 👏👏👏
Thank you so much, Judi – I mean…wouldn’t YOU want a Fresh Freesia prop if you had a gray and Petal Pink airplane?! 😉