

Hey guys – happy…NOVEMBER!!! Yikes! And – did you remember to set your clocks back an hour before you went to bed or…did you have to remedy that when you got up? I remembered – barely! – to fix the stove and microwave before I went to bed so…I wasn’t confused when I went to make coffee this morning. I mean – at least not by THAT!! LOL
So – the card I made last night is a fun fold – one that looks sorta tricky but…when you see how to do it – you’ll see how easy it really is! It’s called a Pivot & Flip Panel card and…it’s supper cool! I decorated mine for Christmas with the Pretty Poinsettia bundle and some Winter Dreams Specialty DSP! Take a look-see:

I learned how to make this cool little number by watching Lisa Curcio make one on a video – thanks, Lisa!
I started with a 5 1/2″ x 8 1/2″ piece of Secret Sea cardstock that I scored at 2 1/8″, 4 1/4″ and 6 3/8″ – then folded it as a “w” – with the 2 1/8″ and 6 3/8″ folds as “mountain” and the 4 1/4″ score as a “valley.
Using Liquid Glue, I matted four 1 7/8″ x 5 1/4” pieces of Paper Medley Mix In DSP (looks like Hydrangea Hue denim to me!) on Barely Blush 2026-2028 In Color Pearlized Paper. Then I adhered one of the matted panels to each panel of the card base with more Liquid Glue. That’s the front of the card.

For the back, I adhered three 2″ x 5 3/8″ pieces of snowy Winter Dreams Specialty DSP to three of the panels.
For the remaining panel, I stamped a Pretty Poinsettia sentiment in Secret Sea ink on a 2″ x 5 3/8″ piece of Basic White cardstock. In the corner, I stamped a Pretty Poinsettia flower in Hydrangea Hue ink. I made a sticky note mask for the flower and placed it over the top – then stamped the two little pine boughs from the set in Barely Blush. I picked up the mask and stamped a Barely Blush flower center.

To make the “flaps” on the front, I matted four 1 1/8″ x 4″ pieces of snowflake-strewn Winter Dreams Specialty DSP to Barely Blush 2026-2028 In Color Pearlized Paper and then to 1 3/8″ x 4 1/4″ pieces of Secret Sea cardstock.
I adhered the each of the matted panels to the MIDDLE sections of the front of the card base using Liquid Glue as shown below. Note: I made sure that the top (or bottom) edges lined up with the card base. I also got the outer edges lined up with the card base – but the more important piece was to be sure that the card would still close – so…not too close to the center fold.

For the center panel, I scored a 2 1/2″ x 8 1/2″ piece of Secret Sea cardstock at 4 1/4″ and folded it as a “mountain”.
I matted a 2 1/4″ x 4″ piece of snowy Winter Dreams Specialty DSP on Barely Blush 2026-2028 In Color Pearlized Paper and adhered it to the left side of the panel.

For the other side, I stamped a sentiment from Pretty Poinsettia in Secret Sea ink on the left side of a 2 1/4″ x 4″ piece of Basic White cardstock. I colored the open letters with a Dark Barely Blush Stampin’ Blend. Then I matted it on Barely Blush 2026-2028 In Color Pearlized Paper and adhered it to the right side of the center panel.

Using the dies in the Pretty Poinsettia set – and the Impressions Plate – I cut out one each of the flowers and then a second set of the three smaller flowers – from Hydrangea Hue 2026-2028 In Color Pearlized Paper. Without using the Impressions Plate, I also cut out a large leaf from Basic White cardstock, a second large leaf from Silver Foil and two of each little flower centers from Basic White cardstock.
With the two dies from the Frosted Pinecones set, I cut out three (a large and two small) pine boughs from Barely Blush 2026-2028 In Color Pearlized Paper.

I snipped the top three leaves off both large leaf die cuts.
For the left side of the center panel, using Liquid Glue, I adhered two pine boughs, the two leaf “top” – and a poinsettia that I built using one of each size die cut petals.

On the other panel, I built a second flower with the remaining flower die cuts. I snipped one more leaf – a white and silver – and tucked them, along with the final pine bough – under the flower.

The center panel is adhered to each of the two end panels of the card front using Liquid Glue. Note: I made sure that the edges were lined up with the ends of the card base – and that the panel was centered top-to-bottom between the flaps. And I ensured that the center fold was lined up with the canter fold of the card base. 
To finish off, I adhered matted pieces of Winter Dreams Specialty DSP to the exposed backs of the top and bottom flaps.


This card was done – but…it needed a custom envelope – cuz…it’s pretty darned thick! I made the envelope from an 8 1/2″ x 8 1/2″ piece of Willow White cardstock and my Simply Scored Scoring Tool. You can watch how to do it on the video – it’s about the last 20 min or so!
The front of my custom envelope got the Pretty Poinsettia pine boughs in Barely Blush ink…

…and the Pretty Poinsettia flower in Hydrangea Hue (with a Barely Blush flower center) on the flap.

Et Voila! Well – as non-traditional as Hydrangea Hue is for poinsettia flowers – I am loving how these turned out, aren’t you!? The dies in the Pretty Poinsettia set – especially when paired with the Impressions Plate – yield stunning florals and leaves for your Christmas cards! Hydrangea Hue and Secret Sea are a match made in heaven and Winter Dreams Specialty DSP is a perfect companion! And this Pivot & Flip Panel fun fold is SO beautiful 0 it creates a stunning display card for your special recipient!!

I hope you like!
If you’d like to recreate this card, all the products and card cuts you’ll need are down below! And this is a the card I made on yesterday’s Saturday Nite Live YouTube video. If you’d like to see it – for the first time or again – here ’tis!

I’ve also created a printable PDF with written instructions and a list of the products used to create this project. You can download, print and/or save it by clicking this image:


Missed any tutorials? You can check out my past projects right here!
TTFN
M

Connect with me! https://campsite.bio/stampsnlingers


CUSTOMER REWARDS
Earn 10% of your retail amount on all orders of $20 or greater! And you’ll be earning Punkin’ Head Peppermints – one peppermint for each $25 you spend thru my Online Store! When you gather up 16 Peppermint Points – you’ll be able to select a $40 gift right from me!
You’ll also be getting a link to my ZOOM The Craftroom (an exclusive TWICE-A-WEEK online event for my customers) and the monthly Online Tutorial – featuring the Wrapped in Greenery Bundle for November orders.
See my Customer Rewards page for full details.


Get the Stampin’ Up! Products Used in this Project:






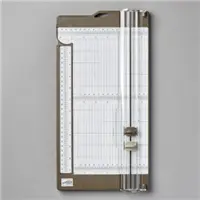
Card Cuts Used in This Project:
Secret Sea Cardstock: 5 1/2″ x 8 1/2″ (card base – scored and folded at 2 1/8″, 4 1/4″ and 6 3/8″); 2 1/2″ x 8 1/2″ (center panel – scored and folded at 4 1/4″); 1 3/8″ x 4 1/4″ (x4 – front flaps on front)
2026-2028 In Color Pearlized Paper: 2″ x 5 3/8″ (x4 – mats for DSP panels on front of card base); 2 3/8″ x 4 1/8″ (x2 – mats for center panel); 1 1/4″ x 4 1/8″ (x4 – mats for flaps on front); 1 1/4″ x 2″ (x4 – mats for back of flaps on front); Pretty Poinsettia die cut petals; Frosted Pinecones die cut pine boughs
Silver Foil: Pretty Poinsettia die cut large leaf (divided)
Basic White Cardstock: 2 1/4″ x 4″ (sentiment side of center panel); 2″ x 5 3/8″ (sentiment panel on back); Pretty Poinsettia die cut flower centers (x4 – 2 of each side) and large leaf (divided)
Paper Medley Mix In DSP: 1 7/8″ x 5 1/4″ (x4 – DSP panels on front of card base)
Winter Dreams Specialty DSP: 1 1/8″ x 4″ (x4 – snowflake – flaps on front); 2 1/4″ x 4″ (center panel left side); 1 1/8″ x 1 7/8″ (x4 – snow – backs of flaps on front); 2″ x 5 3/8″ (x3 – snow – DSP panels on back of card base)
Willow White Cardstock: 8 1/2″ x 8 1/2″ (envelope – assembled as shown in video)
If you need any stamping supplies, I’d be very happy to be your Demonstrator. Just click on the Order Stampin’ Up! Online Now button on the right side of the screen to go directly to my online store or drop me an email if you have any questions. Happy Stamping!
Shop the Last Chance List here. Earn FREE Stampin’ Up! Products – Join my Punkin Head Peppermint Rewards – My online customer thank you program!
Finn Fan Fix 

The morning routine.
Addy helps Wayne remember that dogs need to lick the plate. Finn waits patiently – laying down and saving his energy. Rank has it’s priviledges…

Then – when it’s time…

It’s like clockwork every morning! 🤷♀️
TTFN
M