

Happy Happy Hawwwmp Day, y’all! Hope your week is going well – FALL appears to be back in GA – hope hope HOPING it’s here for good. And that winter isn’t grinning evilly right around the corner. Fall in Georgia is glorious and I’d like a month – at least! – to enjoy it!
Today’s card isn’t really a Fall card – it’s more like…Spring-y! It showcases some gorgeous Mosaic Tile DSP and the coordinating Tile Garden Bundle on a pretty birthday card. Take a look-see:

I came across a card that Sue Campfield made on Pinterest and I decided it was too pretty to not make my own version. So – I did!
I started with a 5 1/2″ x 7 1/4″ piece of Pretty Peacock cardstock that I scored at 4 1/4″ – that makes a shorter-than-usual card front.
I matted a 2 3/4″ x 5 1/8″ piece of Mosaic Garden DSP on Hydrangea Hue cardstock – and adhered it to the card front with Liquid Glue.

On three 1 1/4″ x 1 1/4″ pieces of Basic White cardstock, I stamped a Tile Garden stem in Pretty Peacock ink and a flower in Crisp Cantaloupe ink.
Using the smallest petal-edged Tile Garden die, I cut out three Hydrangea Hue squares. Using Liquid Glue, I adhered the stamped white squares to the mats.

Using a straight edge to get them all aligned – and Liquid Glue just on the top portion of each little square – I adhered the matted squares to the edge of the card front
On a piece of Basic White cardstock, I stamped a Tile Garden sentiment in Golden Glow ink. Then I cut it out with the large Stylish Shapes banner die.

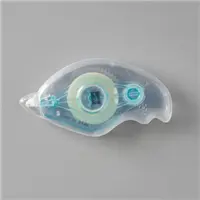
Using Stampin’ Seal, I adhered a figure-8 of Hydrangea Hue 3/8″ Bordered Ribbon to the back of the banner.
I adhered the whole thing to the top of the card front with Stampin’ Dimensionals.

I added some 2026-2028 In Color Dots (a Golden Glow dot each flower center and five Hydrangea Hue Dots to the banner) and the card front was done!

For the inside, I embossed a 1 1/4″ x 5 1/4″ piece of Basic White cardstock in the Rustic Check 3D Embossing Folder. I set it on a 4″ x 5 1/4″ piece of Basic White cardstock and used it as a guide to stamp a Tile Garden sentiment in Golden Glow and a stem/flower in the corner. I added a Golden Glow 2026-2028 In Color Dot to the flower center and then adhered the embossed strip to the panel with Liquid Glue.

I used Liquid Glue to adhere the panel to a 4 1/8″ x 5 3/8″ piece of Hydrangea Hue cardstock and then to the inside of the Pretty Peacock card base and the card was done.
My Basic White Medium Envelope got the Tile Garden flower on the front…

…and more Mosaic Garden DSP on the envelope flap.

Et Voila! Wow – every time I play with the Mosaic Garden DSP, I love it more. The colors are just wonderful together and the bold – and yet delicate!? – designs are so pretty for so many projects. It’s backed up perfectly with the coordinating Tile Garden bundle – with it’s fun flowers and handy sentiments! And – the dies. THE DIES!! 😎

I hope you like!
If you’d like to recreate this card, all the products and card cuts you’ll need are down below!
I’ve also created a printable PDF with written instructions and a list of the products used to create this project. You can download, print and/or save it by clicking this image:


Missed any tutorials? You can check out my past projects right here!
TTFN
M

Connect with me! https://campsite.bio/stampsnlingers
CUSTOMER REWARDS
Earn 10% of your retail amount on all orders of $20 or greater! And you’ll be earning Punkin’ Head Peppermints – one peppermint for each $25 you spend thru my Online Store! When you gather up 16 Peppermint Points – you’ll be able to select a $40 gift right from me!
You’ll also be getting a link to my ZOOM The Craftroom (an exclusive TWICE-A-WEEK online event for my customers) and the monthly Online Tutorial – featuring the Noel Tidings Bundle for October orders.
See my Customer Rewards page for full details.


Stamps-N-Lingers Packaging & Envelope Stock Up Ordering Special!

For all orders of $50 or greater placed through me between now and Monday, 12 October you’ll get to choose a free pack of Stampin Up! Envelopes, Note Cards & Envelopes, Treat Bags or Treat Boxes with your order of $50 or more this week!
Here’s the deets:
– For any order of $50 or greater (before shipping and taxes) placed through me, you’ll get to select one pack of Stampin Up! Envelopes, Note Cards & Envelopes, Treat Bags or Treat Boxes of your choice from me – for free!
– You’ll also earn Peppermint Rewards points AND you’ll get my October Card Class Tutorials (featuring the gorgeous Neutral Noel bundle!).
For quick reference, here are the goodies you can choose from:
– Basic White Medium Envelopes
– Advent Treat Boxes
– Flat 4″ x 8″ Cellophane Bags
– White Gable Boxes
– Iridescent Treat Bags
– Festive Flecks Mix and Match Cards & Envelopes
– Basic White Note Cards & Envelopes
– Clear Medium Envelopes
– Scalloped Window Boxes
I’ll be asking for your choice when I send the Thank You email out with your Monthly Tutorial and your peppermint count! ** PLEASE NOTE: if you haven’t given me your druthers OR if your choice is “Not Orderable” for whatever reason when I place the order for all the goodies…I’ll order a pack of Basic White Medium Envelopes (or whatever is available!) for you instead!
SUPER JOINING SPECIAL THRU THE END OF OCTOBER!

When you join Stampin’ Up! – anytime! – you’ll pay $100 plus tax to get signed up! Then – Stampin’ UP will send you a coupon code for $125 – use that against…whatever you want to purchase! There’s no limit and whatever is over and above the $125 will count towards your sales…AND you’ll get your discount on that amount! BOOM!
BUT! When you join during this special offer (6 – 31 Oct) – you will ALSO get an EXTRA $50 in Stampin’ Rewards deposited immediately in your Stampin’ Up! account!! You can spend THOSE anytime within the first three months after you sign-up. Whoo-hoo!
AND – if this is your first-time as a demonstrator – you’re ALSO going to receive a surprise Welcome Box right from Stampin’ UP!


And – did you know?? Stampin’ UP! Demonstrators get all those things PLUS…all the special things offered to customers!


Join for the fun – the discount – the early access to new goodies and new catalogs….or Join to get a little business going…it’s ALL up to YOU!
Let me know if you have any questions about joining or being a Stampin’ Up! demonstrator! Drop me a note at stamps-n-lingers@comcast.net, I’d love to chat with you!

Head over to my Join My Team page here to see all the benefits of being a Demonstrator! I’d love to have you on my team and help you get all that discount, and all the early goodies, and…ALL THE THINGS! 🙂
You can also see additional information on my Stampin’ Up! site here!


Click here to purchase your Starter Kit and Get Started!
Get the Stampin’ Up! Products Used in this Project:











Card Cuts Used in This Project:
Pretty Peacock Cardstock: 5 1/2″ x 7 1/4″ (card base, scored and folded at 4 1/4″)
Hydrangea Hue Cardstock: 2 7/8″ x 5 1/4″ (mat for card front); Smallest Petal-edge Tile Garden die cut (x3 – mats for floral images); 4 1/8″ x 5 3/8″ (mat for inner liner)
Basic White Cardstock: 1 1/4″ x 1 1/4″ (x3 – floral images on front); Stylish Shapes banner (sentiment); 1 1/4″ x 5 1/4″ (embossed strip on inner liner); 4″ x 5 1/4″ (inner liner)
Mosaic Garden DSP: 2 3/4″ x 5 1/8″ (card front); 2 1/4″ x 6″ (envelope flap)
If you need any stamping supplies, I’d be very happy to be your Demonstrator. Just click on the Order Stampin’ Up! Online Now button on the right side of the screen to go directly to my online store or drop me an email if you have any questions. Happy Stamping!
Shop the Last Chance List here. Earn FREE Stampin’ Up! Products – Join my Punkin Head Peppermint Rewards – My online customer thank you program!
Finn Fan Fix 

When I suggested to the Little Miss that we need to get up out the chair….

…she made her thoughts quite clear.
With nary a word.
TTFN
M