

Hello hello, y’all! Happy Sunday! Hope your weekend is going well – you have nice weather – AND – you’re ready for September. Cuz…it’s bearing down on us like a freight train!! Day after tomorrow – and it’s a BIG DAY!
On that day – you’re going to be able to pick up a few of the cool things that I’ve used on today’s fun fold card. It’s decorated with some pretty hot foiled vellum Lustrous Leaves (new on 1 Sept!) and a sentiment (and a few other things!) from the Elegant Leaves stamp set (ALSO coming on 1 Sept!). A little plaid Painted Patch DSP (yup – ALSO new on the 1st) – added a little whimsy. Take a look-see:

Now – I’ve seen this card a few times around the interwebs but…I used measurements from Karen Titus’ cards so… 🙂
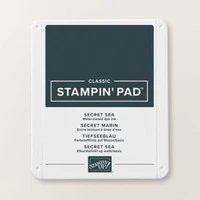
I started with a 5 1/2″ x 8 1/2″ piece of Secret Sea cardstock that I scored at 4 1/4″ on the long side. Then I put the short end at the top of the Paper Trimmer and cut at 1 1/2″ from the top just to the score line.

Using Liquid Glue, I adhered that 1 1/2″ flap down to the inside back of the card base.
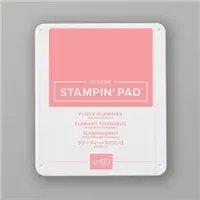
I matted a 1 1/4″ x 4″ piece of new Painted Patch DSP (get this on 1 Sept) to a 1 3/8″ x 4 1/8″ piece of Flirty Flamingo cardstock and adhered it to that flap with Liquid Glue.

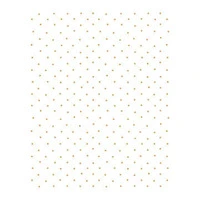
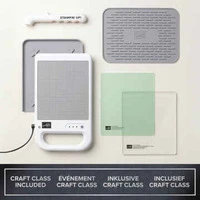
I used the Stampin’ Hot Foil System and Gold Stampin’ Hot Foil to hot foil a 3 3/4″ x 4″ piece of Basic White cardstock with the Swiss Dots Hot Foil Die (available right this very minute!!).
I matted the panel on a 3 7/8″ x 4 1/8″ piece of Flirty Flamingo cardstock and adhered it to the large side of the card front with Liquid Glue.
In the corner of a 2 1/8″ x 2 3/8″ piece of Basic White cardstock, I stamped a sentiment from the Elegant Leaves set (in the Sept-Dec 2026 Catalog and available on 1 Sept) in Secret Sea ink. I matted it on Flirty Flamingo and adhered it to the card front with Stampin’ Dimensionals.

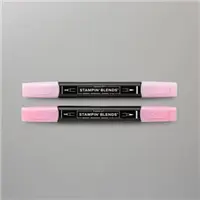
I used the Stampin’ Hot Foil System and Gold Stampin’ Hot Foil to hot foil a piece of Vellum Specialty Paper with the new Lustrous Leaves Hot Foil Dies (available 1 Sept). Using Flirty Flamingo Stampin’ Blends, I carefully colored the leaves. Note: be judicious about coloring over the foil – too much of the Blends can melt it!
Then I cut them out with the coordinating die in the Lustrous Leaves Hot Foil Die set.

I used all the little leaf dies in the Lustrous Leaves Hot Foil Die to cut out 13 little Basic White leaves.

I adhered the vellum leaves to the card front with Mini Glue Dots and then tucked six of the little white leaves in and around them with Liquid Glue.

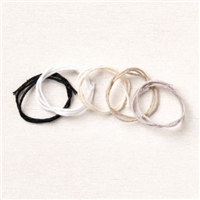
I tied a little bow from white Baker’s Twine and adhered it with a dab of Liquid Glue.
Then I added some new Secret Sea Radiant Gems (coming 1 Sept) and the card front was done.

For the inside card, I scored and folded a 3 1/2″ x 7″ piece of Secret Sea cardstock at 3 1/2″.
I matted a 3 1/4″ x 3 1/4″ piece of the plaid Painted Patch DSP on a Flirty Flamingo mat and then adhered it to the front of the little card base with Liquid Glue.

I adhered six more of the little white die cut leaves to the card front – remember, on this one, the fold is at the BOTTOM so be sure you get the right side up! – with Liquid Glue.
In the corner, I adhered one more Vellum leaf and a final die cut white leaf with Liquid Glue. A teensy little white Baker’s Twine bow – added with Liquid Glue – and a few Secret Sea Radiant Gems finished it off.

For the inside of this card, I stamped a second Elegant Leaves sentiment in Secret Sea ink on a 3 3/8″ x 3 3/8″ piece of Basic White cardstock. In the corner, I stamped an Elegant Leaves leaf in Flirty Flamingo ink.

I used Liquid Glue to adhere the panel to the inside of the little card base – remember where up and down is! – and then adhered it to the inside of the large card base with Liquid Glue.
Finally – for the back, I stamped a couple of Elegant Leaves leaves in Flirty Flamingo on a 4 1/8″ x 5 3/8″ piece of Basic White cardstock, adhered it to the back of the large card base with Liquid Glue and the card was done!

My Basic White Medium Envelope got an Elegant Leaves leaf in Flirty Flamingo on the front…

…and more of the Painted Patch DSP on the envelope flap.

Et Voila! So – I’m calling this a Hidden Card Front Flap card. No clue what it’s REAL name is but…that’s what I named it! 🤷♀️ I really like the Lustrous Leaves hot foiled on Vellum and colored in PINK, don’t you? A fun change from Fall colors – and shows how versatile this set is! The Elegant Leaves stamp set and Painted Patch DSP – both from the new Sept-Dec 2026 Catalog – are a perfect pairing with them. I can’t wait for you to pick these up on TUESDAY, 1 Sept! If you don’t already have the Swiss Dots Hot Foil Die – get it! It’s a wonderful – low key elegant – way to add a little sumpin-sumpin to a card front!

I hope you like – and have already added these to your 1 Sept gotta-get-it list!!
If you’d like to recreate this card, all the products and card cuts you’ll need are down below! And – this is the card I made on yesterday’s Saturday Nite Liv YouTube Video! If you’d like to see it – for the first time – or again! – here ’tis!

I’ve also created a printable PDF with written instructions and a list of the products used to create this project. You can download, print and/or save it by clicking this image:


Missed any tutorials? You can check out my past projects right here!
TTFN
M

Connect with me! https://campsite.bio/stampsnlingers
CUSTOMER REWARDS
Earn 10% of your retail amount on all orders of $20 or greater! And you’ll be earning Punkin’ Head Peppermints – one peppermint for each $25 you spend thru my Online Store! When you gather up 16 Peppermint Points – you’ll be able to select a $40 gift right from me!
You’ll also be getting a link to my ZOOM The Craftroom (an exclusive TWICE-A-WEEK online event for my customers) and the monthly Online Tutorial – featuring the Flowering Meadow Bundle for August orders.
See my Customer Rewards page for full details.


Designer Series Paper and Cardstock Sale ENDS SOON!


For the rest of August, you can get 15% off on select Designer Series Papers and Cardstocks!
Here’s the deets!
– Sales Period: August 4–31
– Ordering Ends: August 31, 2026, at 11:59 p.m. (MT)
– While supplies last.
– You’ll find all qualifying items in one convenient location—the “Designer Series Paper and Cardstock Sale” page in the online store.
Check out this video – you’ll get a look-see at some of the papers in the sale and there are some pretty samples, too (who doesn’t like a little inspiration?!)!


One of our bestest things is our gorgeous Designer Series Paper and high quality cardstock, so…take advantage of your chance to stock up!
Get the Stampin’ Up! Products Used in this Project: You’ll also need the Elegant Leaves stamp set. Lustrous Leaves Hot Foil Dies, Painted Patch DSP and Radiant Gems when they’re available!







Card Cuts Used in This Project:
Secret Sea Cardstock: 5 1/2″ x 8 1/2″ (large card base – scored and cut as shown above); 3 1/2″ x 7″ (small inside card, scored and folded at 3 1/2″)
Flirty Flamingo Cardstock: 1 3/8″ x 4 1/8″ (mat for small side flap on large card base); 3 7/8″ x 4 1/8″ (mat for large card front); 2 1/4″ x 2 1/2″ (mat for sentiment); 3 3/8″ x 3 3/8″ (mat for front of small inside card)
Vellum Specialty Paper: Lustrous Leaves hot foiled and die cut leaves
Basic White Cardstock: 3 3/4″ x 4″ (Swiss Dots hot foiled large card front); 2 1/8″ x 2 3/8″ (sentiment); 3 3/8″ x 3 3/8″ (small card inner liner); 4 1/8″ x 5 3/8″ (back panel); Lustrous Leaves die cut small leaves (x13)
Painted Patch DSP: 1 1/4″ x 4″ (small side flap on large card base); 3 1/4″ x 3 1/4″ (small inside card front); 2 1/4″ x 6″ (envelope flap)
If you need any stamping supplies, I’d be very happy to be your Demonstrator. Just click on the Order Stampin’ Up! Online Now button on the right side of the screen to go directly to my online store or drop me an email if you have any questions. Happy Stamping!
Shop the Clearance Rack here. Earn FREE Stampin’ Up! Products – Join my Punkin Head Peppermint Rewards – My online customer thank you program!
Finn Fan Fix 

She’s ambi-sleep-trous


Sorta makes my neck hurt just looking at her! 😳
TTFN
M