
Good morning, y’all – welcome to another edition of the Amy’s Inkin’ Krew Team blog hop! Each month we make projects centered around a theme – and this month our theme is Fun Folds! Be sure to check out everyone’s projects – we’ve got a bunch of talented ladies hopping with us this month!
I played with an easy fun fold this week – it’s kind of a cool Front-Flap Fold – and I decorated it with Velvet Meadow Specialty DSP and…a wreath from the Flowering Meadow bundle. Take a look-see:

I started with a 5 1/2″ x 8 1/2″ piece of Cloud Cover cardstock. I scored it at 4 1/4″ and then put the short end of the “front” panel at 1 3/8″ in my Paper Trimmer. I cut down to the 4 1/4″ score line.

I turned the card base, putting the long side at the top…

…cut off the strip.

I scored the short strip at 3/8″ and folded it – this is the front flap.

Using Liquid Glue on the 3/8″ “tab” of the strip, I adhered it to the top of the card base – centered on the back panel.

I used Liquid Glue to adhere a 4 1/8″ x 5 3/8″ piece of Velvet Meadow Specialty DSP to the back panel.
On a piece of 4″ x 4 1/8″ piece of Basic White cardstock, I stamped a Flowering Meadow sentiment in Peaceful Pine ink. In the corner, I stamped a stem and a leaf in Peaceful Pine ink and the flower image in Bubble Bath ink. I stamped the three-flower-center image in Daffodil Delight ink.
In the corner of a second 4″ x 4 1/8″ piece of Basic White cardstock, I stamped the Flowering Meadow leaf twice in Peaceful Pine ink. I adhered both panel to the inside of the card base with Liquid Glue.

For the front, I adhered a 1 1/4″ x 3 5/8″ piece of Velvet Meadow Specialty DSP to the front flap using Liquid Glue.
I adhered a 4″ x 4 1/8″ piece of the Velvet Meadow Specialty DSP to the front panel of the card base.

I used the largest Stylish Shapes circle die to cut out a Basic White circle – this will be the base for the wreath on the front.
I used the leaf die in the Flowering Meadow die set to cut out some leaves:
– four from the dark side of a piece of Peaceful Pine Two-tone Cardstock
– four from the light side of the Peaceful Pine Two-tone Cardstock
– four from Peaceful Pine 2026-2028 In Color Pearlized Paper

Using Liquid Glue, I adhered the leaves (12 in all) around the edge of the die cut circle.


On a piece of Basic White, I stamped the Flowering Meadow leaf five times in Peaceful Pine ink and cut them out with the coordinating die.
I added them into the wreath, adhering them with Liquid Glue.
Using Liquid Glue, I adhered the wreath to the front flap – centering it on the card base.

I cut out five small flowers from Daffodil Delight, Bubble Bath and white Velveteen Assortment Specialty Paper – for a total of 15 little flowers!
I also cut out two larger flowers – from Berry Burst cardstock – and the flower centers from Daffodil Delight cardstock. I adhered the centers to the flowers with Liquid Glue.
I adhered the two large flowers with Stampin’ Dimensionals.

I tied a small Linen Thread bow and adhered it with a Glue Dot.
On a piece of Cloud Cover cardstock, I stamped a Flowering Meadow sentiment in Peaceful Pine ink and cut it out with the Three Banner Punch.

I adhered the sentiment to the wreath – using Stampin’ Dimensionals.
Finally – I added all the little flowers with Liquid Glue – and gave each of them a tiny Iridescent Pearl Basic Jewel and…the card was done!
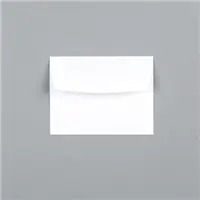
My Basic White Medium Envelope got the Flowering Meadow flowers and leaf on the front…

…and a little more Velvet Meadow Specialty DSP on the envelope flap!

Et Voila! Well – I remember why I love this Flowering Meadow bundle – those leaf dies are as cool and pretty as can be! With the addition of pretty sentiments and a bunch of lovely stamped flowers – it’s an English cottage garden wherever you want it! The Velvet Meadow Specialty DSP (which is expected back in stock around the beginning of August) is beautiful – with its colors and pretty flocking!! And this front-flap fun fold is fun AND easy, don’t you think!?

I hope you like!
If you’d like to recreate this project, all the products and card cuts you’ll need are down below!
I’ve also created a printable PDF with written instructions and a list of the products used to create this project. You can download, print and/or save it by clicking this image:

Missed any tutorials? You can check out my past projects right here!
Now that you’ve seen my card, take a minute to hop thru all our projects today. If you click the Next Blog button, you’ll go right to Amy’s page. And you can just click on the names below to go direct to all the blogs!

TTFN
M

Connect with me! https://campsite.bio/stampsnlingers
CUSTOMER REWARDS
Earn 10% of your retail amount on all orders of $20 or greater! And you’ll be earning Punkin’ Head Peppermints – one peppermint for each $25 you spend thru my Online Store! When you gather up 16 Peppermint Points – you’ll be able to select a $40 gift right from me!
You’ll also be getting a link to my ZOOM The Craftroom (an exclusive TWICE-A-WEEK online event for my customers) and the monthly Online Tutorial – featuring the Fern & Flora Bundle for July orders.
See my Customer Rewards page for full details.


WANT TO JOIN US?
NEW JOINING PROCESS
As part of our new, more streamlined and easy, join process, all first-time demonstrators will receive a surprise Welcome Box—a gesture of appreciation and a warm welcome into the global Stampin’ Up! creative community! I’m going to keep the insides a secret but…there’s some fun goodies to help welcome you to the team!

How the New Process Works
Step 1: Join
New demonstrators will:
- choose a team leader.
- accept required agreements.
- enter a few personal details.
- pay the $100 join fee.
- click submit.
Step 2: Shop
Once their information has been reviewed and approved (usually very quickly), their Welcome Box ships, and the new demonstrator receives an email with:
- their demonstrator ID.
- a coupon code to begin shopping.
About the Coupon Code
- Valued at $125.
- Coupon code can be applied to any demonstrator order.
- Order CAN exceed the coupon code value (I got asked all the time if new folks could go over $125 for their Starter Kit and I hated having to say “no”!).
- Got a list LONGER than $125? Easy peasy! Any amount above the coupon code value:
- receives the demonstrator discount.
- counts toward the quarterly sales minimum.
- earns Stampin’ Rewards if it meets the qualifying purchase amount (as long as you’ve opted into the Stampin’ Rewards program).
Additional perk for new demonstrators
- New demonstrators may add eight free catalogs to any order!

Get the Stampin’ Up! Products Used in this Project:




Price: $17.00


Price: $10.00








Card Cuts Used in This Project:
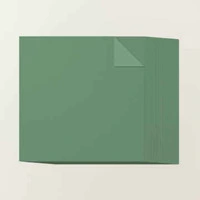
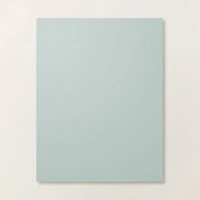
Cloud Cover Cardstock: 5 1/2″ x 8 1/2″ (card base, scored and folded at 4 1/4″); 1 3/8″ x 4 1/4″ (top flap – cut from card base – scored at 3/8″); Three Banner Punch (sentiment)
Peaceful Pine Two-Tone Cardstock: Flowering Meadow die cut leaves (x8 – four in dark, four in light)
2026-2028 In Color Pearlized Paper (in Peaceful Pine): Flowering Meadow die cut leaves (x4)
Bubble Bath Cardstock: Flowering Meadow die cut small flowers (x5)
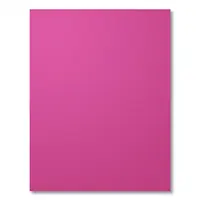
Berry Burst Cardstock: Flowering Meadow die cut large flowers (x2)
Daffodil Delight Cardstock: Flowering Meadow die cut small flowers (x5); Flowering Meadow die cut flower centers (x2);
Velveteen Assortment Specialty Paper (in white): Flowering Meadow die cut small flowers (x5)
Basic White Cardstock: Largest Stylish Shapes die cut circle (base for wreath); Stamped & Die Cut Flowering Meadow leaves (x5); 4″ x 4 1/8″ (x2 – inner liner panels)
Velvet Meadow Specialty DSP: 4″ x 4 1/8″ (front panel); 1 1/4″ x 3 5/8″ (on top flap strip); 4 1/8″ x 5 3/8″ (back panel of card base); 2 1/4″ x 6″ (envelope flap)
If you need any stamping supplies, I’d be very happy to be your Demonstrator. Just click on the Order Stampin’ Up! Online Now button on the right side of the screen to go directly to my online store or drop me an email if you have any questions. Happy Stamping!
Shop the Clearance Rack here. Earn FREE Stampin’ Up! Products – Join my Punkin Head Peppermint Rewards – My online customer thank you program!
Finn Fan Fix 
No FFF’s on Blog Hop Days!
TTFN
M


 #20 Demonstrator in Sales in the US 2023-2024
 #13 Demonstrator in Leadership in the US 2023-2024
 #21 Demonstrator in Team Building in the US 2023-2024


 KarensCardCorner
 Stamp with Amy K
 Stampin With Shirley G
 Tarabeth Stamps
 TL's Bright Spot
Interesting fun fold! And that wreath–Chef’s Kiss! TFS
Thank you, ma’am! 🙂
Just beautiful Mary! Your wreath is stunning, love the mix of designer papers that you’ve used too! 🙂
Thanks so much, Amy! 🙂
Just gorgeous! I especially love the floral wreath!
Thanks, I LOVE how the wreath turned out! 🙂
Beautiful card, Mary! I am gonna have to give this fun fold a whirl! Thanks for sharing how you made it!
You bet – have fun with it, Wendy – thank you! 🙂
What a great FF, might have to CASE 😍🤗
Love how the wreath holds the card together!
Thanks, Ann Louise – it’s a cool fun fold, for sure! 🙂
What a pretty card! The wreath and the DSP go so well together!
Thanks so much, Charlene – I love how the wreath came out! 🙂
WOWZER!! This is gorgeous Mary 🙂 LOVE that wreath and it’s perfect with this fold.
Thanks so much, Karen! 🙂
Such a clever fun fold with the beautiful wreath on the top flap – love it!
Thanks so much, Deborah! 🙂