

Happy Friday, y’all! Ready for a good weekend? Big plans?? 🙂
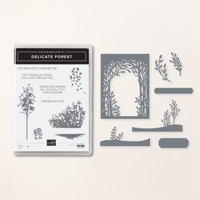
My card today is one that I made for a friend who’d helped me out a couple weeks back. Masculine cards can be…difficult, I know – but…I pulled out the Delicate Forest bundle and the Biggest Wish stamp set (again!), plus some cool Basics 3D Embossing – all in Crumb Cake and Mossy Meadow! Take a look-see:

I started by using the large forest-y die from the Delicate Forest dies to cut from the middle of a 4″ x 5 1/4″ piece of Mossy Meadow cardstock.
I dry-fit the die cut on a 4 1/4″ x 5 1/2″ piece of Crumb Cake cardstock – then I put a sticky note UNDER the die cut and onto the Crumb Cake panel – just under the narrow piece at the bottom. When I picked up the Mossy Meadow die cut – the sticky note remained as a mask on the Crumb Cake panel. Confused? Check out the video! 🙂

With the mask in place, I stamped the pretty tree image from the Delicate Forest stamp set three times in Crumb Cake ink, varying the height of the tree each time.
I pulled off the sticky note mask and embossed the panel in the cross-hatch folder from the Basics 3D Embossing Folder.

Using Liquid Glue, I adhered the stamped and embossed panel on the front of a Crumb Cake card base.
Then I used Black Stampin’ Dimensionals – in smaller pieces where necessary – to adhere the Mossy Meadow die cut in place. Tip: be generous with the Dimensionals – this die can stand plenty of support!

I used the dies in the Delicate Forest set to cut out two Vellum cardstock leaves, which I adhered to the card front with Liquid Glue.
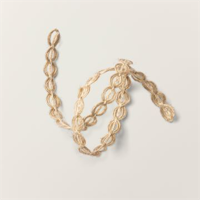
I used some Glue Dots to adhere a length of Natural 1/4″ Wavy Trim to the card front – over the bottoms of the vellum leaves.

On a piece of Crumb Cake cardstock, I stamped a sentiment from the Biggest Wish stamp set in Mossy Meadow ink. Then I cut it out with the larger label die from the Delicate Forest die set.
Using Black Stampin’ Dimensionals (double-stacked on the left side and single on the right) I adhered the sentiment over the trim.

I added a large Brushed Metallic Adhesive-backed Dot and the card front was done!
On the inside, I stamped the corner foliage image from the Delicate Forest stamp set in Crumb Cake in the corner of a Crumb Cake panel.

I used Liquid Glue to adhere the panel to a Mossy Meadow mat and into the Crumb Cake card base and the card was done!
My Very Vanilla Medium Envelope got the Delicate Forest image in Crumb Cake ink on the front…

…and again on the envelope flap!

Et Voila! Oh my – I LOVE this Delicate Forest bundle! The die set is…stunning – you KNOW how I feel about foliage die cuts! And the sentiments are lovely – perfectly suited for sympathy cards. Since I didn’t want this one as a sympathy card – I reached for what has become a Go-To for me – the Biggest Wish stamp set. Which was just right!

I hope you like!
If you’d like to recreate this project, all the products and card cuts you’ll need are down below! And – this is the card I made on yesterday’s Thursday After Lunch Bunch YouTube live video. If you’d like to see it – for the first time or again! – here ’tis!

I’ve also created a printable PDF with written instructions and a list of the products used to create this card. You can download, print and/or save it by clicking this image:


Missed any tutorials? You can check out my past projects right here!
TTFN
M

Connect with me! https://campsite.bio/stampsnlingers
HOST CODE FOR 16 JAN – 31 JAN: NV72DGEQ
Use this host code when you order $50 or greater and receive a free gift (AND the Monthly Card Tutorial) from me! If your order is over $150, please do not use this code, but you’ll still get the free gift. The free gift is your choice of any item valued up to $10.00 in any active Catalog! That includes some of the Host Exclusive stamp sets! See my Customer Rewards page for full details.
Note: Make sure that you can see my name on the final checkout page listed as your Demonstrator when you order so that you know that you’re ordering with me and you’ll get my rewards!
You’ll also be getting a link to my ZOOM The Craftroom (an exclusive TWICE-A-WEEK online event for my customers) and the monthly Online Tutorial. The January Tutorial features the beautiful Stippled Roses Bundle!


It’s Sale-A-Bration Time!

We ALL look forward to Sale-A-Bration each year and this year is no exception! And – since it coincides with the release of the wonderful new January – April 2024 Mini Catalog, there’s no doubt at all that THIS is the time to SHOP, HOST and JOIN!
Get all the deets at my Stampin’ Up! Promotions page right here!
Get the Stampin’ Up! Products This Project:


Card Cuts Used in the This Project:
Crumb Cake Cardstock: 4 1/4″ x 11″ (card base, scored and folded at 5 1/2″); 4 1/4″ x 5 1/2″ (embossed front card panel); Delicate Forest die cut label (sentiment); 3 7/8″ x 5 1/8″ (inner liner)
Mossy Meadow Cardstock: 4″ x 5 1/4″ (x2 – Die cut card front and the mat for inner liner)
Vellum Cardstock: Delicate Forest die cut leaves (x2)
If you need any stamping supplies, I’d be very happy to be your Demonstrator. Just click on the Order Stampin’ Up! Online Now button on the right side of the screen to go directly to my online store or drop me an email if you have any questions. Happy Stamping!
Shop the Clearance Rack here. Earn FREE Stampin’ Up! Products – Join my Punkin Head Peppermint Rewards – My online customer thank you program!
Finn Fan Fix 

Licking the soup bowl by the light of the Christmas tree.

Finn likes the tree still being up – don’t let him tell you any different! That soft white light is VERY flattering!
TTFN
M