Good morning on this Patriot Day – a day of remembrance. Do you remember where you were 21 years ago? What you were doing when you heard that our world as we knew it – with its unassailable borders – had changed forever? I surely do. And I remember how I felt in the days and weeks after – the patriotic sense of ONENESS that permeated our country. We all need to always remember that feeling – and the cause.
Okay. Seriousness done. Let’s get down to business! 🙂
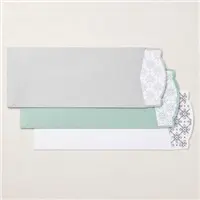
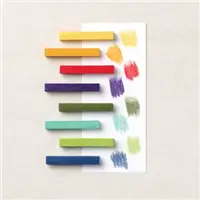
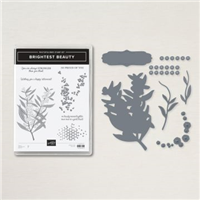
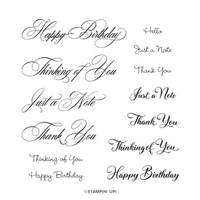
I’ve got a pretty Fall thank you card for you today – thanks to the Brightest Beauty stamp set with its bundled Golden Beauty Dies. Texture Chic Specialty DSP adds some unexpected Fall colors – and the aptly-named Go To Greetings set makes this a true thank-you card! Take a look-see:

This fits perfectly with the Global-Design-Project theme challenge. 🙂

I started by adhering a piece of the Texture Chic DSP on a Mango Melody mat for the card front.
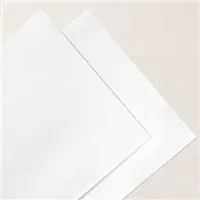
Next, I stamped the large leafy image from Brightest Beauty in Versamark Ink several times on a Basic White panel. I sprinkled the images with Clear Embossing Powder and heat set it with my Heat Tool on the high setting.

When the powder was cool, I used Blending Brushes to swirl Mango Melody and Petal Pink ink onto the panel. Then I wiped off the ink from the embossed portions – creating an “emboss resist” image!
Then I ran the panel thru the Stampin’ Cut and Emboss Machine in the Timber 3D Embossing Folder.

I used a Paper Trimmer to cut the embossed panel into five 1″-wide strips (there’s a little leftover and I just tossed it!) and then adhered them to the card front with Liquid Glue – sort of like pick-up-sticks! 🙂
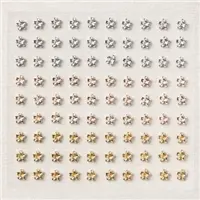
I used the leaves and flowers dies in the Golden Beauty die set to cut out about a bazillion flowers from Crushed Curry and gold Glimmer Paper and some leaves/stems from Soft Succulent cardstock.

And then – I got busy with my Liquid Glue – adhering ALL the stems – and ALL the flowers! Some friends from Down Under who were watching my YouTube video last night told me that this looks like an Australian Wattle Bush…

… so do it proud and make it plenty bushy and wattle-y!!

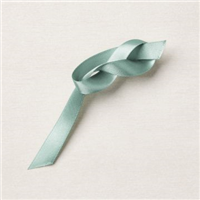
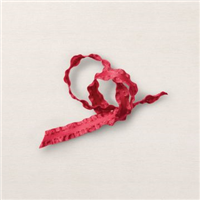
Once the wattles are in place – tie a simple bow from a length of gold Simply Elegant Trim and adhere it with a Glue Dot.
On a piece of Petal Pink cardstock, stamp the Brightest Beauty sentiment in Soft Suede – then cut it out with the label die in the Golden Beauty set.

I used Stampin’ Dimensionals to adhere the sentiment and the card front was done! Tip: put the Dimensionals on the card front – versus on the back of the label die cut. Makes it a ton easier to avoid the bow! 🙂
On the inside, I stamped a sentiment from Go To Greetings in Soft Suede on a piece of Basic White cardstock. In the corner, I stamped the big leafy image from Brightest Beauty in Soft Succulent. Then I used the flower-fill image in Crushed Curry.

I used Liquid Glue to adhere the panel to a Mango Melody mat and into my Soft Suede card base, popped the card front on with Stampin’ Dimensionals and the card was done!
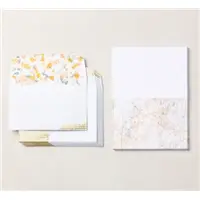
My Basic White Medium Envelope got the Brightest Beauty floral on the front…

…and more Texture Chic Specialty DSP on the envelope flap.

Et Voila! I think the Texture Chic paper was an unexpected – but…sorta perfect!…choice for a Fall card. I love how it works with the Brightest Beauty images and Golden Beauty die cut foliage, don’t you?? And – if you haven’t tried the emboss-resist coloring technique – give it a go! It’s fun and gorgeous!

I hope you like!
If you’d like to recreate this card, all the products and card cuts you’ll need are down below!
And – I made this card yesterday on my YouTube Video – if you’d like to see the replay, here ’tis! Enjoy! For the video card – I switched the card base and mat colors – let’s pretend I did it on purpose, okay? So – you can see both color combos – and decide which one you like better! 🤷♀️🤷♀️🤷♀️
And…I’ve also created a printable PDF with written instructions and a list of the products used to create this project. You can download, print and/or save it by clicking this image:

Missed any tutorials? You can check out my past projects right here!
TTFN
M

Connect with me! https://campsite.bio/stampsnlingers

HOST CODE FOR 1 SEP – 15 SEP: RY9VTG9C
Use this host code when you order $50 or greater and receive a free gift (AND the Monthly Card Tutorial) from me! If your order is over $150, please do not use this code, but you’ll still get the free gift. The free gift is your choice of any item valued up to $10.00 in any active Catalog! That includes some of the Host Exclusive stamp sets! See my Customer Rewards page for full details.
Note: Make sure that you can see my name on the final checkout page listed as your Demonstrator when you order so that you know that you’re ordering with me and you’ll get my rewards!
You’ll also be getting a link to my ZOOM The Craftroom (an exclusive TWICE-A-WEEK online event for my customers) and the monthly Online Tutorial. The September Tutorial features the Perched in a Tree Bundle!


NEW CHRISTMAS GIFTING KIT!
Check out the latest addition to the Kits Collection by Stampin’ Up! It’s your one-stop solution to those gift card holders and tags you need for the holidays!

The Christmas Gifting Kit has everything you need to create gorgeous gift tags to attach to presents and gift card holders that adds a handmade touch.
Christmas Gifting Kit Details and what’s included:
- Kit includes 9 tags and 9 gift card holders—3 each of 3 designs

- Includes the exclusive Christmas Gifting Stamp Set and a Shaded Spruce Classic Stampin’ Spot

- Sized to fit standard gift cards
- Coordinating colors: Basic Black, black foil, Mint Macaron, Real Red, Shaded Spruce

Get this – and ALL our great kits! – right here – in the Kits Collection on the online store.
Whoo-hoo!

Here’s this week’s Deals! They’re good thru Wednesday, 14 September 2022; 11:50 p.m. (MT)! 🙂
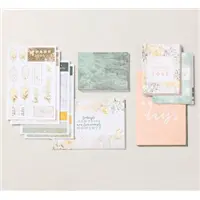


Get the Stampin’ Up! Products Used in this Project:


Price: $15.00


Card Cuts Used in This Project:
Soft Suede Cardstock: 5 1/2″ x 8 1/2″ (card base, scored and folded at 4 1/4)
Mango Melody Cardstock: 4 1/8″ x 5 3/8″ (x2 – mats for card front and for inner liner);
Crushed Curry Cardstock: Golden Beauty Die cut flowers on front of card
Soft Succulent Cardstock: Golden Beauty Die cut leaves/branches
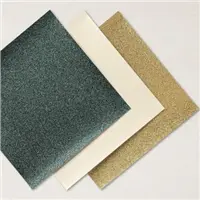
Glimmer 12 x 12 Paper – in Gold: Golden Beauty Die cut flowers on front of card
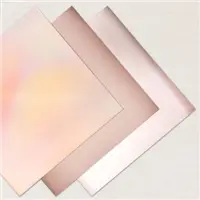
Petal Pink Cardstock: Golden Beauty Die label (sentiment)
Basic White Cardstock: 3 7/8″ x 5 1/8″ (embossed panel on front – cut into 5 – 1″ wide strips); 4″ x 5 1/4′ (inner liner)
Texture Chic Specialty DSP: 4″ x 5 1/4″ (card front); 2 1/2″ x 6″ (envelope flap)
If you need any stamping supplies, I’d be very happy to be your Demonstrator. Just click on the Order Stampin’ Up! Online Now button on the right side of the screen to go directly to my online store or drop me an email if you have any questions. Happy Stamping!
Shop the Clearance Rack here. Earn FREE Stampin’ Up! Products – Join my Punkin Head Peppermint Rewards – My online customer thank you program!
Finn Fan Fix

So…we had a LOT of good Finn-knowledgable-answers yesterday on what Finn was doing in the picture I posted.
No one was spot on though so…I’ll show you the answer via another picture.
You gonna be like…oh…duh! 😉

Yep.
This…

…is “Finn” for….every bite you take, every snack you make….I’ll be watching you! 😉
TTFN
M


 #20 Demonstrator in Sales in the US 2023-2024
 #13 Demonstrator in Leadership in the US 2023-2024
 #21 Demonstrator in Team Building in the US 2023-2024


 KarensCardCorner
 Stamp with Amy K
 Stampin With Shirley G
 Tarabeth Stamps
 TL's Bright Spot
Thanks for the earworm and the beautiful wattles!
Thanks, Karen – and you’re welcome! 🙂
Yikes, sorry that I missed your live AGAIN last night! Such a pretty card, love the colors! My first thought on the Finn photo was food…but the I couldn’t figure out what food you’d be eating in the bedroom. Should have gone with that. 😉
Lunch! Staying out of Miss Sonya’s way while she cleans the house! Thanks, Amy! 🙂
I remember it very well. And will never forget. Your message is true, and very well said.
And your card is lovely.
Thanks, Mom! 🙂
In your bedroom??? It must have been a late night snack!! So it’s a “wattle bush”…hmmmmm.
Nope – lunch. On Fridays when Miss Sonya is here – we try to get out of her way at lunch time – so…I sit in the rocker in my room eating my lunch! Finn “helps”! LOL!
LOL……Absolutely Finn……I was close……not the crate part, but the wanting a treat part….treat, or bite, or peppermint. or a plate lick….
Yep – “food” is almost always a good guess! Thanks, Faith! 🙂
Where did you get the tweezers? Watching replay. I didn’t know the flower is called wattle berries. Thanks for letting us know. I wish stampin up would name the flowers in their description. I know I have always wondered what some of the stamps in the collections are that are not very well known.
That would be cool, for sure! The tweezers are from EK Tools – and I just got them on Amazon. I suspect you could find them in a Hobby Lobby or Michaels… Thanks! 🙂
Those little “berries” are actually fluffy flowers. Australia has a special Wattle Day on 1 September when all the trees are blooming. This is a gorgeous set and one that I had to purchase as soon as I saw it.
Oh shoot – my bad! I was calling them berries and they’re flowers! 🤦♀️ Whatever they are – they’re really pretty! Glad you got the set, Carolyn 🙂