Good morning good morning and happy Friday! Hope your SHORT week has been great and that you’re ready for the weekend!
I also hope you’ve already ordered one (or more!) of the new Christmas Gifting Kit! I sure did!
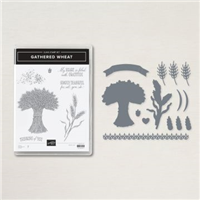
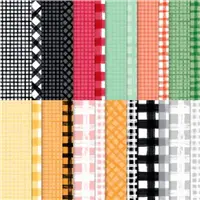
My card today is NOT for Christmas – instead it celebrates my favorite season – FALL! Pumpkin spice lattes, pumpkin spice bread, pumpkin spice fudge, pumpkin spice cookies….you get the picture! For this card, I used the Gathered Wheat stamp set and the bundled Wheat Dies. And some of the wunnermus Gingham Cottage DSP. And I used all that Fall goodness to make an uber-cool side-step fun fold card. Take a look-see:

Being that it’s a fun fold, I thought I’d play along with the Creative Creases challenge!

I think it’s pretty much spot on for The Paper Players theme challenge, too!

I saw this fun fold done earlier this week – my friend and teammate Carol Buckalew did a great video to show how to do it. I’d been a little askeered of this fold – but…once Carol showed me how to do it – I was hooked! And it really IS easy – so…I hope you’ll make one , too!
I started with a 5 1/2″ x 8″ piece of Crushed Curry cardstock that, using my Simply Scored Scoring Tool, I scored along the long side at 3″, 6″ and 7″. I folded the scored lines as a mountain (3″), valley (6″) and mountain (7″). This is the main card base.

Then I scored a 3″ x 6″ piece of Crushed Curry at 4 1/4″ – and folded it as a mountain. That’s the side-step panel.
On a piece of Basic White cardstock, I stamped one of the Gathered Wheat sentiments in Early Espresso. I also stamped the wheat image in Crushed Curry. Then I matted the panel on Early Espresso and used Liquid Glue to adhere it to the inside of the main card base. I added a Rustic Metallic Adhesive-backed Dot. Tip: I recommend that you do this inside panel first – BEFORE you assemble the rest of the card. LOTS easier! 🙂

I matted a piece of Gingham Cottage DSP on Early Espresso and used Liquid Glue to adhere the matted panel to the front of the main card base. I matted a narrow strip of the DSP on Early Espresso and adhered it to the smallest front panel with Liquid Glue.
I set the side-step panel into place to do a “dry fit” and then, using it as a guide, stamped a second sentiment from Gathered Wheat in Early Espresso on the front of the main card base – splitting the difference between the side-step panel and the right side of the card base. Over the top, I stamped the splatter image in Crushed Curry.

I matted another piece of Gingham Cottage DSP on an Early Espresso mat and adhered it to the front of the side-step panel.
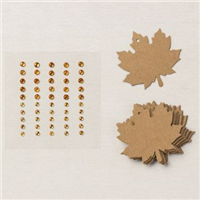
To decorate the panel, I used two Leaf Label die cuts that I adhered with Liquid Glue.
Then I cut six Crushed Curry Wheat tops using the dies from the Wheat Die set.

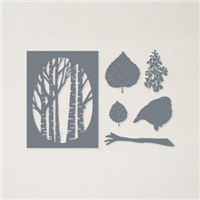
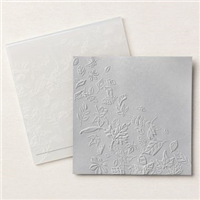
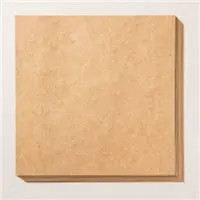
I embossed a piece of Kraft 6″ x 6″ Paper in the Leaf Fall 3D Embossing Folder and then used the leaf dies from the Aspen Tree die set to cut out 2 large and 2 small leaves from the embossed paper.
Using Liquid Glue in the middles of the leaves – I adhered them to the side-step panel. I let them spill over the edge of the panel – but NOT past the top or sides of the main card base.

I tucked the die cut wheat tops in using Liquid Glue. Then I tied a Linen Thread double-loop bow and adhered it with a Glue Dot.
In the corner of the narrow front panel, I stamped the little wheat image from Gathered Wheat in Crushed Curry.
I used Liquid Glue on the bottom 1″ of the side-step panel and adhered it to the narrow bottom strip – aligning the bottoms. Then I closed the card base and used more Liquid Glue to adhere the smaller portion of the panel to the back of the main card base – thus creating the side-step panel. You can see how to do it in the video I did – the link is down below!
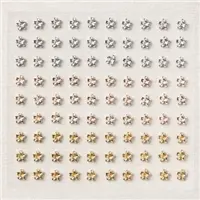
Then I added more Rustic Metallic Adhesive-Backed dots and the card front was done.
On another piece of Gingham Cottage DSP panel, I stamped the large wheat image from Gathered Wheat in Crushed Curry ink.

I used Liquid Glue to adhere the panel to an Early Espresso mat and then onto the back of the main card base and the card was done!
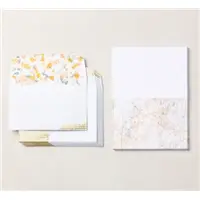
My Basic White Medium Envelope got the large Gathered Wheat image in Crushed Curry on the front…

…and more Gingham Cottage DSP on the envelope flap.

Et Voila! I love this side-step fold – it stands up SO perfectly! Your recipient will be able to display it easily – and show off your creative prowess. The Fall theme is made easy with the Gathered Wheat stamp set and bundled Wheat Dies. Gingham Cottage DSP has many different plaid and gingham designs in holiday colors to choose from!

I hope you like!
If you’d like to recreate this card, all the products and card cuts you’ll need are down below! And – I made this card yesterday on my FB Video – if you’d like to see the replay, here ’tis on my YouTube channel! Enjoy!
And…I’ve also created a printable PDF with written instructions and a list of the products used to create this project. You can download, print and/or save it by clicking this image:

Missed any tutorials? You can check out my past projects right here!
TTFN
M

Connect with me! https://campsite.bio/stampsnlingers
HOST CODE FOR 1 SEP – 15 SEP: RY9VTG9C
Use this host code when you order $50 or greater and receive a free gift (AND the Monthly Card Tutorial) from me! If your order is over $150, please do not use this code, but you’ll still get the free gift. The free gift is your choice of any item valued up to $10.00 in any active Catalog! That includes some of the Host Exclusive stamp sets! See my Customer Rewards page for full details.
Note: Make sure that you can see my name on the final checkout page listed as your Demonstrator when you order so that you know that you’re ordering with me and you’ll get my rewards!
You’ll also be getting a link to my ZOOM The Craftroom (an exclusive TWICE-A-WEEK online event for my customers) and the monthly Online Tutorial. The September Tutorial features the Perched in a Tree Bundle!


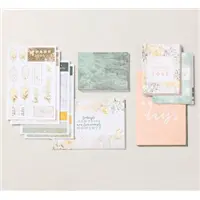
NEW CHRISTMAS GIFTING KIT!
Check out the latest addition to the Kits Collection by Stampin’ Up! It’s your one-stop solution to those gift card holders and tags you need for the holidays!

The Christmas Gifting Kit has everything you need to create gorgeous gift tags to attach to presents and gift card holders that adds a handmade touch.
Christmas Gifting Kit Details and what’s included:
- Kit includes 9 tags and 9 gift card holders—3 each of 3 designs

- Includes the exclusive Christmas Gifting Stamp Set and a Shaded Spruce Classic Stampin’ Spot

- Sized to fit standard gift cards
- Coordinating colors: Basic Black, black foil, Mint Macaron, Real Red, Shaded Spruce

Get this – and ALL our great kits! – right here – in the Kits Collection on the online store.
Whoo-hoo!

Here’s this week’s Deals! They’re good thru Wednesday, 14 September 2022; 11:50 p.m. (MT)! 🙂


Get the Stampin’ Up! Products Used in this Project:


Card Cuts Used in This Project:
Crushed Curry Cardstock: 5 1/2″ x 8″ (card base, scored and folded at 3″, 6″ and 7″); 3″ x 6″ (side step panel,scored and folded at 4 1/4″); Wheat Die cut wheat tops (x6)
Early Espresso Cardstock: 2 7/8″ x 5 3/8″ (x3 – mats for front and back and inner liner of main card base); 7/8″ x 5 3/8″ (mat for smallest front panel of main card base); 2 7/8″ x 4 1/8″ (mat for front of side-step panel)
Kraft Paper: Aspen Tree die cut leaves (x2 – large and x2 – small)
Basic White Cardstock: 2 3/4″ x 5 1/4″ (inner liner of main card base)
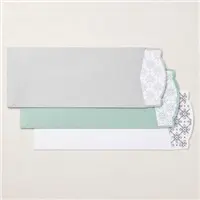
Gingham Cottage DSP: 2 3/4″ x 5 1/4″ (x2 – front and back of main card base); 3/4″ x 5 1/4″ (smallest front panel of main card); 2 3/4″x 4″ (front of side-step panel); 2 1/2″ x 6″ (envelope flap)
If you need any stamping supplies, I’d be very happy to be your Demonstrator. Just click on the Order Stampin’ Up! Online Now button on the right side of the screen to go directly to my online store or drop me an email if you have any questions. Happy Stamping!
Shop the Clearance Rack here. Earn FREE Stampin’ Up! Products – Join my Punkin Head Peppermint Rewards – My online customer thank you program!
Finn Fan Fix

Can you find ET?

Can you find Finn?

TTFN
M


 #20 Demonstrator in Sales in the US 2023-2024
 #13 Demonstrator in Leadership in the US 2023-2024
 #21 Demonstrator in Team Building in the US 2023-2024


 KarensCardCorner
 Stamp with Amy K
 Stampin With Shirley G
 Tarabeth Stamps
 TL's Bright Spot
Such a pretty fall card! Love the gingham, perfect colors too! Sorry that I missed your live, I’ll catch the replay. 🙂 Poor Finn, he hardly has a comfortable place to lay down with all of those pillows and beds. 😉
I know – his life is very very difficult, indeed!! Thanks, Amy! 🙂
Pretty card, pretty fireplace, handsome Finn!
Thank you so much, Karen! 🙂
Mary, what a pretty fall card! I love the fancy fold and the gingham with the brown & yellow! Thanks for playing at The Paper Players this week!
Thanks so much, Jennie – appreciate you stopping by!!
So pretty and perfect for Fall. Love the layers and bow on the fun fold. TFS. Love the ET/Finn comparison—Finny is out of this world, isn’t he? 😉
He IS pretty awesome!! Thanks so much, Susan! 🙂
Absolutely stunning, Mary! This is a work of art to display the entire fall season. I love the wheat stamped on the back…a perfect finishing touch. Thank you for playing with The Paper Players this week!
Thanks so much, Ann – appreciate you stopping by!!
What a great fun fold, Mary! I’ve already made one using your tutorial! So pretty with the leaves and gingham…thanks for sharing it with the Players this week!
Thank you, ma’am! Appreciate the kind word and glad you were able to make one!! 🙂
On behalf of Creative Creases, I want to thank you so much for entering your gorgeous card in Debbie’s challenge. I definitely will try this fold again probably with Boughs of Holly DSP. Thank you for the pdf and I enjoyed the video.
Karen, DT
Thanks so much, Karen – I appreciate you stopping by! 🙂
What a beautiful step card, Mary! I really love the focal image and the papers you chose really set it off. Perfect card for fall! Thank you for playing at Creative Creases Challenge and hope you can join in again soon.
Debbie
Secrets To Stamping
Thank you so much, Debbie – appreciate you stopping by! 🙂
A beautiful golden autumn show piece. The gingham check, in two sizes is perfect! Thank you for playing with us for CC#40.
Thanks so much! Appreciate you stopping by, Rae!!